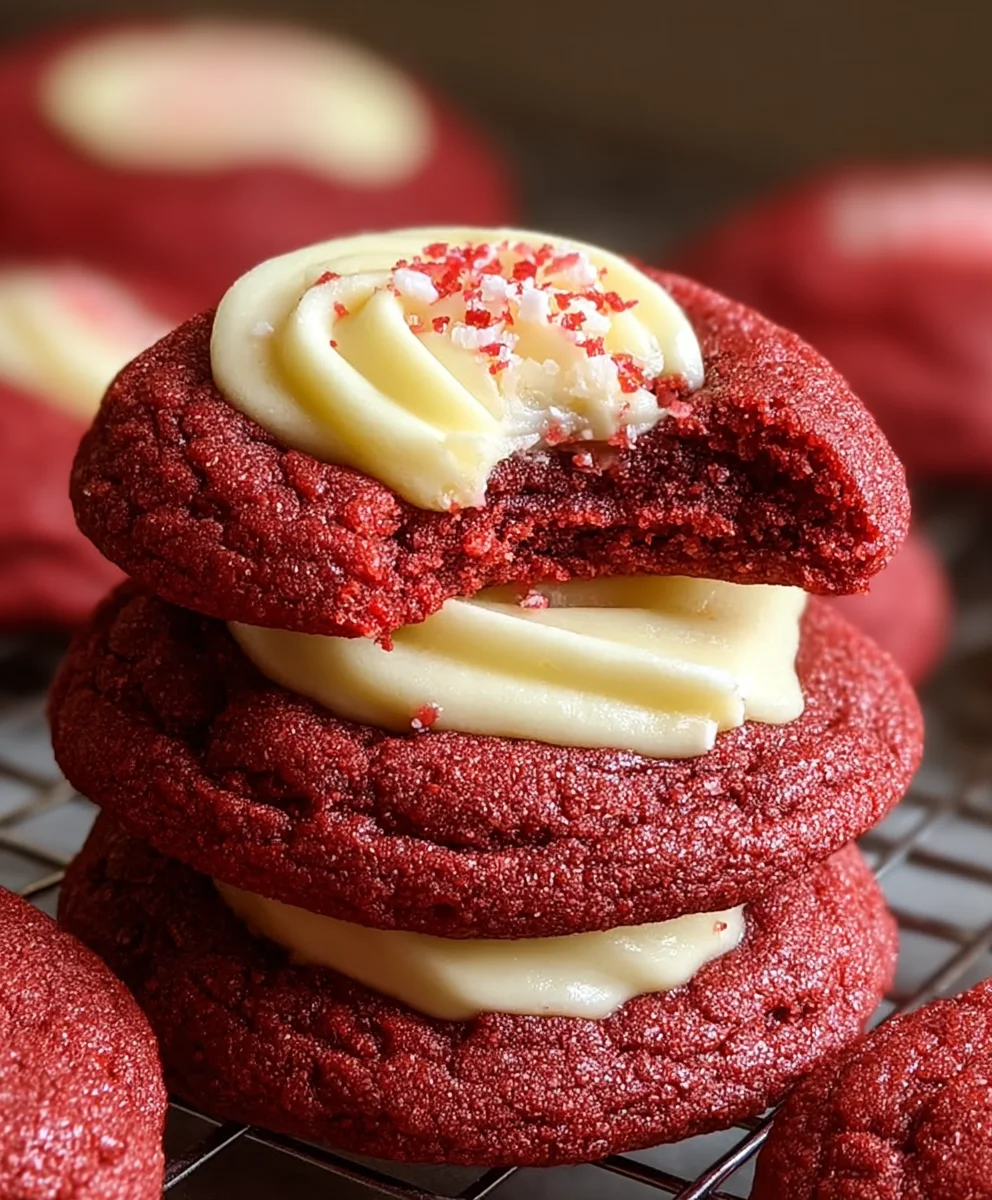
Cream Cheese Red Velvet Cookies-Delicious & Easy
Cream cheese red velvet cookies are more than just a dessert; they’re a little slice of decadent happiness. Who can resist that vibrant crimson hue paired with the subtle, tangy sweetness of cream cheese? It’s a combination that instantly sparks joy and evokes feelings of celebration, making these cookies perfect for holidays, special occasions, or simply as a delightful treat to brighten any ordinary day. What truly sets these cream cheese red velvet cookies apart is the harmonious balance of flavors and textures. The rich cocoa notes of the red velvet dough meld beautifully with the bright tang of the cream cheese, creating a sophisticated yet utterly comforting cookie. Each bite offers a delightful chegrape juicess with a hint of fudgy goodness, all elevated by those iconic swirls of cream cheese that bake into luscious pockets of pure indulgence. Get ready to fall in love with every single bite of these extraordinary cream cheese red velvet cookies – they’re guaranteed to become a new favorite.
Ingredients:
- 1 1/4 cups all-purpose flour
- 1/4 cup unsweetened cocoa powder
- 1 teaspoon baking powder
- 1/4 teaspoon salt
- 1/2 cup unsalted butter, softened to room temperature
- 3/4 cup granulated sugar
- 1 large egg, at room temperature
- 1 teaspoon vanilla extract
- 1 tablespoon red food coloring
- 4 ounces cream cheese, softened to room temperature
- 1/4 cup powdered sugar (also known as confectioners’ sugar or icing sugar)
- 1/2 teaspoon vanilla extract
Preparing the Red Velvet Dough
Dry Ingredients Assembly
In a medium-sized bowl, begin extract by whisking together the dry ingredients for your Cream Cheese Red Velvet Cookies. This includes the 1 1/4 cups of all-purpose flour, which provides the structural base of our cookies. Next, add the 1/4 cup of unsweetened cocoa powder. This is what gives red velvet its characteristic subtle chocolate flavor and a portion of its color. Then, incorporate the 1 teaspoon of baking powder. Baking powder acts as a leavening agent, helping our cookies to puff up slightly and achieve a pleasant, slightly chewy texture rather than being dense. Finally, add the 1/4 teaspoon of salt. Salt doesn’t just add a salty taste; it actually enhances all the other flavors present in the dough, making them more pronounced and balanced. Ensure all these ingredients are thoroughly combined; a whisk is ideal for this, as it aerates the flour slightly and breaks up any clumps. Set this bowl aside for later.
Creaming Butter and Sugar
In a separate, larger bowl, we’ll start with the foundation of our cookie’s richness. Add the 1/2 cup of softened unsalted butter. It’s crucial that the butter is truly softened – pliable and easy to indent with a finger, but not melted. This allows it to properly cream with the sugar. Now, add the 3/4 cup of granulated sugar to the butter. Using an electric mixer (a stand mixer with a paddle attachment or a handheld mixer), beat the butter and sugar together on medium speed. You’re looking for the mixture to become light and fluffy, pnon-alcoholic ale in color, and increase in volume. This process, known as creaming, incorporates air into the dough, which contributes to the cookies’ texture and tenderness. This usually takes about 2 to 3 minutes of vigorous mixing. Don’t rush this step, as it’s foundational for a great cookie texture.
Adding Wet Ingredients and Color
Once the butter and sugar mixture is perfectly creamed, it’s time to add the wet ingredients. Crack in your 1 large egg. Ensure your egg is at room temperature, just like the butter; this helps everything emulsify smoothly. Add the 1 teaspoon of vanilla extract for its warm, sweet aroma and flavor. Now, for the signature red velvet hue, add the 1 tablespoon of red food coloring. For the most vibrant color, I recommend a gel-based food coloring, as it’s more concentrated. Mix these in on low speed until just combined. Scrape down the sides and bottom of the bowl with a spatula to ensure all ingredients are incorporated evenly. The mixture will now be a beautiful, vivid red.
Combining Wet and Dry
With the wet ingredients and color fully incorporated, it’s time to bring everything together. Gradually add the dry ingredient mixture (the flour, cocoa, baking powder, and salt) to the wet ingredients. Mix on low speed, or by hand with a spatula, just until the flour streaks disappear. Be careful not to overmix at this stage. Overmixing develops the gluten in the flour too much, which can result in tough cookies. A few streaks of flour are perfectly fine; they will be fully incorporated as you handle the dough. The dough will be quite thick and may look a little sticky.
Making the Cream Cheese Filling
Creaming the Filling Base
Now, let’s prepare the delectable cream cheese filling that makes these cookies truly special. In a clean medium bowl, place the 4 ounces of softened cream cheese. Again, ensuring the cream cheese is softened is key for a smooth filling. Add the 1/4 cup of powdered sugar to the cream cheese. Powdered sugar is preferred here over granulated sugar because it dissolves easily, creating a smooth, creamy texture without any graininess. Also, add the 1/2 teaspoon of vanilla extract for an extra layer of flavor.
Whipping the Filling
Using an electric mixer or a whisk, beat the cream cheese, powdered sugar, and vanilla extract together until the mixture is completely smooth and creamy. Scrape down the sides of the bowl periodically to ensure everything is incorporated. You’re aiming for a consistency that is light, airy, and pipeable or dollop-able. If the mixture seems a bit too thick, you can add a tiny splash of milk (literally a teaspoon at a time) and beat again until it reaches your desired consistency. This filling will be used to create a delightful surprise inside each cookie.
Assembling and Baking the Cookies
Forming the Cookies with a Surprise Center
Take your red velvet dough and roll it into small balls, about 1 inch in diameter. You can use a small cookie scoop for consistency. Place these dough balls on a parchment-lined baking sheet, leaving about 2 inches of space between each one as they will spread. Now, take about a teaspoon of the cream cheese filling and place it on top of each dough ball. Gently press the cream cheese filling down into the dough slightly, and then carefully pull the red velvet dough up and around the filling to completely enclose it. You want to ensure the cream cheese is fully encased in the dough so it doesn’t leak out during baking. Roll the dough ball again to smooth it out, making sure the cream cheese is completely hidden. Repeat this for all your dough balls.
Baking to Perfection
Preheat your oven to 350°F (175°C) and line two baking sheets with parchment paper. Arrange the formed cream cheese-filled red velvet cookie dough balls on the prepared baking sheets, ensuring they have enough space to spread. Bake for approximately 10-12 minutes. The cookies are ready when the edges are set and slightly firm, but the centers still look soft and slightly underbaked. This slight underbaking is what contributes to a wonderfully chewy cookie. For a more cake-like cookie, bake for a minute or two longer. Allow the cookies to cool on the baking sheet for about 5 minutes before carefully transferring them to a wire rack to cool completely. This resting period on the baking sheet helps them firm up further.

Conclusion:
And there you have it! Your very own batch of delightful Cream Cheese Red Velvet Cookies. These cookies are a perfect blend of rich, moist red velvet cake and the creamy tang of cream cheese, all baked to chewy perfection. I hope you enjoyed making them as much as I do! These cookies are incredibly versatile. They are absolutely divine on their own, perhaps with a glass of cold milk. For a more decadent experience, try serving them warm with a scoop of vanilla bean ice cream, or even sandwiched together with a little extra cream cheese frosting for an ultimate red velvet treat. If you’re feeling adventurous, consider adding a handful of white chocolate chips or some finely chopped pecans for an extra layer of texture and flavor. Don’t be afraid to experiment and make these Cream Cheese Red Velvet Cookies your own. Baking should be fun, so dive in and enjoy the process!
Frequently Asked Questions:
How do I store these Cream Cheese Red Velvet Cookies?
Once completely cooled, store your Cream Cheese Red Velvet Cookies in an airtight container at room temperature for up to 3-4 days. For longer storage, you can freeze them in a single layer on a baking sheet until firm, then transfer to a freezer-safe bag or container for up to 2-3 months. They thaw beautifully at room temperature.
Can I make these cookies ahead of time?
Yes, absolutely! You can prepare the cookie dough and refrigerate it for up to 2 days or freeze it for up to 3 months. When ready to bake from chilled dough, you may need to add a minute or two to the baking time. For frozen dough, thaw overnight in the refrigerator before scooping and baking as directed.
Cream Cheese Red Velvet Cookies-Delicious & Easy
Delicious and easy red velvet cookies with a delightful cream cheese filling. Perfect for any occasion!
Ingredients
-
1 1/4 cups all-purpose flour
-
1/4 cup unsweetened cocoa powder
-
1 teaspoon baking powder
-
1/4 teaspoon salt
-
1/2 cup unsalted butter, softened to room temperature
-
3/4 cup granulated sugar
-
1 large egg, at room temperature
-
1 teaspoon vanilla extract
-
1 tablespoon red food coloring
-
4 ounces cream cheese, softened to room temperature
-
1/4 cup powdered sugar
-
1/2 teaspoon vanilla extract
Instructions
-
Step 1
In a medium bowl, whisk together flour, cocoa powder, baking powder, and salt. Set aside. -
Step 2
In a large bowl, beat softened butter and granulated sugar until light and fluffy. Add egg, 1 teaspoon vanilla extract, and red food coloring. Mix until combined. -
Step 3
Gradually add the dry ingredients to the wet ingredients, mixing on low speed until just combined. Do not overmix. -
Step 4
In a separate bowl, beat softened cream cheese, powdered sugar, and 1/2 teaspoon vanilla extract until smooth and creamy. -
Step 5
Roll red velvet dough into 1-inch balls. Place a teaspoon of cream cheese filling on top of each ball and enclose it with the dough, forming a smooth ball. -
Step 6
Bake at 350°F (175°C) for 10-12 minutes, until edges are set and centers are soft. Cool on baking sheets for 5 minutes before transferring to a wire rack to cool completely.
Important Information
Nutrition Facts (Per Serving)
It is important to consider this information as approximate and not to use it as definitive health advice.
Allergy Information
Please check ingredients for potential allergens and consult a health professional if in doubt.