Easy Turtle Bars-Decadent & Quick Dessert Recipe
Easy Turtle Bars are about to become your new go-to treat, and I can tell you why. There’s something undeniably magical about these bars that just speaks to the soul. Imagin extracte this: a rich, buttery shortbread base, followed by a generous layer of gooey caramel, a scattering of crunchy pecans, and then topped with a decadent chocolate drizzle. It’s a symphony of textures and flavors that creates pure bliss with every bite. What makes these Easy Turtle Bars so special, besides their incredible taste, is just how simple they are to make. You don’t need fancy skills or hours in the kitchen to achieve this spectacular dessert. Whether you’re baking for a crowd, a special occasion, or just a Tuesday night craving, these bars deliver maximum impact with minimal effort. Get ready to impress yourself and everyone lucky enough to snag a piece!
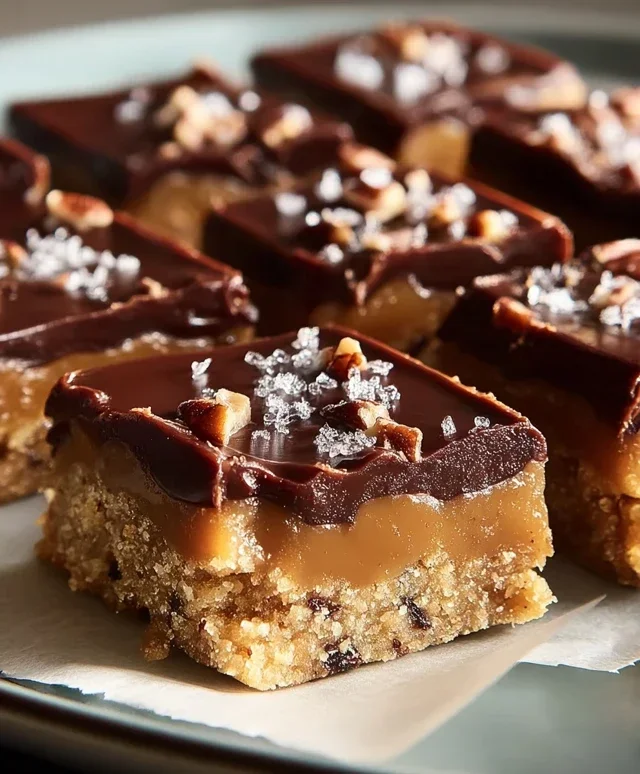
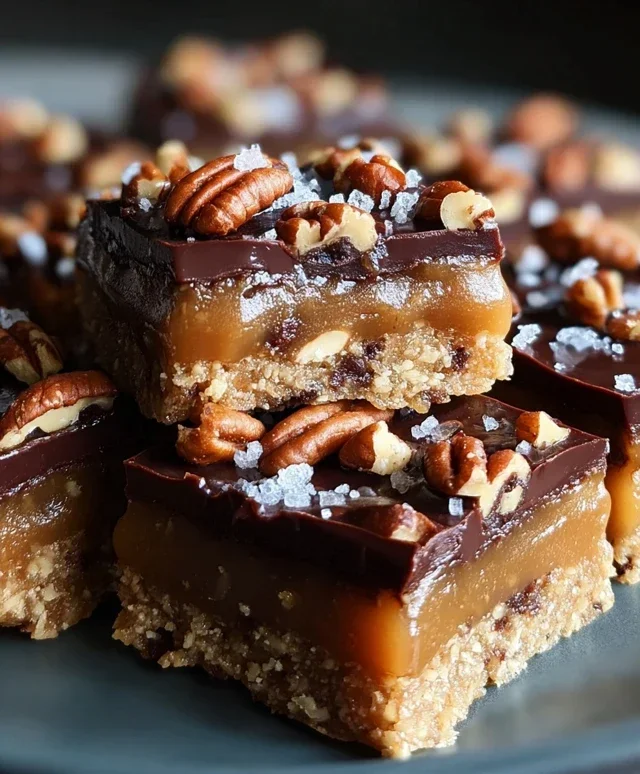
Easy Turtle Bars
There are certain desserts that just scream “comfort” and “indulgence,” and for me, Easy Turtle Bars are right at the top of that list. Imagin extracte a rich, buttery shortbread base, topped with a gooey caramel, and studded with crunchy pecans, all finished with a drizzle of melted chocolate. It’s like all your favorite candy bar flavors transformed into a perfectly portable, incredibly satisfying bar. The best part? They’re surprisingly simple to make. You don’t need any fancy equipment or complicated techniques. So, whether you’re a seasoned baker or just starting out, these bars are a guaranteed crowd-pleaser and a fantastic way to treat yourself or share with loved ones. Let’s get started on creating these little pockets of deliciousness.
Ingredients:
Preparing the Shortbread Base
The foundation of these incredible bars is a simple yet divine shortbread. It’s buttery, slightly crum extractbly, and the perfect vehicle for all the delicious toppings to come. Start by preheating your oven to 350 degrees Fahrenheit (175 degrees Celsius). This ensures even baking from the moment the bars go in. Next, grab an 8×8 inch baking pan. I like to line mine with parchment paper, leaving a little overhang on the sides. This makes lifting the bars out for cutting so much easier, minimizing any sticking or breakage.
In a medium bowl, combine the 2 cups of all-purpose flour and the 1 cup of packed brown sugar. Whisk them together to ensure there are no brown sugar lumps. Now, add the ½ cup of softened butter. Using a pastry blender, a fork, or even your hands, work the ingredients together until the mixture resembles coarse crum extractbs. You want it to be well combined, with no dry pockets of flour remaining. The softened butter is key here; it helps the ingredients bind together without overmixing, which can lead to tough shortbread.
Press this crum extractbly mixture evenly into the bottom of your prepared baking pan. You can use the bottom of a measuring cup or a flat-bottomed glass to get a nice, compact layer. Don’t press too hard, but ensure it’s an even thickness across the entire pan. This consistent layer will bake up beautifully and provide a solid base for our gooey caramel and pecans. We’ll bake this base for about 15-18 minutes, or until it’s lightly golden around the edges. Keep an eye on it, as ovens can vary. You want it to be just set and fragrant, not deeply browned.
Crafting the Gooey Caramel Topping
Once the shortbread base has had its initial bake, it’s time to create that irresistible caramel layer. While the base is still warm in the pan, carefully remove it from the oven. In a small saucepan, combine the ⅔ cup of butter and the ½ cup of packed brown sugar. Place this over medium heat, stirring constantly. The goal is to melt the butter completely and dissolve the brown sugar, creating a smooth, molten mixture. As it heats, you’ll notice it start to bubble and thicken. Continue stirring for about 2-3 minutes, ensuring the sugar is fully incorporated and you have a glossy, caramel-like sauce.
This is where the magic happens. Carefully and evenly pour this hot caramel mixture over the warm shortbread base in the pan. You want to spread it as evenly as possible, ensuring no bald spots. Use a spatula to gently coax the caramel to the edges, covering the entire surface. Now, it’s time for the pecans. Sprinkle the 1 cup of pecan halves all over the caramel layer. You can arrange them artfully, or just scatter them – either way, they’ll add that delightful crunch and nutty flavor that makes these bars a “turtle.” Gently press the pecans into the caramel so they adhere well.
Return the pan to the oven. We’re going to bake these for another 20-25 minutes. This second bake is crucial for several reasons. It allows the caramel to set up properly, becoming that perfect gooey consistency we’re looking for. It also toasts the pecans slightly, bringin extractg out their nutty flavor even more. You’ll know they’re ready when the caramel is bubbling around the edges and the pecans are lightly golden. Be careful not to overbake, as this can make the caramel too hard.
The Finishing Touch: Chocolate Drizzle
The bars are almost ready! Once they come out of the oven, let them cool in the pan on a wire rack for at least 30 minutes. This cooling period is essential for the caramel to firm up. If you try to cut them too soon, you’ll end up with a gooey mess, which is delicious, but not the clean bars we’re aiming for.
After the initial cooling, it’s time for the final flourish: the chocolate drizzle. In a microwave-safe bowl, combine the 1 cup of milk chocolate chips. Microwave them in 30-second intervals, stirring between each interval, until they are mostly melted and smooth. Alternatively, you can melt them in a double boiler. Once the chocolate is smooth and pourable, use a spoon or a piping bag with a small tip to drizzle the melted chocolate over the cooled caramel and pecan layer. Create a zig-zag pattern or any design you fancy. This adds another layer of sweetness and a beautiful visual appeal.
If you’re feeling fancy and want that extra touch of elegance, sprinkle the ¼ teaspoon of sea salt over the melted chocolate while it’s still wet. The salt provides a lovely contrast to the sweetness, enhancing all the flavors. Let the chocolate drizzle set completely. This can take another hour or so at room temperature, or you can speed it up by placing the pan in the refrigerator for about 15-20 minutes.
Once everything is set, use the parchment paper overhang to lift the entire slab of bars out of the pan. Place it on a cutting board and cut it into squares or rectangles. These bars are rich, so smaller portions are often perfect! Enjoy your homemade Easy Turtle Bars – a truly irresistible treat!
Conclusion:
And there you have it – the ultimate guide to creating these unbelievably delicious and incredibly Easy Turtle Bars! This recipe truly delivers on its promise of rich, decadent flavor with minimal fuss. The combination of chewy caramel, crunchy pecans, and luscious chocolate creates a symphony of textures and tastes that is simply irresistible. They’re perfect for potlucks, bake snon-alcoholic ales, or simply satisfying a serious sweet craving. I know you’ll love how straightforward this recipe is, making it accessible for bakers of all skill levels.
For serving, these bars are fantastic on their own, but I also love them slightly warmed, perhaps with a scoop of vanilla ice cream for an extra special treat. Looking for variations? Don’t be afraid to experiment! You could swap the pecans for walnuts or even almonds. A sprinkle of sea salt on top before baking adds a delightful salty-sweet contrast. For a twist, try adding a tablespoon of instant coffee granules to the caramel mixture for a mocha-inspired flavor.
I genuinely encourage you to give these Easy Turtle Bars a try. They are a guaranteed crowd-pleaser and will quickly become a go-to recipe in your baking repertoire. Get ready to impress your friends and family with these delightful squares of happiness!
Frequently Asked Questions:
Can I make these bars ahead of time?
Absolutely! These bars store beautifully in an airtight container at room temperature for up to 3-4 days. They might even taste better the next day as the flavors meld together.
What kind of chocolate should I use?
I recommend using good quality semi-sweet chocolate chips or chunks for the best flavor and meltability. You can also experiment with milk chocolate or dark chocolate chips if you prefer a different level of sweetness or intensity.
My caramel is too hard/soft. What went wrong?
Caramel consistency can be tricky! If it’s too hard, it might have cooked for too long or at too high a temperature. If it’s too soft, it might not have cooked long enough. For these bars, a slightly softer, chewy caramel is ideal. Using a candy thermometer can help ensure accuracy for future batches.
Easy Turtle Bars
Decadent and easy-to-make turtle bars featuring a buttery shortbread base, gooey caramel, and chocolatey pecan topping.
Ingredients
-
2 cups all-purpose flour
-
1 cup packed brown sugar
-
½ cup butter, softened
-
1 cup pecan halves
-
⅔ cup butter
-
½ cup packed brown sugar
-
1 cup milk chocolate chips
Instructions
-
Step 1
Preheat oven to 350°F (175°C). Grease and flour a 9×13 inch baking pan. -
Step 2
In a medium bowl, combine 2 cups all-purpose flour, 1 cup packed brown sugar, and ½ cup softened butter. Mix until crumbly. -
Step 3
Press the flour mixture evenly into the bottom of the prepared baking pan to form the crust. -
Step 4
In a saucepan over medium heat, melt ⅔ cup butter with ½ cup packed brown sugar. Stir until the sugar is dissolved and the mixture is smooth. Bring to a gentle boil and cook for 2 minutes, stirring constantly. -
Step 5
Remove from heat and stir in 1 cup pecan halves. -
Step 6
Pour the pecan mixture evenly over the crust. -
Step 7
Bake for 20-25 minutes, or until the edges are golden brown. -
Step 8
Remove from oven and immediately sprinkle 1 cup milk chocolate chips over the hot bars. Let stand for 5 minutes to melt, then spread the chocolate evenly. -
Step 9
Allow the bars to cool completely in the pan before cutting into squares.
Important Information
Nutrition Facts (Per Serving)
It is important to consider this information as approximate and not to use it as definitive health advice.
Allergy Information
Please check ingredients for potential allergens and consult a health professional if in doubt.