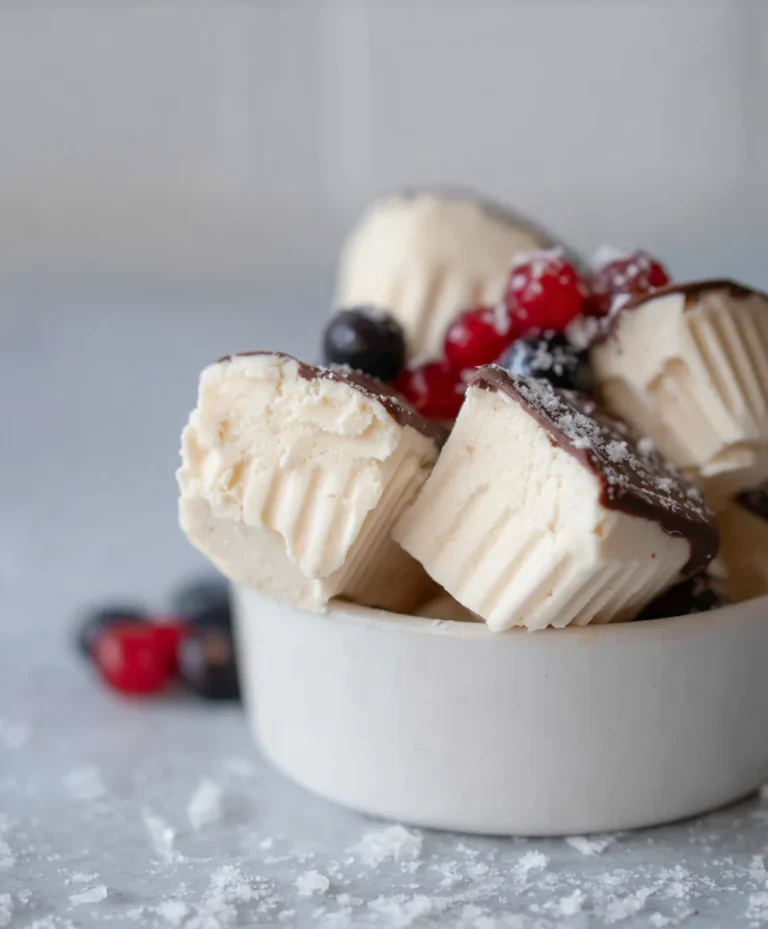
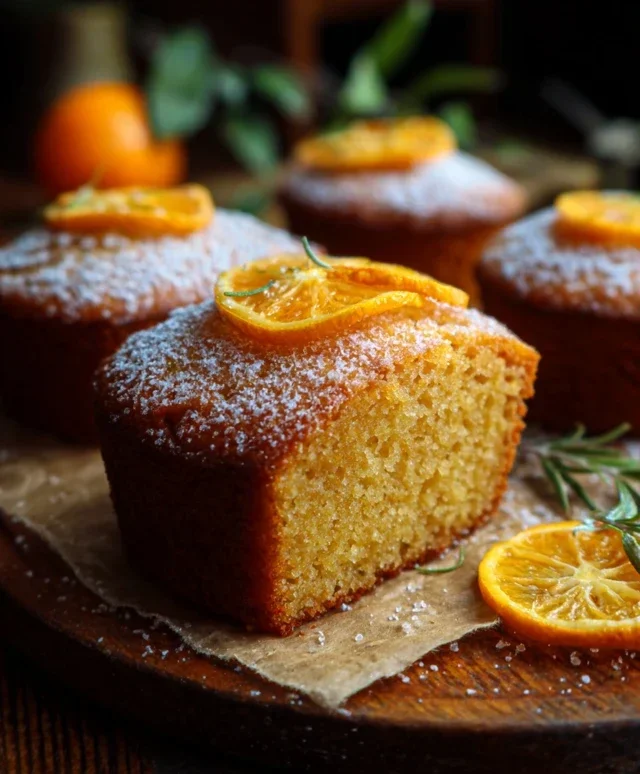
Easy Sugar Free Fudge Recipe – Delicious & Healthy Treat
Sugar free fudge isn’t just a dessert; it’s a revelation! If you’ve ever craved that intensely rich, melt-in-your-mouth chocolatey goodness but want to keep sugar out of the equation, you’ve come to the right place. We all love fudge for its decadent texture and satisfying sweetness, a classic treat that evokes comforting memories and brings a smile to our faces. But for many, the sugar content can be a barrier. That’s where our exceptional sugar free fudge recipe shines. What makes it truly special is its ability to deliver all the indulgence you expect from traditional fudge, without the guilt or the sugar spike. It’s proof that you don’t need to compromise on flavor or texture when choosing a healthier alternative. Get ready to experience pure chocolate bliss, reimagin extracted.
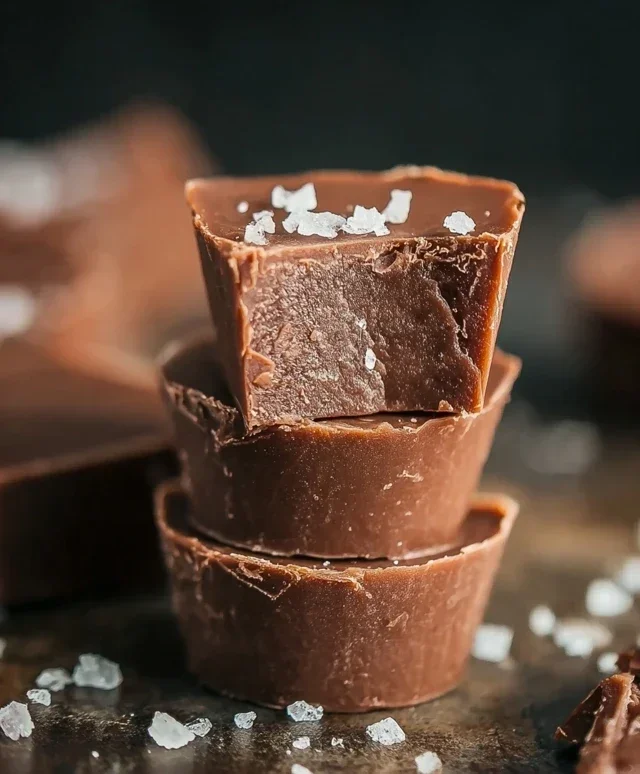
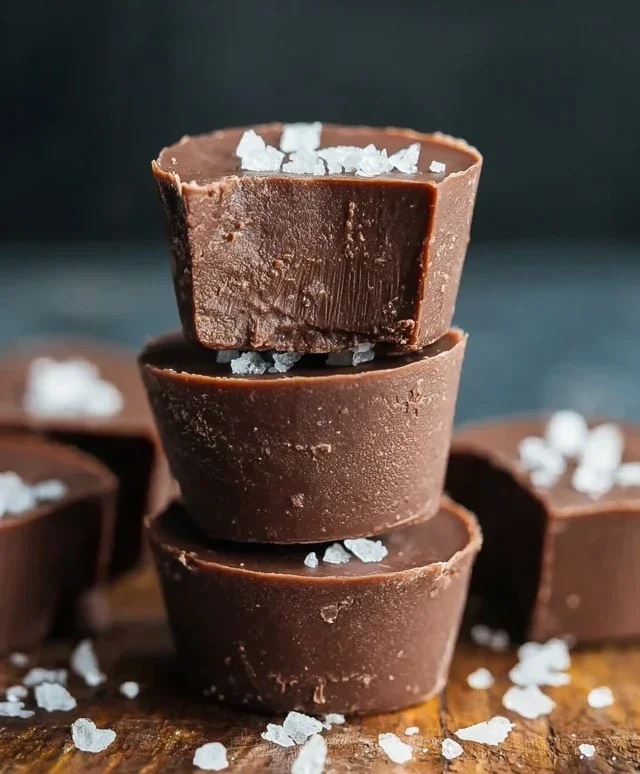
Sugar Free Fudge
Sometimes, a craving for something rich, chocolatey, and utterly indulgent strikes. But what if you’re watching your sugar intake? Does that mean you have to deny yourself the pleasure of a delicious fudge? Absolutely not! This sugar-free fudge recipe is a game-changer. It delivers all the decadent flavor and satisfying texture of traditional fudge, without any added sugar. It’s surprisingly simple to make, requiring just a few pantry staples and a little bit of patience. Get ready to impress yourself and anyone you share this with. This recipe is so easy, you’ll find yourself whipping it up whenever that sweet tooth calls.
Ingredients:
Cooking Instructions
This recipe relies on the magic of melting and a little bit of setting. The key is to gently melt the ingredients together to create a smooth, luscious base.
Step 1: Prepare Your Pan
The first step is to get your pan ready for the fudge. I like to use an 8×8 inch baking dish. Line it with parchment paper, making sure to leave some overhang on the sides. This overhang will act as handles, making it super easy to lift the fudge out once it’s set. You can also lightly grease the parchment paper if you’re worried about sticking, though it’s usually not necessary. This preparation ensures that your beautiful fudge won’t get stuck and will come out in one clean piece, ready to be cut into perfect squares.
Step 2: Gentle Melting – The Foundation of Smoothness
Now for the star of the show: melting the chocolate. You have a couple of options here. The most common and generally easiest method is using a double boiler. To do this, fill a saucepan with about an inch of water and bring it to a gentle simmer. Place a heatproof bowl (glass or metal) on top of the saucepan, ensuring the bottom of the bowl doesn’t touch the water. Add your sugar-free chocolate chips to this bowl. Stir them constantly with a heat-resistant spatula or wooden spoon. The steam from the simmering water will gently melt the chocolate without scorching it. Alternatively, you can melt the chocolate chips in the microwave. Place the chocolate chips in a microwave-safe bowl and heat on 50% power for 30-second intervals, stirring well after each interval, until the chocolate is mostly melted and smooth. Be very careful not to overheat the chocolate, as it can seize and become unusable. Patience is key here. We want a beautifully smooth, liquid chocolate base.
Step 3: Incorporating the Nut Butter and Vanilla
Once your sugar-free chocolate chips are completely melted and smooth, it’s time to add the almond butter. If you’re using a different nut or seed butter, make sure it’s smooth and at room temperature. This helps it incorporate more easily into the melted chocolate. Add the cup of almond butter to the melted chocolate. Continue to stir gently and consistently. The almond butter will begin extract to melt and blend into the chocolate, creating a thicker, richer mixture. Keep stirring until the almond butter is fully incorporated and you have a uniform, glossy consistency. Next, add the teaspoon of vanilla extract. Stir this in thoroughly. The vanilla extract will enhance the chocolate flavor and add a subtle depth to the overall taste. Again, stir until everything is perfectly combined and there are no streaks of nut butter or vanilla visible.
Step 4: Pouring and Setting the Fudge
Once your fudge mixture is completely smooth and well combined, carefully pour it into your prepared 8×8 inch baking dish. Use your spatula to spread the fudge evenly into all the corners of the pan. Get it as smooth as possible on top for a nice finish. At this point, the fudge will be quite soft and liquidy. It needs time to set and firm up. Place the baking dish in the refrigerator. You’ll want to let it chill for at least 2-3 hours, or until it’s firm to the touch. The colder it is, the firmer it will become. I often leave it in the fridge overnight to ensure it’s perfectly set and easy to cut. Resist the temptation to peek too early, as this can disrupt the setting process.
Step 5: Cutting and Enjoying Your Sugar Free Treat
Once the fudge has completely set and is firm, it’s time for the best part: cutting it! Gently lift the fudge out of the baking dish using the parchment paper overhang. Place it on a cutting board. Use a sharp knife to cut the fudge into small squares. I usually aim for 1-inch squares, but you can cut them smaller or larger depending on your preference. If the fudge feels a little too hard to cut, let it sit at room temperature for about 5-10 minutes to soften slightly. Wipe your knife clean between cuts if needed to ensure clean edges. Store your sugar-free fudge in an airtight container in the refrigerator. It will keep well for about a week, though I doubt it will last that long! Enjoy this guilt-free indulgence whenever you need a sweet pick-me-up. It’s perfect with a cup of coffee or tea, or just as a little treat on its own. You’ve created something truly delicious and satisfying without any of the sugar!
Conclusion:
I hope you’re as excited about this sugar free fudge recipe as I am! It’s truly a fantastic way to enjoy a rich, decadent treat without the guilt often associated with traditional fudge. The beauty of this recipe lies in its simplicity and the wonderful flexibility it offers. You get that satisfyingly smooth, melt-in-your-mouth texture you crave, all while keeping your sugar intake in check. Whether you’re managin extractg diabetes, following a low-carb lifestyle, or simply looking for a healthier indulgence, this sugar free fudge is a delightful option. I highly encourage you to give it a try – you might be surprised at how utterly delicious it is!
Serving this fudge is wonderfully versatile. It makes an elegant dessert after a meal, a perfect accompaniment to your morning coffee, or a thoughtful homemade gift for friends and family. For variations, don’t be afraid to experiment! You can add a pinch of cinnamon for warmth, a hint of espresso powder for a mocha flavor, or even a dash of cayenne pepper for a surprising spicy kick. Chopped nuts like walnuts or pecans are also a fantastic addition for extra crunch and flavor. Get creative and make it your own!
Frequently Asked Questions:
Q: Can I use a different sugar substitute?
A: Absolutely! While erythritol or xylitol work wonderfully, you can experiment with other granular or powdered sugar substitutes like monk fruit sweetener or stevia blends. Keep in mind that different substitutes have varying sweetness levels, so you might need to adjust the quantity slightly. It’s always a good idea to taste the mixture before chilling and adjust sweetness as needed.
Q: How should I store this sugar free fudge?
A: Stored in an airtight container, this fudge will keep well in the refrigerator for up to two weeks. For longer storage, you can freeze individual pieces wrapped tightly in parchment paper and then placed in a freezer-safe bag. It thaws beautifully and retains its delicious texture.
Sugar Free Fudge
A quick and easy sugar-free fudge recipe using chocolate chips and almond butter.
Ingredients
-
2 cups sugar free chocolate chips
-
1 cup almond butter
-
1 teaspoon vanilla extract
-
1/4 cup unsweetened cocoa powder
-
1/4 cup sugar-free sweetener (e.g., erythritol or xylitol)
-
1/4 cup unsweetened almond milk
Instructions
-
Step 1
Line an 8×8 inch baking pan with parchment paper, leaving an overhang on the sides. -
Step 2
In a microwave-safe bowl, combine sugar-free chocolate chips, almond butter, unsweetened cocoa powder, sugar-free sweetener, and unsweetened almond milk. -
Step 3
Microwave on high power in 30-second intervals, stirring well after each interval, until the mixture is smooth and melted. This should take approximately 2-3 minutes total. -
Step 4
Stir in the vanilla extract until well combined. -
Step 5
Pour the fudge mixture into the prepared baking pan and spread evenly. -
Step 6
Refrigerate for at least 2-3 hours, or until firm. Cut into squares before serving.
Important Information
Nutrition Facts (Per Serving)
It is important to consider this information as approximate and not to use it as definitive health advice.
Allergy Information
Please check ingredients for potential allergens and consult a health professional if in doubt.