Delicious Strawberry Brownies-Fruity Chocolate Heaven
Strawberry brownies are the ultimate indulgence, a dessert that perfectly marries the rich, fudgy goodness of chocolate with the bright, sweet burst of fresh strawberries. Who doesn’t adore a classic brownie? Now, imagin extracte taking that beloved treat and elevating it with vibrant, jewel-like strawberries, creating a flavor sensation that’s both comforting and exciting. These strawberry brownies are more than just a dessert; they’re a celebration of contrasting yet harmonious tastes. We love them because they offer that satisfying chocolatey depth we crave, while the addition of strawberries adds a delightful tang and a beautiful visual appeal. This recipe transforms a simple brownie into something truly spectacular, a guaranteed crowd-pleaser that will have everyone asking for the secret. Get ready to experience your new favorite way to enjoy brownies!
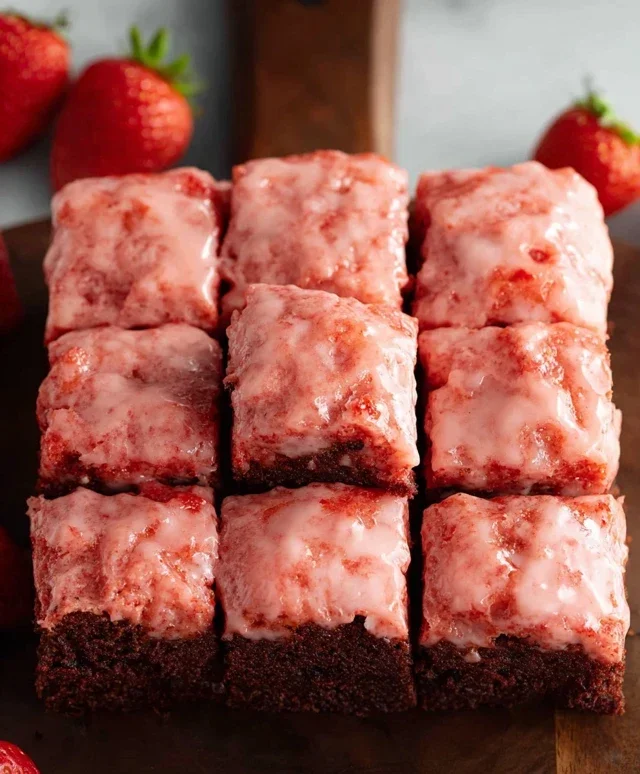
Strawberry Brownies
Get ready for a delightful treat that’s as pretty as it is delicious! These Strawberry Brownies are a fantastic way to enjoy the classic comfort of brownies with a vibrant burst of strawberry flavor. They’re incredibly easy to make, often requiring just a few pantry staples and a box of strawberry cake mix. The result is a fudgy, slightly chewy brownie with a delightful fruity twist that’s sure to become a new favorite. Whether you’re baking for a special occasion or just a Tuesday treat, these brownies are a guaranteed crowd-pleaser.
Ingredients:
Instructions:
Preparing the Brownie Batter
1. Preheat your oven and prepare your baking pan. Before you even start mixing, get your oven preheated to 350°F (175°C). This ensures that your brownies bake evenly from the moment they go in. Next, grab an 8×8 inch baking pan. It’s crucial to grease and flour this pan thoroughly, or better yet, line it with parchment paper, leaving an overhang on the sides. This overhang acts as a handy “sling” to lift the finished brownies out of the pan easily, making for less mess and more perfect squares.
2. Combine the wet ingredients and cake mix. In a large mixing bowl, add your 2 large eggs, 1/3 cup of vegetable or canola oil, and 1 teaspoon of vanilla extract. Whisk these together until they are well combined. Now, it’s time to add the star of the show: your box of strawberry cake mix with pudding. Pour the entire contents of the cake mix box into the bowl with the wet ingredients. This is where the magic begin extracts.
3. Mix until just combined. Using a sturdy spoon or a spatula, begin extract to mix the cake mix into the wet ingredients. Be careful not to overmix at this stage. You want to mix until there are no dry streaks of cake mix visible. The batter will be quite thick and fudgy, which is exactly what you’re looking for. Overmixing can develop the gluten in the flour too much, leading to a tougher brownie. A few small lumps are perfectly fine and will likely bake out.
4. Spread the brownie batter into the prepared pan. Take your thick, delicious strawberry brownie batter and spoon it into your prepared 8×8 inch baking pan. Use your spatula or the back of the spoon to spread the batter evenly across the bottom of the pan. Ensure it reaches all the corners and edges to create a uniform layer. This even distribution is key for consistent baking and cutting later on.
Creating the Strawberry Swirl and Frosting
5. Prepare the strawberry swirl topping. In a separate, smaller bowl, combine your 3/4 cup of powdered sugar with the 2 tablespoons of strawberry preserves. Add 1 ½ tablespoons of milk and, if you’re using it, the 1 tablespoon of cream cheese. This optional cream cheese adds an extra layer of richness and a subtle tang that complements the strawberry beautifully. Whisk these ingredients together until you have a smooth, pourable glaze. If the glaze seems too thick, you can add another teaspoon of milk, a little at a time, until you reach your desired consistency. If it’s too thin, add a little more powdered sugar.
6. Create the swirl effect. Dollop spoonfuls of the prepared strawberry glaze randomly over the top of the brownie batter in the baking pan. Once all the glaze is distributed, take a toothpick or a butter knife and gently swirl the glaze into the brownie batter. Make figure-eights or random zig-zags to create a beautiful marbled effect. Be mindful not to over-swirl, as you want distinct ribbons of strawberry pink against the reddish-brown of the brownie.
Baking and Finishing
7. Bake until a toothpick comes out with moist crum extractbs. Place your pan in the preheated oven. Bake for approximately 25 to 30 minutes. The exact baking time can vary depending on your oven. You’ll know they’re done when the edges are set and a toothpick inserted into the center comes out with moist crum extractbs attached, not wet batter. Be careful not to overbake, as this will result in dry brownies.
8. Cool completely before slicing. This is a crucial step for achieving clean cuts. Once the brownies are out of the oven, let them cool in the pan on a wire rack for at least 15-20 minutes. Then, using the parchment paper sling, carefully lift the entire brownie slab out of the pan and place it on the wire rack to cool completely. Trying to cut into warm brownies will lead to a messy, smudged result. Once fully cooled, you can slice them into squares. These Strawberry Brownies are best enjoyed at room temperature. You can store any leftovers in an airtight container at room temperature for up to 3 days. Enjoy your delicious, homemade strawberry treat!
Conclusion:
These Strawberry Brownies are an absolute triumph! They perfectly blend the rich, fudgy goodness of a classic brownie with the bright, sweet burst of fresh strawberries. The contrast in textures and flavors is simply divine, making them an ideal treat for any occasion. Whether you’re a seasoned baker or just starting out, this recipe is surprisingly straightforward and yields incredibly rewarding results. They’re perfect for birthday parties, a delightful afternoon pick-me-up, or even as a decadent dessert for a special dinner.
For serving suggestions, I love enjoying them warm with a scoop of vanilla bean ice cream or a dollop of freshly whipped cream. They’re also fantastic on their own, allowing the strawberry and chocolate flavors to shine. If you’re looking to get creative, consider adding a swirl of strawberry jam into the brownie batter before baking for an extra layer of fruitiness, or perhaps a sprinkle of white chocolate chips to complement the fresh berries. Don’t be afraid to experiment and make these Strawberry Brownies your own!
Frequently Asked Questions:
Can I use frozen strawberries instead of fresh?
Yes, you absolutely can! If using frozen strawberries, make sure to thaw them completely and drain off any excess liquid. You might also want to gently pat them dry with a paper towel before folding them into the batter to prevent the brownies from becoming too wet.
How long do these brownies store for?
Stored in an airtight container at room temperature, these delicious strawberry brownies will keep for about 2-3 days. For longer storage, you can refrigerate them for up to a week. They also freeze beautifully for up to 2-3 months – just be sure to wrap them tightly!
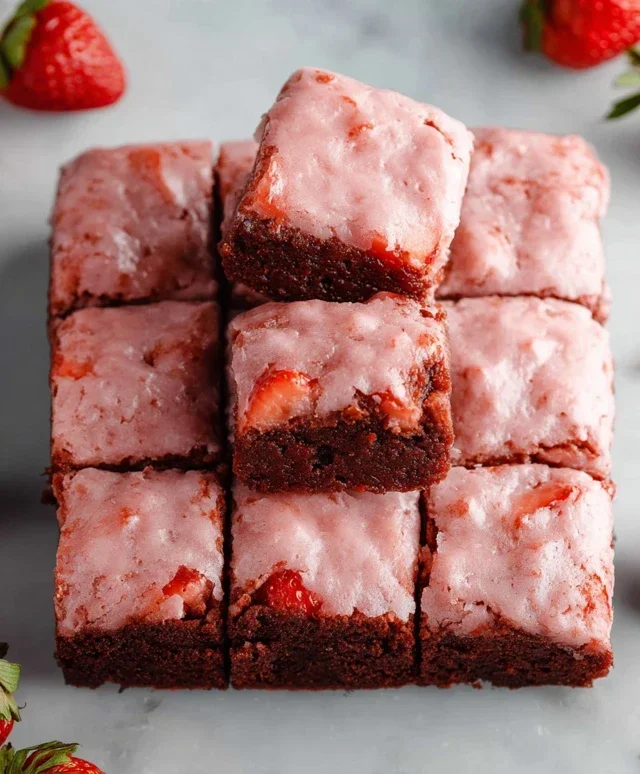
Strawberry Brownies
Delicious and easy strawberry brownies made with a strawberry cake mix and bursting with strawberry flavor. A perfect treat for any occasion.
Ingredients
-
1 box strawberry cake mix with pudding in the mix
-
2 large eggs
-
1/3 cup vegetable or canola oil
-
1 teaspoon vanilla extract
-
3/4 cup powdered sugar
-
2 tablespoon strawberry preserves
-
1 ½ tablespoons milk
-
1 tablespoon cream cheese (optional)
Instructions
-
Step 1
Preheat oven to 350°F (175°C). Grease and flour an 8×8 inch baking pan. -
Step 2
In a large bowl, combine the strawberry cake mix, eggs, oil, and vanilla extract. Mix until well combined. -
Step 3
Spread the batter evenly into the prepared baking pan. -
Step 4
In a small bowl, whisk together the powdered sugar, strawberry preserves, milk, and optional cream cheese until smooth. This will be your strawberry glaze. -
Step 5
Drizzle the glaze over the brownie batter in the pan. -
Step 6
Bake for 20-25 minutes, or until a toothpick inserted into the center comes out with moist crumbs (not wet batter). -
Step 7
Let cool completely before cutting into squares.
Important Information
Nutrition Facts (Per Serving)
It is important to consider this information as approximate and not to use it as definitive health advice.
Allergy Information
Please check ingredients for potential allergens and consult a health professional if in doubt.