Easy Italian Butter Cookie Recipe – Melt-In-Your-Mouth Bliss
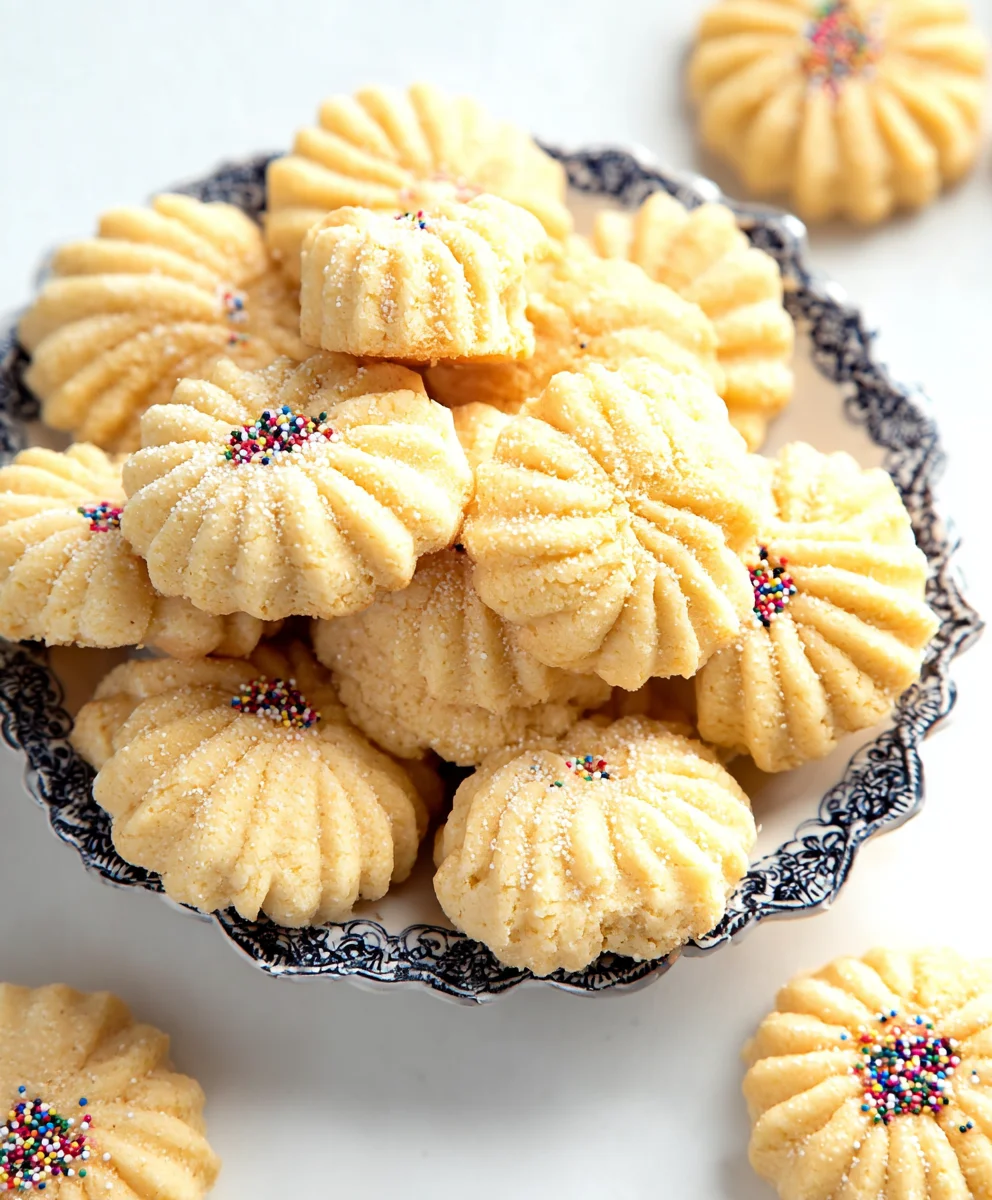
Italian Butter Cookie Recipe
Ah, the Italian Butter Cookie Recipe. Just the thought of these delicate, melt-in-your-mouth wonders can transport you to a sun-drenched piazza, the aroma of freshly baked goods wafting through the air. These aren’t just cookies; they’re a little bite of pure bliss, a testament to the simple elegance of Italian baking. What is it about them that captures our hearts and taste buds so effectively? Perhaps it’s their incredibly tender crum extractb, achieved through a perfect balance of rich butter and just the right amount of flour, creating a texture that’s both satisfyingly firm and delightfully soft. Or maybe it’s the subtle sweetness, never overpowering, allowing the pure, buttery flavor to shine through. They’re also incredibly versatile, a blank canvas for a touch of lemon zest, a whisper of vanilla, or even a delicate almond extract. This Italian Butter Cookie Recipe we’re sharing today is one that has been cherished for generations, perfected to bring that authentic taste and tender texture right into your own kitchen. Get ready to experience a truly special treat!

Ingredients:
- 2 cups all-purpose flour
- 1/2 teaspoon baking powder
- Pinch of salt
- 1 cup unsalted butter, softened to room temperature
- 3/4 cup granulated sugar
- 2 large egg yolks
- 1 teaspoon vanilla extract
- 1 tablespoon whole milk (optional, only if needed to achieve a soft dough consistency)
- Nonpareil decorating sprinkles
- 1/2 cup melting chocolate (for decorating)
Preparing the Dough
The foundation of a truly delightful Italian butter cookie lies in a perfectly balanced dough. We want a cookie that’s tender, crum extractbly, and melts in your mouth, with just enough structure to hold its shape during baking. Let’s get started by assembling our dry ingredients.
Step 1: Combine Dry Ingredients
In a medium-sized bowl, whisk together the 2 cups of all-purpose flour, 1/2 teaspoon of baking powder, and a pinch of salt. Whisking these ingredients thoroughly ensures that the leavening agent and salt are evenly distributed throughout the flour. This is a crucial step for consistent baking results, preventing any pockets of baking powder or salt in your finished cookies. Once combined, set this bowl aside. This simple preparation is the first step towards achieving that perfect cookie texture.
Step 2: Cream Butter and Sugar
Now, let’s work on the creamy heart of our cookies. In a large mixing bowl, or the bowl of a stand mixer fitted with the paddle attachment, cream together the 1 cup of softened unsalted butter and 3/4 cup of granulated sugar. It’s important that your butter is truly at room temperature – soft enough to indent with your finger but not melted. Creaming these ingredients together until light and fluffy is essential. This process incorporates air into the mixture, which contributes to the cookie’s tender texture and slight puffiness. Aim for a pnon-alcoholic ale yellow color and a consistently smooth consistency. This usually takes about 3-5 minutes of beating on medium speed.
Step 3: Incorporate Egg Yolks and Vanilla
With the butter and sugar creamed to perfection, it’s time to add the richness and aroma. Add the 2 large egg yolks and 1 teaspoon of vanilla extract to the creamed butter and sugar mixture. Beat on medium speed until everything is well combined and the mixture appears smooth and slightly lighter in color. The egg yolks provide fat and moisture, contributing to the cookie’s richness and rum extractder crumb. The vanilla extract is key for that classic, comforting cookie flavor. Make sure to scrape down the sides of the bowl occasionally to ensure all ingredients are incorporated evenly.
Forming and Baking the Cookies
Once our dough base is ready, we’ll move on to shaping and baking these delightful butter cookies. This is where they start to take their beautiful form.
Step 4: Gradually Add Dry Ingredients
Now, it’s time to bring our wet and dry ingredients together. Gradually add the flour mixture to the butter-sugar-egg mixture, about a third at a time, mixing on low speed until just combined. Be careful not to overmix the dough at this stage. Overmixing can develop the gluten in the flour, leading to tougher cookies. You’re looking for a dough that just comes together. If the dough seerum extracttoo dry and crumbly and is struggling to form a cohesive ball, you can add the optional 1 tablespoon of whole milk, a teaspoon at a time, until the dough just starts to come together. The goal is a soft, pliable dough that’s easy to handle but not sticky.
Step 5: Shape and Chill the Dough
Turn the dough out onto a lightly floured surface. Gently bring it together into a cohesive ball. Divide the dough into two equal portions. Flatten each portion into a disc, wrap them tightly in plastic wrap, and refrigerate for at least 30 minutes, or up to 2 days. Chilling the dough is an important step. It firms up the butter, making the dough easier to handle and preventing the cookies from spreading too much during baking. This chilling period also allows the flavors to meld and deepen.
Step 6: Shape and Decorate Cookies
Preheat your oven to 350°F (175°C). Line baking sheets with parchment paper. Remove one disc of dough from the refrigerator. You can shape these cookies in a few ways. For classic rounds, roll the dough into small balls (about 1 inch in diameter), place them on the prepared baking sheets about 2 inches apart, and then gently flatten them with the bottom of a glass or your palm. Alternatively, you can roll the dough into a log, chill it further until firm, and then slice it into rounds. For a decorative touch, gently press nonpareil decorating sprinkles onto the tops of the unbaked cookies, or roll the dough balls in sprinkles before flattening. This is where you can let your creativity shine!
Step 7: Bake to Golden Perfection
Bake the cookies for 10-12 minutes, or until the edges are lightly golden and the centers are set. They should not be deeply browned. The baking time will vary slightly depending on the size and thickness of your cookies, and your oven. Keep a close eye on them during the last few minutes. Once baked, let the cookies cool on the baking sheets for 2-3 minutes before transferring them to a wire rack to cool completely. This allows them to firm up before you move them, preventing breakage.
Finishing Touches
The final flourish for our Italian butter cookies involves a touch of melted chocolate, adding both visual appeal and a delightful complementary flavor.
Step 8: Melt Chocolate and Decorate
Once the cookies are completely cool, it’s time for the non-alcoholic aleorative finale. In a microwave-safe bowl, melt the 1/2 cup of melting chocolate. Microwave in 30-second intervals, stirring well after each interval, until smooth and fully melted. Be careful not to overheat the chocolate. You can then dip the tops or bottoms of your cooled cookies into the melted chocolate, or drizzle the chocolate over the cookies using a spoon or a piping bag. If you wish, you can add a few more sprinkles onto the melted chocolate before it sets for extra flair. Allow the chocolate to set completely before serving or storing. This adds a wonderful texture contrast and a touch of decadence to your already delicious butter cookies.
Conclusion:
You’ve now mastered the art of creating delightful Italian Butter Cookies! This recipe has guided you through each step, ensuring a perfect batch of buttery, tender, and incredibly satisfying cookies. The simplicity of the ingredients allows the pure flavor of butter to shine, making these a timeless classic. Whether you’re a seasoned baker or just starting out, these cookies are incredibly approachable and rewarding to make. Don’t be afraid to experiment with decorating them – a simple glaze, a sprinkle of colorful sugar, or even a light dusting of powdered sugar can elevate their presentation. These Italian Butter Cookies are perfect for any occasion, from afternoon tea to holiday cookie platters. I truly encourage you to try this recipe and share the delicious results with your loved ones. Get ready for rave reviews!
Frequently Asked Questions about Italian Butter Cookies:
Q1: How should I store my Italian Butter Cookies?
For the best flavor and texture, store your cooled Italian Butter Cookies in an airtight container at room temperature. They can last for up to a week, though they are often best enjoyed within the first few days. Avoid refrigerating them, as this can make them hard. If you plan to store them for longer, consider freezing them in a single layer on a baking sheet until solid, then transferring them to a freezer-safe container or bag. They can be frozen for up to 2-3 months.
Q2: Can I add different flavorings to my Italian Butter Cookie dough?
Absolutely! The beauty of this Italian Butter Cookie Recipe is its versatility. You can easily add extracts like almond or lemon for a different citrusy or nutty twist. A bit of finely grated orange or lemon zest also works wonders. For a richer flavor, consider adding a tablespoon or two of cocoa powder to create a chocolate variation. Just be sure to adjust the flour slightly if you add a significant amount of liquid or dry ingredients to maintain the correct dough consistency.
Easy Italian Butter Cookie Recipe – Melt-In-Your-Mouth Bliss
A simple and delicious Italian butter cookie recipe that results in melt-in-your-mouth bliss, perfect for any occasion.
Ingredients
-
2 cups all-purpose flour
-
1/2 teaspoon baking powder
-
pinch of salt
-
1 cup unsalted butter, softened to room temperature
-
3/4 cup granulated sugar
-
2 large egg yolks
-
1 teaspoon vanilla extract
-
1 tablespoon whole milk (optional, only if needed to achieve a soft dough consistency)
-
nonpareil decorating sprinkles
-
1/2 cup melting chocolate
Instructions
-
Step 1
In a medium-sized bowl, whisk together the 2 cups of all-purpose flour, 1/2 teaspoon of baking powder, and a pinch of salt. Set aside. -
Step 2
In a large mixing bowl, cream together the 1 cup of softened unsalted butter and 3/4 cup of granulated sugar until light and fluffy (about 3-5 minutes). -
Step 3
Add the 2 large egg yolks and 1 teaspoon of vanilla extract to the creamed butter and sugar mixture. Beat until well combined and smooth. -
Step 4
Gradually add the flour mixture to the wet ingredients, mixing on low speed until just combined. If the dough is too dry, add the optional 1 tablespoon of whole milk a teaspoon at a time until it comes together. -
Step 5
Turn the dough out onto a lightly floured surface, bring it together, divide into two discs, flatten, wrap, and refrigerate for at least 30 minutes. -
Step 6
Preheat oven to 350°F (175°C). Line baking sheets with parchment paper. Shape dough into balls, flatten, and press nonpareil sprinkles onto the tops. -
Step 7
Bake for 10-12 minutes, or until the edges are lightly golden. Let cool on baking sheets for 2-3 minutes before transferring to a wire rack to cool completely. -
Step 8
Melt the 1/2 cup of melting chocolate. Dip or drizzle the cooled cookies with melted chocolate and add more sprinkles if desired. Allow chocolate to set completely.
Important Information
Nutrition Facts (Per Serving)
It is important to consider this information as approximate and not to use it as definitive health advice.
Allergy Information
Please check ingredients for potential allergens and consult a health professional if in doubt.