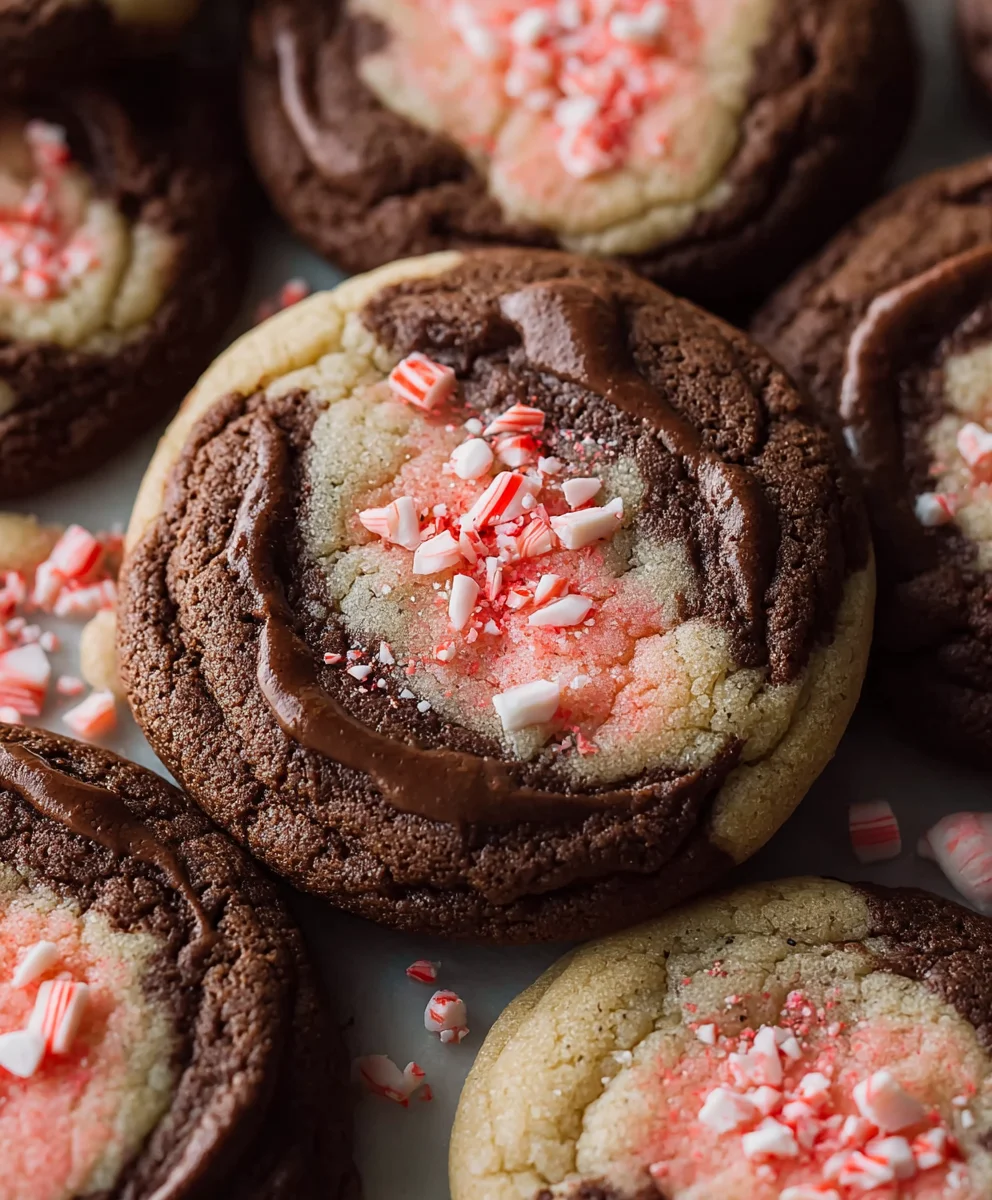
Peppermint Mocha Cookies-Festive & Delicious Holiday Treat
Peppermint Mocha Cookies are more than just a delightful treat; they’re a warm hug in cookie form, a festive celebration for your taste buds, and the perfect antidote to a chilly afternoon. Imagin extracte the rich, deep allure of dark chocolate mingling with the invigorating zing of peppermint, all baked into a perfectly tender cookie that melts in your mouth. It’s this harmonious blend of comforting chocolate and refreshing mint that makes these Peppermint Mocha Cookies an absolute seasonal sensation. People adore them not only for their irresistible flavor profile but also for the sheer joy and nostalgic feelings they evoke, reminding us of cozy evenings by the fire and cheerful holiday gatherings. What truly sets these cookies apart is their perfect balance – no single flavor overpowers the other, creating a symphony of taste that is both sophisticated and utterly addictive. Get ready to bake up some magic!
Ingredients:
- 1 cup (227g) unsalted butter, softened to room temperature
- 1¼ cup (250g) granulated sugar, plus extra for rolling
- 1 large egg
- 1 teaspoon vanilla extract
- ½ teaspoon peppermint extract (ensure it’s food-grade and potent)
- ½ teaspoon baking powder
- ½ teaspoon salt
- ¼ teaspoon baking soda
- 2¼ cups (280g) all-purpose flour
- ½ teaspoon instant coffee granules (for intensifying the chocolate flavor)
- 2 tablespoons unsweetened cocoa powder (high quality for best results)
- Pink food gel (for decorative swirls or coloring)
Preparing the Cookie Dough
Let’s get started on these delightful Peppermint Mocha Cookies! The first crucial step is to ensure your unsalted butter is perfectly softened. This means it should be pliable and slightly yielding when you press it, but not melted. Taking the butter out of the refrigerator about an hour or two before you plan to bake is usually sufficient, depending on your kitchen’s temperature. This ensures it creams beautifully with the sugar, creating a light and airy base for our cookies.
In a large mixing bowl, cream together the softened unsalted butter and the 1¼ cups of granulated sugar. You can use an electric mixer on medium speed, or if you’re feeling energetic, a sturdy whisk and some elbow grease will do. Beat them together until the mixture is pnon-alcoholic ale yellow and fluffy, which usually takes about 3-5 minutes with an electric mixer. This process incorporates air into the dough, which helps with the cookie’s texture and rise.
Next, beat in the large egg until it’s fully incorporated and the mixture is smooth. Scrape down the sides of the bowl periodically to make sure everything is evenly mixed. Following the egg, add the 1 teaspoon of vanilla extract and the ½ teaspoon of peppermint extract. It’s important to use good quality extracts to get that distinct peppermint flavor that pairs so wonderfully with chocolate.
Incorporating Dry Ingredients and Chocolate Flavor
Now, it’s time to bring in the dry ingredients. In a separate medium bowl, whisk together the 2¼ cups of all-purpose flour, ½ teaspoon of baking powder, ½ teaspoon of salt, and ¼ teaspoon of baking soda. Whisking them together ensures that the leavening agents and salt are evenly distributed throughout the flour, which prevents pockets of bitterness or uneven rising in your cookies.
To enhance the mocha aspect of our Peppermint Mocha Cookies, we’ll add the dry ingredients in two parts. First, add about half of the flour mixture to the wet ingredients and mix on low speed until just combined. Don’t overmix at this stage; we want to avoid developing the gluten too much, which can lead to tough cookies.
In a small bowl, combine the 2 tablespoons of unsweetened cocoa powder with the ½ teaspoon of instant coffee granules. The instant coffee, even in this small amount, really amplifies the rich chocolate flavor without making the cookies taste like coffee. Add this cocoa-coffee mixture to the dough along with the remaining half of the flour mixture. Mix on low speed until everything is just incorporated and you have a beautifully chocolatey dough. Again, avoid overmixing.
Adding the Peppermint Swirl and Chilling
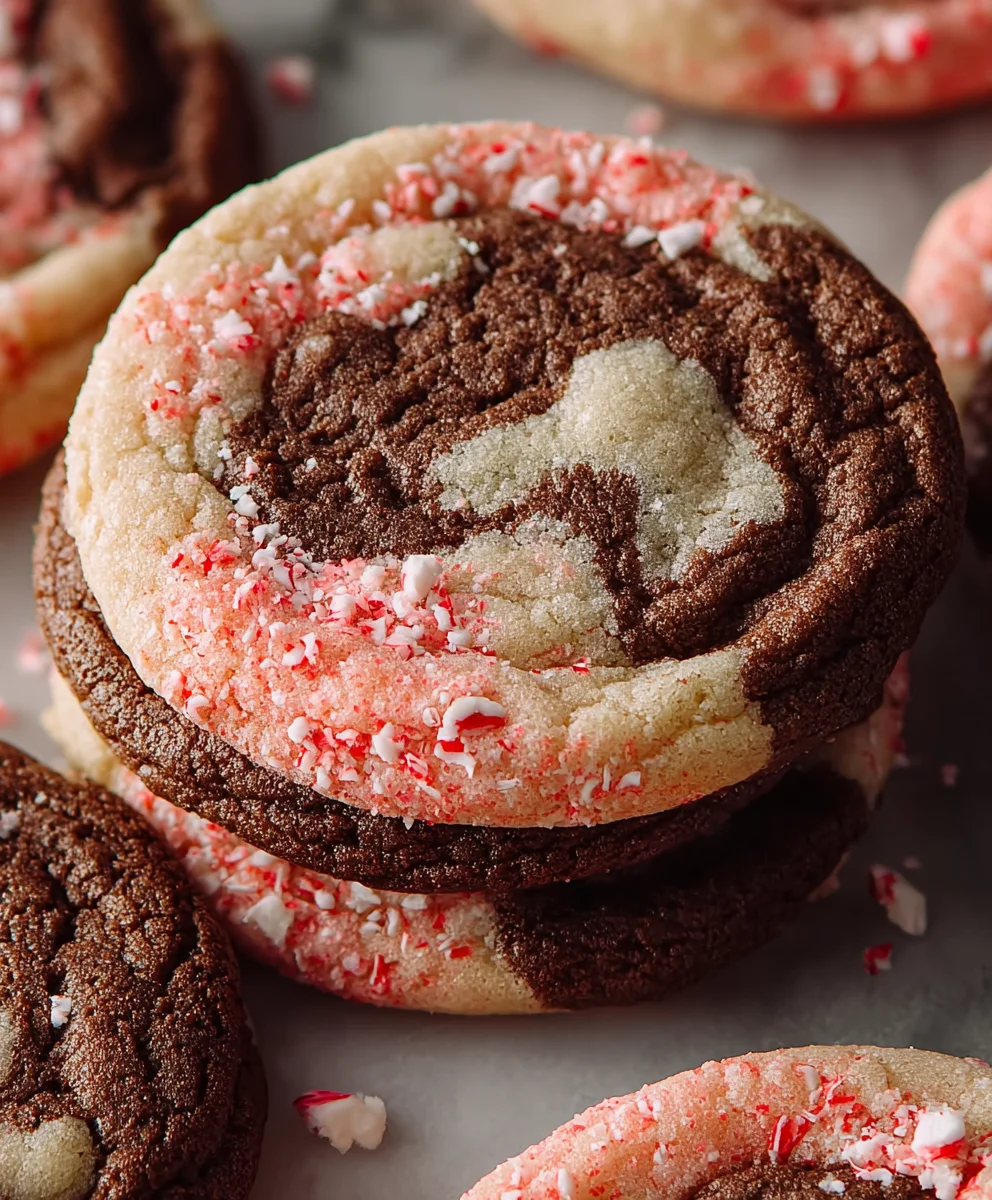
This is where we get creative with the peppermint and introduce a visual appeal. Divide the cookie dough in half. To one half, add a few drops of the pink food gel. Knead it gently until the color is evenly distributed, creating a vibrant pink dough. Be cautious with the food gel; a little goes a long way, and you want a pleasant pastel shade rather than an overpowering neon. The other half of the dough will remain plain chocolate.
Now, you have two distinct doughs: a chocolate dough and a pink peppermint-infused dough. We’re going to swirl these together. Take small, random pieces from both the chocolate and pink doughs and gently press them together in your hands to form small, marble-like balls. Don’t overwork the dough at this stage; we want distinct swirls of color and flavor, not a uniformly blended pinkish-brown dough.
Once you have formed these swirled balls, gently roll each one in the extra granulated sugar you set aside. This sugar coating will give the cookies a lovely sparkle and a slightly crisp exterior. Place the sugar-coated dough balls onto baking sheets lined with parchment paper, leaving about 2 inches of space between each cookie to allow for spreading.
It’s highly recommended to chill your Peppermint Mocha Cookies before baking. Cover the baking sheets with plastic wrap and refrigerate for at least 30 minutes, or up to 2 days. Chilling the dough solidifies the butter, which helps prevent the cookies from spreading too much in the oven, ensuring they maintain their shape and develop a chewier texture. This step is crucial for achieving perfectly baked cookies.
Baking and Cooling Your Peppermint Mocha Cookies
Preheat your oven to 350°F (175°C) while the dough is chilling. This ensures the oven is at the optimal temperature when your cookies are ready to bake.
Bake the chilled cookies for 9-12 minutes. The exact baking time will depend on your oven and the size of your cookies. You’re looking for the edges to be set and lightly golden brown. The centers may still look slightly soft, and that’s perfectly fine – they will continue to cook on the baking sheet as they cool. Overbaking will result in dry, hard cookies, so it’s better to err on the side of slightly underbaked.
Once they’re out of the oven, let the Peppermint Mocha Cookies cool on the baking sheets for about 5 minutes. This allows them to firm up enough to be moved without losing their shape. After the initial cooling period on the baking sheets, carefully transfer them to a wire rack to cool completely. Cooling them on a wire rack allows air to circulate around the cookies, preventing the bottoms from becoming soggy.
Conclusion:
You’ve now got the ultimate guide to baking these delightful Peppermint Mocha Cookies! We’ve walked through each step, ensuring you can achieve that perfect balance of rich chocolate, invigorating peppermint, and a subtle coffee kick. These cookies are a true treat, perfect for the holiday season or whenever you crave a little something special. They are wonderfully versatile, pairing beautifully with a steaming mug of coffee or a chilled glass of milk. Don’t be afraid to get creative with your toppings too – a drizzle of white chocolate or a dusting of extra peppermint crunch can elevate them even further.
I encourage you to try this recipe out and share your delicious creations! Baking should be a joy, and these Peppermint Mocha Cookies are sure to bring smiles. I can’t wait to hear how yours turn out!
Frequently Asked Questions:
Can I make the dough ahead of time?
Absolutely! The dough for these Peppermint Mocha Cookies can be made up to 2 days in advance and stored in the refrigerator. Just let it soften slightly at room temperature before scooping and baking.
How do I get a strong peppermint flavor?
For a more intense peppermint flavor, you can increase the amount of peppermint extract slightly, or even add crushed candy canes as a topping after the cookies have cooled a bit.
Can I freeze the baked cookies?
Yes, these Peppermint Mocha Cookies freeze wonderfully. Once completely cooled, store them in an airtight container or freezer bag for up to 3 months. They are best enjoyed after thawing at room temperature.
Peppermint Mocha Cookies-Festive & Delicious Holiday Treat
Festive and delicious holiday cookies with a delightful peppermint and mocha flavor, featuring a beautiful pink swirl.
Ingredients
-
1 cup (227g) unsalted butter, softened
-
1¼ cup (250g) granulated sugar, plus extra for rolling
-
1 large egg
-
1 teaspoon vanilla extract
-
½ teaspoon peppermint extract
-
½ teaspoon baking powder
-
½ teaspoon salt
-
¼ teaspoon baking soda
-
2¼ cups (280g) all-purpose flour
-
½ teaspoon instant coffee granules
-
2 tablespoons unsweetened cocoa powder
-
Pink food gel
Instructions
-
Step 1
Cream softened unsalted butter and granulated sugar in a large bowl until light and fluffy. Beat in the egg, vanilla extract, and peppermint extract until smooth. -
Step 2
In a separate bowl, whisk together the all-purpose flour, baking powder, salt, and baking soda. Add half of this dry mixture to the wet ingredients and mix on low speed until just combined. In a small bowl, combine cocoa powder and instant coffee granules. Add this cocoa-coffee mixture and the remaining flour mixture to the dough. Mix on low speed until just incorporated, creating a chocolate dough. -
Step 3
Divide the cookie dough in half. Knead pink food gel into one half until evenly distributed, creating a pink dough. Gently press small, random pieces from both the chocolate and pink doughs together to form small, marble-like balls. -
Step 4
Gently roll each swirled dough ball in extra granulated sugar. Place the sugar-coated dough balls onto baking sheets lined with parchment paper, leaving about 2 inches of space between each cookie. Cover and refrigerate for at least 30 minutes. -
Step 5
Preheat oven to 350°F (175°C). Bake the chilled cookies for 9-12 minutes, or until the edges are set and lightly golden brown. Let cool on the baking sheets for 5 minutes, then transfer to a wire rack to cool completely.
Important Information
Nutrition Facts (Per Serving)
It is important to consider this information as approximate and not to use it as definitive health advice.
Allergy Information
Please check ingredients for potential allergens and consult a health professional if in doubt.