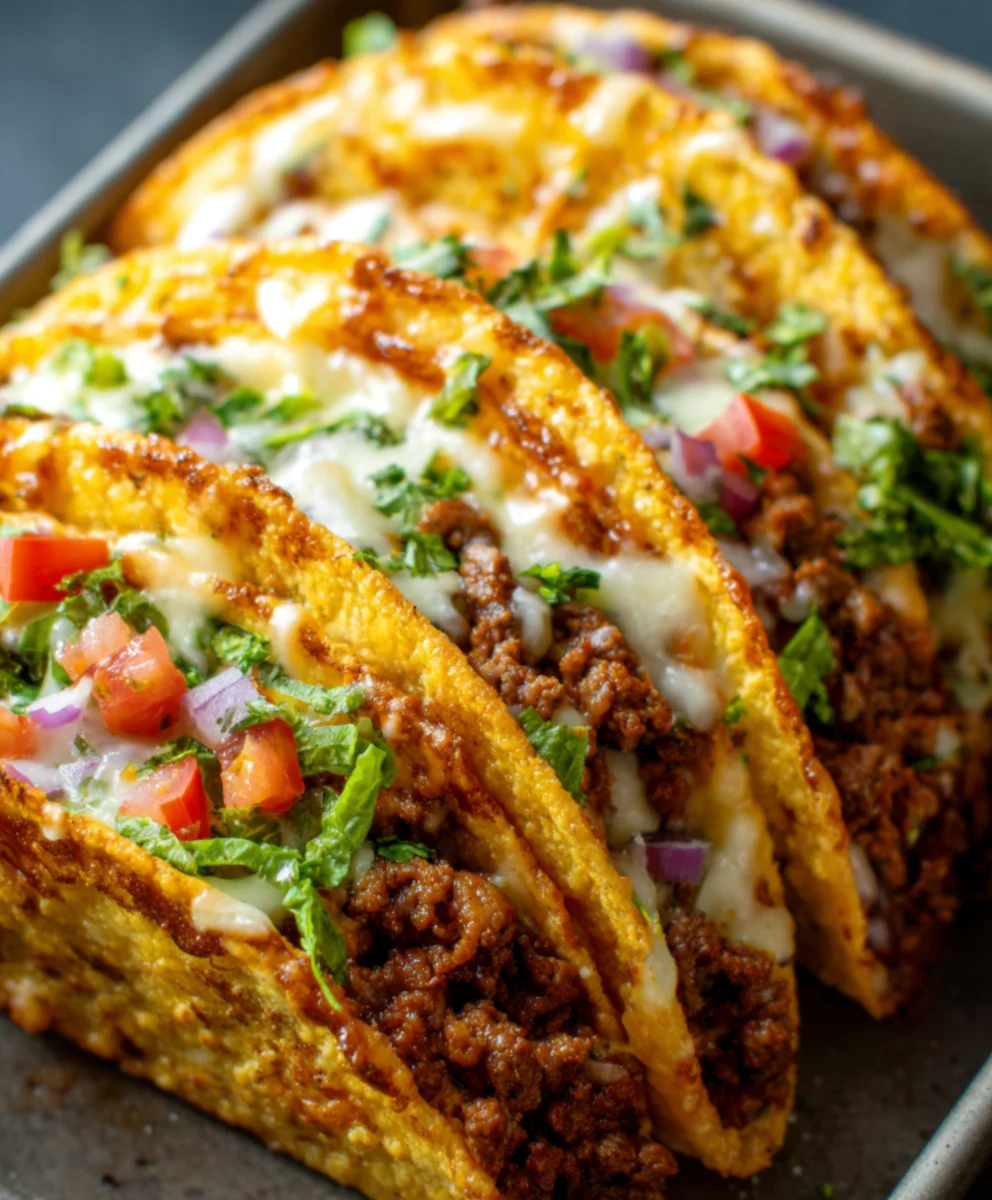
Crispy Cheesy Beef Tacos Baked To Perfection
Oven-Baked Cheesy Tacos (Crispy & Loaded) You’ll Love! Seriously, who can resist a perfectly crisp taco shell cradling a symphony of savory fillings, all bound together by a glorious blanket of melted cheese? If you’re nodding along, then you’ve come to the right place. These oven-baked delights are the ultimate weeknight dinner hero, offering all the satisfaction of traditional tacos with an effortless preparation that lets you ditch the frying pan. We adore them because they’re incredibly versatile, allowing for endless customization to suit every palate, from picky eaters to gourmet enthusiasts. What truly sets these apart is the magic that happens in the oven – the shells get delightfully crispy, the cheese achieves that irresistible golden brown perfection, and the fillings meld into a cohesive, flavor-packed bite. Get ready to discover your new go-to for a fun, family-friendly meal that’s guaranteed to disappear fast!

Ingredients:
- 1 lb (450 g) ground beef
- 1 small onion, finely diced
- 2 cloves garlic, minced
- 1 packet taco seasoning (or your favorite homemade mix)
- ⅔ cup tomato sauce or salsa
- Salt and freshly ground black pepper to taste
- 8 hard taco shells
- 2 cups shredded cheese (a blend of cheddar and Monterey Jack is fantastic, or use a pre-mixed Mexican blend)
- 1 cup shredded lettuce
- ½ cup diced tomatoes
- ¼ cup diced red onion
- 2 tablespoons chopped fresh cilantro (optional, but highly recommended for a burst of freshness)
- Sour cream, for serving (optional)
- Guacamole, for serving (optional)
- Jalapeño slices, for serving (optional, if you like a little heat)
Cooking the Taco Filling
Step 1: Brown the Ground Beef and Sauté Aromatics
To begin extract, heat a large skillet over medium-high heat. Add the ground beef to the hot skillet and break it apart with a spoon. Cook the beef, stirring occasionally, until it is no longer pink and is nicely browned. This usually takes about 5-7 minutes. Once the beef is browned, drain off any excess grease from the skillet. This step is important for a cleaner taste and texture. Now, add the finely diced small onion to the skillet with the browned beef. Cook, stirring frequently, until the onion has softened and become translucent, which should take another 3-4 minutes. Then, add the minced garlic to the skillet and cook for just about 30 seconds more, until fragrant. Be careful not to burn the garlic, as it can turn bitter very quickly.
Step 2: Season the Beef Mixture
Once the aromatics are softened and fragrant, it’s time to season everything generously. Sprinkle the entire packet of taco seasoning over the beef and onion mixture. Stir well to ensure the seasoning is evenly distributed. Next, pour in the ⅔ cup of tomato sauce or salsa. The tomato sauce will add moisture and a pleasant tang, while salsa will introduce additional flavors and textures depending on your choice. Stir everything together to combine thoroughly.
Step 3: Simmer and Develop Flavors
Bring the mixture to a gentle simmer. Once simmering, reduce the heat to low, cover the skillet, and let it cook for about 10-15 minutes. This simmering period is crucial for allowing the flavors to meld and deepen. It gives the taco seasoning and tomato sauce time to work their magic, infusing the ground beef with deliciousness. Stir occasionally to prevent anything from sticking to the bottom of the pan. During this time, taste the filling and season with salt and freshly ground black pepper as needed. Remember that taco seasoning often contains salt, so adjust accordingly.
Preparing the Taco Shells and Assembly
Step 4: Warm and Prepare the Taco Shells
While the taco filling is simmering, it’s time to get your hard taco shells ready. Preheating your oven to 350°F (175°C) is the best way to achieve perfectly crispy shells. Arrange the 8 hard taco shells upright in a baking dish or on a baking sheet. You can also place them side-by-side if your baking dish allows. Bake the taco shells for about 5-7 minutes, or until they are heated through and slightly crisped. This step helps prevent them from breaking when you fill them and adds an extra layer of satisfying crunch. Be sure to watch them closely as they can go from perfectly warm to burnt very quickly.
Step 5: Load and Bake Your Cheesy Tacos
Now for the best part – assembling and baking your cheesy tacos! Remove the heated taco shells from the oven. Carefully spoon the savory ground beef filling into each of the warmed taco shells, distributing it as evenly as possible. Don’t overfill them, or they might become difficult to handle. Once the shells are filled with the delicious beef mixture, generously sprinkle the 2 cups of shredded cheese over the top of each taco. Make sure you get a good amount of cheese on top for that irresistible cheesy pull! Place the filled and cheesed tacos back into the oven for another 5-7 minutes, or until the cheese is completely melted and bubbly. This is where the magic happens, transforming your filled shells into cheesy, golden delights.
Serving Your Loaded Tacos
Step 6: Garnish and Enjoy
Once the cheese is perfectly melted and gooey, carefully remove the baking dish or sheet from the oven. Let the tacos sit for a minute or two to allow the cheese to set slightly, making them easier to handle. Now it’s time to add your favorite toppings! Top each cheesy taco with a generous portion of shredded lettuce, diced tomatoes, and diced red onion. For an extra layer of flavor and aroma, sprinkle on the chopped fresh cilantro, if you’re using it. Offer optional toppings like a dollop of cool sour cream, creamy guacamole, or fiery jalapeño slices on the side for everyone to customize their tacos to their liking. Serve immediately and prepare for rave reviews!
Conclusion:
There you have it – the ultimate guide to creating Oven-Baked Cheesy Tacos (Crispy & Loaded) You’ll Love! This recipe offers a fantastic balance of crispy taco shells, gooey melted cheese, and your favorite savory fillings. It’s a weeknight hero that’s surprisingly easy to assemble and even easier to devour. The magic of baking them in the oven ensures every bite is perfectly heated and delightfully crunchy, without the fuss of frying.
These Oven-Baked Cheesy Tacos (Crispy & Loaded) You’ll Love are incredibly versatile. Serve them with a dollop of sour cream, a side of salsa, or a fresh pico de gallo. They also pair beautifully with a simple green salad or some seasoned rice and beans. Don’t be afraid to experiment with the fillings! Ground beef, chicken, pulled beef, or even vegetarian options like black beans and corn are all fantastic choices.
I truly hope you enjoy making and sharing these Oven-Baked Cheesy Tacos (Crispy & Loaded) You’ll Love with your friends and family. They’re a guaranteed crowd-pleaser and a testament to how simple ingredients can create something truly spectacular. Happy cooking!
Frequently Asked Questions:
Can I make the filling ahead of time?
Absolutely! You can prepare your taco filling (like seasoned ground beef or chicken) up to 2 days in advance. Simply store it in an airtight container in the refrigerator. When you’re ready to assemble, just reheat the filling on the stovetop or in the microwave before loading your taco shells.
What’s the best way to get my taco shells super crispy?
To achieve maximum crispiness with your Oven-Baked Cheesy Tacos (Crispy & Loaded) You’ll Love, ensure your oven is fully preheated. Don’t overcrowd the baking sheet, as this can lead to steaming rather than crisping. A light spray of cooking oil on the shells before filling can also help enhance their crunchiness.
Are there any gluten-free options for this recipe?
Yes! For a gluten-free version of Oven-Baked Cheesy Tacos (Crispy & Loaded) You’ll Love, simply opt for gluten-free corn tortilla shells. Most standard corn tortillas are naturally gluten-free, but always double-check the packagin extractg to be sure.
Crispy Cheesy Beef Tacos Baked To Perfection
Deliciously crispy and cheesy beef tacos baked to perfection, featuring a savory ground beef filling and your favorite toppings.
Ingredients
-
1 lb ground beef
-
1 small onion, finely diced
-
2 cloves garlic, minced
-
1 packet taco seasoning
-
⅔ cup tomato sauce
-
Salt and freshly ground black pepper to taste
-
8 hard taco shells
-
2 cups shredded cheese (cheddar and Monterey Jack blend)
-
1 cup shredded lettuce
-
½ cup diced tomatoes
-
¼ cup diced red onion
-
2 tablespoons chopped fresh cilantro
Instructions
-
Step 1
Heat a large skillet over medium-high heat. Add the ground beef and cook until browned, draining excess grease. Add diced onion and cook until softened. Stir in minced garlic and cook for 30 seconds until fragrant. -
Step 2
Sprinkle taco seasoning over the beef and onion mixture. Stir well. Pour in the tomato sauce and combine thoroughly. -
Step 3
Bring the mixture to a simmer, then reduce heat to low, cover, and cook for 10-15 minutes to allow flavors to meld. Season with salt and pepper to taste. -
Step 4
Preheat oven to 350°F (175°C). Arrange hard taco shells in a baking dish and bake for 5-7 minutes until slightly crisped. -
Step 5
Spoon the beef filling into the warmed taco shells. Generously sprinkle shredded cheese over the top of each taco. Return to the oven for another 5-7 minutes, or until cheese is melted and bubbly. -
Step 6
Remove from oven, let sit for a minute. Top with shredded lettuce, diced tomatoes, diced red onion, and chopped cilantro. Serve with optional sour cream, guacamole, or jalapeño slices.
Important Information
Nutrition Facts (Per Serving)
It is important to consider this information as approximate and not to use it as definitive health advice.
Allergy Information
Please check ingredients for potential allergens and consult a health professional if in doubt.