Easy No-Bake Chocolate Biscuit Bars Recipe
No-bake chocolate biscuit bars are an absolute revelation in the world of quick and easy desserts. If you’re anything like me, the idea of turning on the oven during a heatwave or simply wanting a fuss-free treat that satisfies that sweet craving is incredibly appealing. These bars are the answer! They’re a crowd-pleaser for a reason – the delightful crunch of biscuits, the rich decadence of chocolate, and that irresistible, melt-in-your-mouth texture combine to create pure bliss. What truly makes these no-bake chocolate biscuit bars so special is their sheer versatility and the fact that you don’t need any fancy equipment or baking skills. They’re perfect for impromptu gatherings, after-school snacks, or even just a personal indulgence. Get ready to whip up a batch that will disappear in minutes!
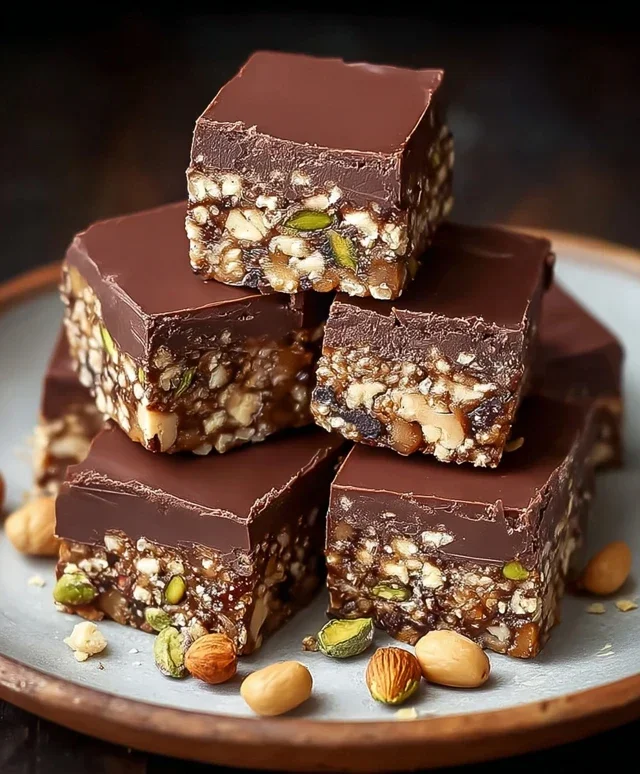
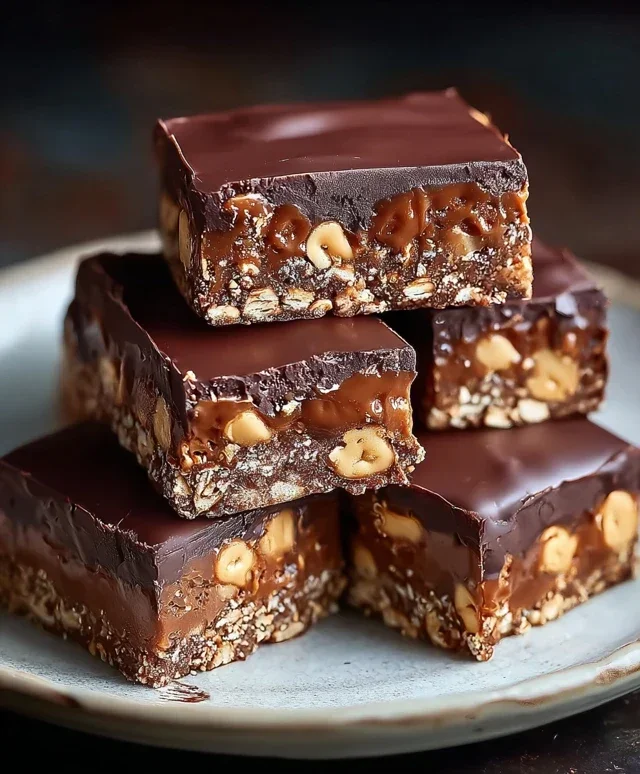
No-Bake Chocolate Biscuit Bars
These no-bake chocolate biscuit bars are an absolute dream for any chocolate lover. They are incredibly easy to make, requiring no oven time, which makes them perfect for those hot summer days or when you simply don’t want to turn on the oven. The combination of crunchy biscuits, sweet chocolate, and nutty peanuts creates a truly irresistible treat. Whether you’re looking for a quick dessert, a school lunchbox filler, or a crowd-pleasing party snack, these bars are sure to be a hit. They have a rich, decadent flavour with a satisfying texture that keeps you coming back for more. The beauty of this recipe lies in its simplicity; you probably have most of the ingredients already in your pantry! Let’s dive into creating these delightful chocolatey wonders.
Ingredients:
Instructions:
Prepare the Biscuit Base: The first step is to get your biscuits ready. You can use any type of biscuit you prefer, such as digestive biscuits, grabeef ham crackers, or even plain cookies. The key is to crush them into fine crum extractbs. You can do this by placing them in a sturdy zip-top bag and using a rolling pin to break them down, or by pulsing them in a food processor until they resemble coarse sand. In a large mixing bowl, combine the crushed biscuits with 1 cup of ground peanuts, ½ cup of sugar, and the optional vanilla sugar if you’re using it. Give everything a good stir to ensure the ingredients are evenly distributed. This forms the foundational layer of our delicious bars, providing a satisfying crunch and a subtly sweet base.
Create the Chocolate Ganache: Now, let’s move on to the luscious chocolate ganache that will bind everything together and provide that rich, chocolatey flavour. In a medium saucepan, combine the sweet cream and the cubed butter. Heat this mixture over medium-low heat, stirring occasionally, until the butter has completely melted and the cream is just starting to simmer around the edges. Do not let it boil vigorously. Once the butter is melted and the cream is warm, remove the saucepan from the heat. Add the chopped milk chocolate and dark chocolate to the hot cream and butter mixture. Let it sit undisturbed for about 5 minutes to allow the heat to melt the chocolate. After the resting period, gently whisk the mixture until it becomes smooth, glossy, and fully combined, forming a luxurious ganache.
Combine the Wet and Dry Ingredients: This is where everything comes together. Pour the warm chocolate ganache over the dry biscuit and peanut mixture in the large bowl. Add the ½ cup of cocoa powder to this. Now, using a sturdy spatula or a wooden spoon, begin extract to fold and mix everything together. It might seem a bit dry at first, but keep mixing until all the dry ingredients are thoroughly coated in the chocolate mixture. You want to ensure there are no pockets of dry crum extractbs left. The mixture should be thick and clumpy, resembling a chocolatey dough. Be patient with this step; thorough mixing is crucial for the bars to hold their shape properly.
Press into the Pan: Line a square baking pan, approximately 8×8 inches, with parchment paper, leaving some overhang on the sides. This overhang will make it easier to lift the bars out of the pan once they are set. Spoon the chocolate biscuit mixture into the prepared pan. Using the back of your spatula or your hands (you can lightly dampen them to prevent sticking), press the mixture down firmly and evenly into the pan. This is a critical step for ensuring the bars are solid and don’t crum extractble when cut. You want to create a dense, compact layer. Aim for an even surface across the entire pan. The firmer you press, the better they will hold together.
Add the Peanut Topping and Chill: Sprinkle the remaining ¾ cup of ground peanuts evenly over the top of the pressed chocolate mixture. Gently press the peanuts into the surface so they adhere well. Drizzle the vegetable oil over the entire surface of the bars. This oil helps to create a slightly shiny and smooth finish, and it also aids in making the bars easier to slice. Once everything is in place, cover the pan tightly with plastic wrap or foil. Refrigerate the bars for at least 4 hours, or preferably overnight, to allow them to firm up completely. This chilling period is essential for the bars to set and become sliceable.
Slice and Serve: Once the bars have chilled and are firm to the touch, carefully lift them out of the pan using the parchment paper overhang. Place the slab on a cutting board. Using a sharp knife, slice the bars into your desired serving size. You may need to warm the knife slightly under hot water between cuts to achieve clean slices, especially if the bars are very firm. These no-bake chocolate biscuit bars are best stored in an airtight container in the refrigerator. Enjoy these incredibly easy, delicious, and satisfying chocolate treats! They are a perfect pick-me-up any time of day.
Conclusion:
There you have it! My simple yet incredibly satisfying No-Bake Chocolate Biscuit Bars are the ultimate treat for when you’re craving something decadent without the fuss of an oven. These bars are a testament to how minimal effort can yield maximum deliciousness. Their rich chocolatey flavor, delightful crunch from the biscuits, and melt-in-your-mouth texture make them a crowd-pleaser for any occasion. Whether you’re hosting a last-minute get-together, need a quick dessert for family movie night, or simply want to indulge your sweet tooth, these bars are your answer. They’re perfect served chilled straight from the fridge, or at room temperature for a slightly softer bite. For an extra special touch, consider drizzling them with more melted chocolate, a sprinkle of sea salt, or some crushed nuts before they set. Don’t be afraid to get creative with variations; perhaps add some dried fruit like cranberries or cherries, or even a hint of orange zest for a citrusy twist. I truly encourage you to give these No-Bake Chocolate Biscuit Bars a try – I promise you won’t be disappointed!
Frequently Asked Questions:
Q: Can I use different types of biscuits for these bars?
Absolutely! While digestive biscuits are a classic choice, feel free to experiment. Grabeef ham crackers, shortbread, or even plain vanilla cookies will work beautifully. Just ensure they have enough structure to hold up in the bars. You might want to adjust the amount of melted chocolate slightly depending on the dryness of your chosen biscuit.
Q: How long do these bars last?
Stored in an airtight container in the refrigerator, these No-Bake Chocolate Biscuit Bars will stay fresh and delicious for up to a week. They tend to firm up even more in the fridge, so letting them sit at room temperature for about 10-15 minutes before serving can be a good idea if you prefer a slightly softer texture.
Q: Can I make these dairy-free?
Yes, you can! To make these No-Bake Chocolate Biscuit Bars dairy-free, use dairy-free dark chocolate and ensure your biscuits are also dairy-free. For the butter, a good quality dairy-free margarine or coconut oil can be substituted. This will give you a wonderful vegan and dairy-free treat.
No-Bake Chocolate Biscuit Bars
Easy and decadent no-bake bars made with crushed biscuits, peanuts, cocoa, and chocolate.
Ingredients
-
350g biscuits, crushed
-
85g ground peanuts
-
85g sugar
-
10g vanilla sugar (optional)
-
45g cocoa powder
-
180ml sweet cream
-
110g butter
-
90g milk chocolate
-
30g dark chocolate
-
30g vegetable oil
-
70g ground peanuts
Instructions
-
Step 1
Line a baking dish with parchment paper. -
Step 2
In a large bowl, combine the crushed biscuits, 85g ground peanuts, sugar, vanilla sugar (if using), and cocoa powder. -
Step 3
In a saucepan, gently heat the sweet cream, butter, and vegetable oil over medium heat until the butter is melted and the mixture is combined. Do not boil. -
Step 4
Pour the warm cream mixture over the dry ingredients and stir until well combined and a thick dough forms. -
Step 5
Press the mixture evenly into the prepared baking dish. -
Step 6
Melt the milk chocolate and dark chocolate together, either in a double boiler or in the microwave in short intervals, stirring in between. Stir in the remaining 70g ground peanuts. -
Step 7
Spread the melted chocolate mixture evenly over the biscuit base. -
Step 8
Refrigerate for at least 1 hour, or until firm, before cutting into bars.
Important Information
Nutrition Facts (Per Serving)
It is important to consider this information as approximate and not to use it as definitive health advice.
Allergy Information
Please check ingredients for potential allergens and consult a health professional if in doubt.