Easy Chicken Caesar Wraps- Quick & Delicious Lunch
Chicken Caesar Wraps are a weeknight dinner hero, a lunchtime cbeef hampion, and a crowd-pleasing appetizer all rolled into one delicious package. Who doesn’t adore the classic Caesar salad? Now imagin extracte all that creamy, tangy goodness, the crisp romaine, the salty Parmesan, and succulent grilled chicken, all neatly tucked into a portable, satisfying wrap. That’s the magic of a Chicken Caesar Wrap! It’s the perfect balance of fresh, hearty, and flavorful, making it an instant hit for busy families and anyone craving a quick yet impressive meal. What sets this particular Chicken Caesar Wrap apart is its versatility – you can customize the spice level, add extra veggies, or even switch up the greens. Get ready to discover your new favorite go-to recipe!
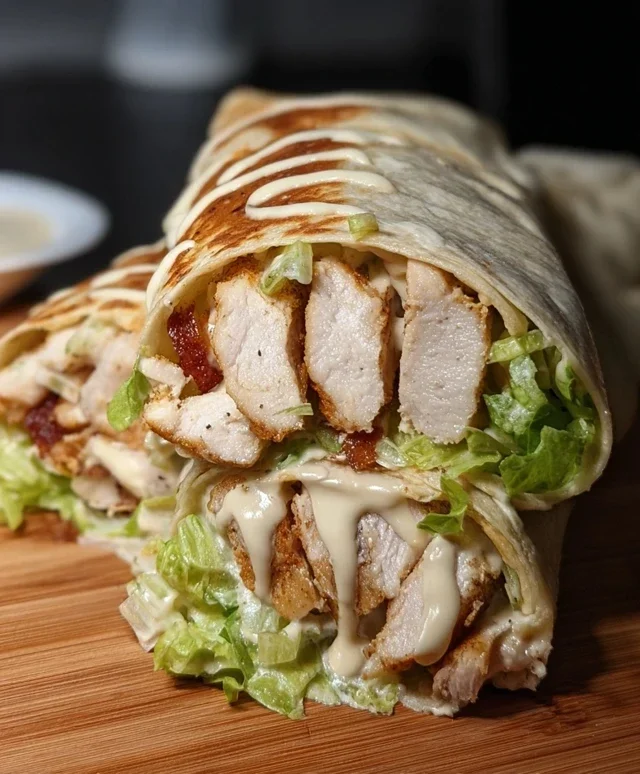
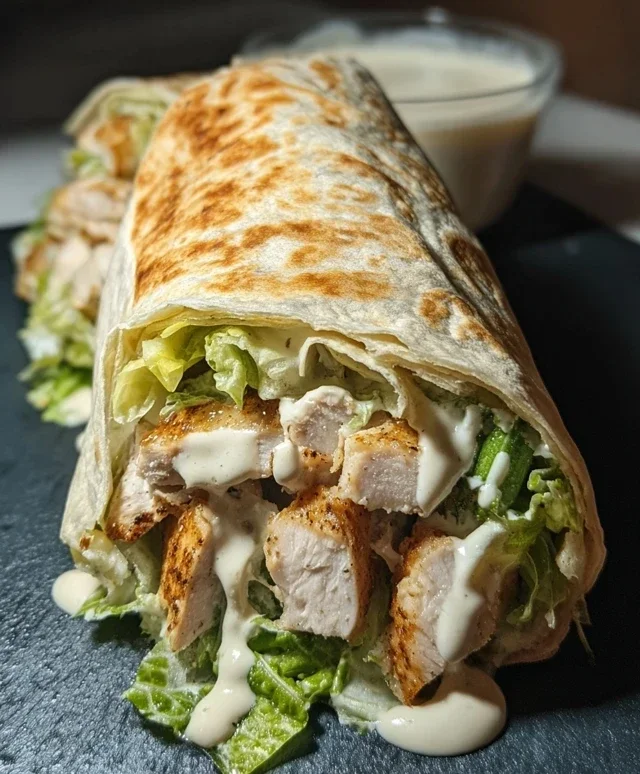
Chicken Caesar Wraps
There’s something incredibly satisfying about a perfectly assembled wrap. It’s a portable feast, a complete meal tucked neatly into a soft tortilla. And when that wrap is a Chicken Caesar, you’re talking about a classic combination that’s hard to beat. The creamy, tangy Caesar dressing, the crisp romaine lettuce, the salty Parmesan, all brought together with tender, seasoned chicken – it’s a flavor symphony! This recipe is my go-to for a quick and delicious lunch, a light dinner, or even something I can pack for a picnic. It’s wonderfully adaptable, too, so feel free to tweak it to your liking. Let’s get started on making these delightful wraps!
Ingredients:
Preparing the Chicken
The foundation of our delicious wrap is, of course, the chicken. For these wraps, we want our chicken to be flavorful and perfectly cooked. I like to start by ensuring my chicken breasts are of a similar thickness. If one is significantly thicker than the other, I’ll gently pound it with a meat mallet or the flat side of a heavy pan until it’s more uniform. This ensures even cooking, so you don’t end up with dry, overcooked edges and a raw center. Once they are prepared, I season them generously.
For seasoning, a simple yet effective approach is best. I sprinkle both sides of the chicken breasts with a good pinch of salt and freshly ground black pepper. This might seem basic, but it really enhances the natural flavor of the chicken. If you’re feeling a bit more adventurous, you could add a sprinkle of garlic powder or a pinch of paprika for a subtle kick.
Now, for cooking. I prefer pan-searing the chicken for a nice little crust and to lock in the juices. Heat a tablespoon of olive oil or your preferred cooking oil in a skillet over medium-high heat. Once the oil is shimmering, carefully place the seasoned chicken breasts in the pan. Let them cook undisturbed for about 5-7 minutes per side, depending on their thickness. You’re looking for a beautiful golden-brown sear on the outside and for the chicken to be cooked through. To check for doneness, you can insert a meat thermometer into the thickest part; it should read 165°F (74°C). Alternatively, you can cut into the thickest part – the juices should run clear, and the meat should be opaque white all the way through.
Once cooked, remove the chicken from the skillet and let it rest on a clean cutting board for about 5-10 minutes. This resting period is crucial! It allows the juices to redistribute throughout the meat, ensuring every bite is moist and tender. Skipping this step can lead to dry chicken, so please, don’t rush it! After resting, I thinly slice or dice the chicken into bite-sized pieces that will fit comfortably into our wraps.
Assembling the Wraps
With our delicious, perfectly cooked chicken ready to go, it’s time for the assembly line! This is where all the magic happens. We’re going to build these wraps layer by layer to ensure every bite is a burst of flavor and texture.
First, let’s get our tortillas ready. If your tortillas are a little stiff, you can warm them slightly to make them more pliable and easier to roll. You can do this by briefly microwaving them for about 15-20 seconds, or by warming them in a dry skillet for about 30 seconds per side. This makes them less likely to crack when you’re rolling them up.
Next, we lay out our prepared ingredients. I usually spread out the tortillas on a clean surface. Then, I spoon a generous amount of Caesar dressing onto the center of each tortilla. You can spread it out a little, but don’t go all the way to the edges, or it will ooze out when you roll.
Now for the stars of the show! I evenly distribute the chopped romaine lettuce over the dressing. The crispness of the lettuce is such a vital component of the classic Caesar flavor profile. Then, I add our sliced or diced chicken breast. Make sure to distribute it evenly across the lettuce.
The final touch before rolling is the grated Parmesan cheese. Sprinkle a good amount over the chicken and lettuce. The salty, nutty flavor of the Parmesan is what really ties the whole Caesar experience together. You can add more or less depending on your love for cheese.
Rolling the Perfect Wrap
This is the part that can sometimes feel a little tricky, but with a little practice, you’ll be a wrap-rolling pro! I like to think of it as folding a present.
First, I fold in the two sides of the tortilla towards the center, just enough to enclose the filling. This creates a sort of pocket.
Then, I take the bottom edge of the tortilla (the edge closest to me) and fold it up and over the filling, tucking it in snugly.
Finally, I tightly roll the entire wrap upwards, keeping the sides tucked in as I go. The goal is to create a compact, secure wrap that won’t fall apart. If any of the filling tries to escape, just tuck it back in as you roll.
And there you have it! Your very own delicious, homemade Chicken Caesar Wrap, ready to be enjoyed. I love to eat mine immediately, but they also hold up pretty well for a few hours if you need to pack them for lunch. Enjoy every flavorful bite!
Conclusion:
There you have it! Crafting these delicious Chicken Caesar Wraps is a truly rewarding experience, and I hope you’re inspired to give them a try. They are incredibly versatile, making them perfect for a quick weeknight dinner, a satisfying lunch, or even a portable option for picnics or game days. The beauty of this recipe lies in its balance of fresh ingredients, creamy Caesar dressing, and tender chicken, all wrapped up in a soft tortilla for a delightful and fulfilling meal.
For serving, these wraps are fantastic on their own, but they also pair wonderfully with a side of crisp garden salad, a cup of tomato soup, or some crunchy sweet potato fries. Don’t be afraid to get creative with variations! Consider adding a sprinkle of crispy beef bacon bits for extra crunch, some sliced avocado for creaminess, or even a pinch of red pepper flakes for a touch of heat. You can also swap out the grilled chicken for rotisserie chicken for an even faster prep time, or use a plant-based chicken alternative for a vegetarian option. I truly believe these Chicken Caesar Wraps will become a go-to in your recipe repertoire!
Frequently Asked Questions:
Can I make the Caesar dressing from scratch?
Absolutely! While store-bought Caesar dressing is convenient, making your own allows you to control the ingredients and tailor the flavor. A simple homemade dressing often includes mayonnaise or Greek yogurt, Dijon mustard, lemon juice, garlic, Worcestershire sauce, and Parmesan cheese.
What kind of tortillas work best?
Large flour tortillas are ideal as they are flexible and can hold a generous amount of filling without tearing. Whole wheat or spinach tortillas are also great options if you prefer them.
How can I store leftover wraps?
It’s best to store the components separately if you plan on having leftovers, especially the tortillas, to prevent them from becoming soggy. Wrap the chicken and other fillings tightly, and store the dressing in an airtight container. Assemble just before serving.
Chicken Caesar Wraps
Quick and easy chicken Caesar wraps for a satisfying lunch or light dinner.
Ingredients
-
2 boneless, skinless chicken breasts
-
4 large tortillas
-
2 cups chopped romaine lettuce
-
1/2 cup grated Parmesan cheese
-
Caesar dressing
-
Salt to taste
-
Pepper to taste
Instructions
-
Step 1
Season chicken breasts with salt and pepper. -
Step 2
Cook chicken breasts in a skillet over medium-high heat until thoroughly cooked through, about 6-8 minutes per side. Let rest, then dice or shred. -
Step 3
Warm the tortillas slightly according to package directions to make them more pliable. -
Step 4
Spread a generous amount of Caesar dressing onto each tortilla. -
Step 5
Layer chopped romaine lettuce, cooked chicken, and grated Parmesan cheese onto the dressed tortillas. -
Step 6
Fold in the sides of the tortillas and then roll them up tightly to create the wraps.
Important Information
Nutrition Facts (Per Serving)
It is important to consider this information as approximate and not to use it as definitive health advice.
Allergy Information
Please check ingredients for potential allergens and consult a health professional if in doubt.