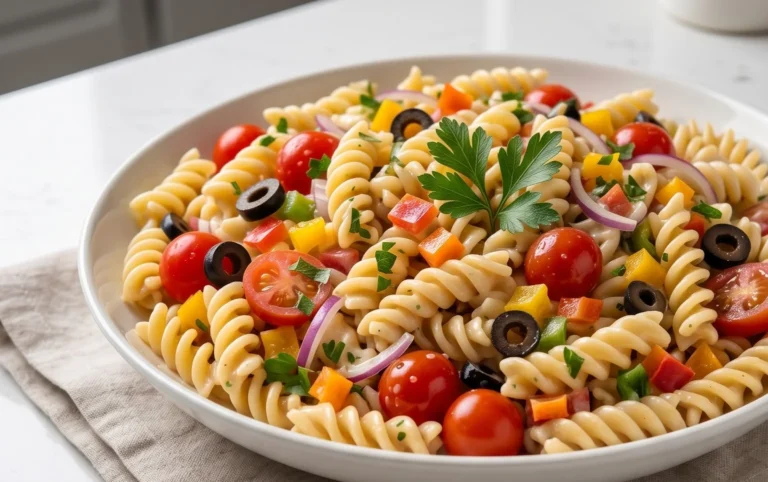
Classic Pasta Salad- The Ultimate Crowd-Pleasing Recipe
Classic Pasta Salad isn’t just a dish; it’s a summer sensation, a potluck hero, and a reliable weeknight savior all rolled into one delightful bowl. We all have that memory, right? A sunny picnic, a backyard BBQ, or perhaps even a busy weeknight when you needed something quick and satisfying. That’s the magic of a well-made classic pasta salad. It’s the perfect balance of tender pasta, crisp vegetables, and a creamy, tangy dressing that sings with flavor. What makes it so special? It’s its incredible versatility, its ability to be customized to your heart’s content, and the sheer comfort it brings. It’s a dish that’s both simple to prepare and incredibly rewarding, bringin extractg smiles to faces with every forkful. Get ready to rediscover your love for this timeless favorite!
Classic Pasta Salad
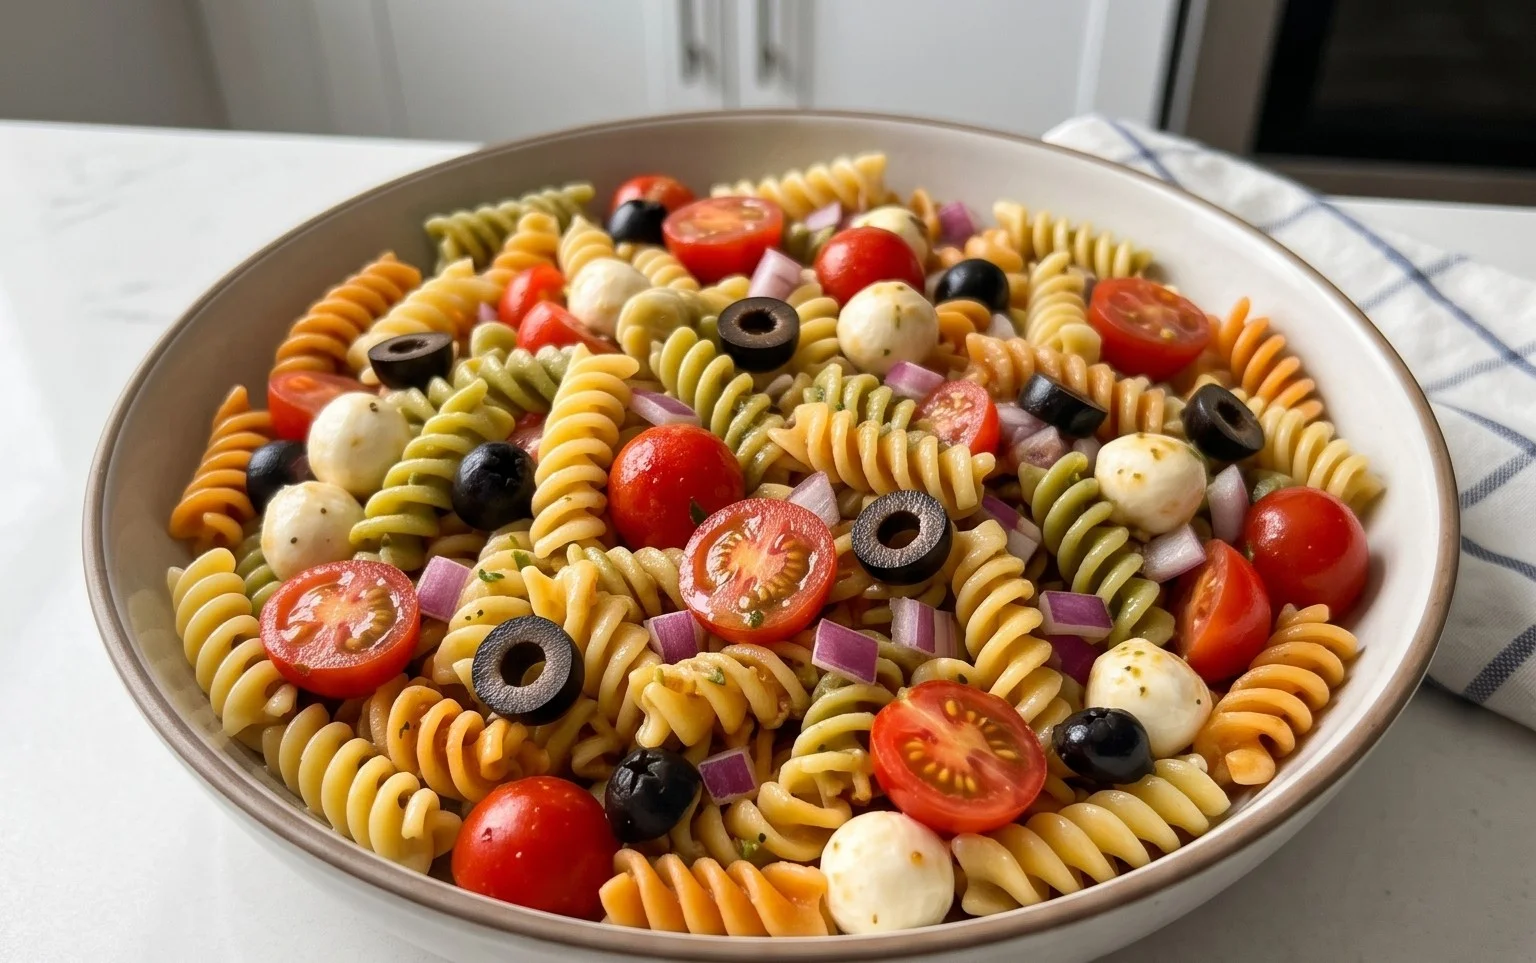
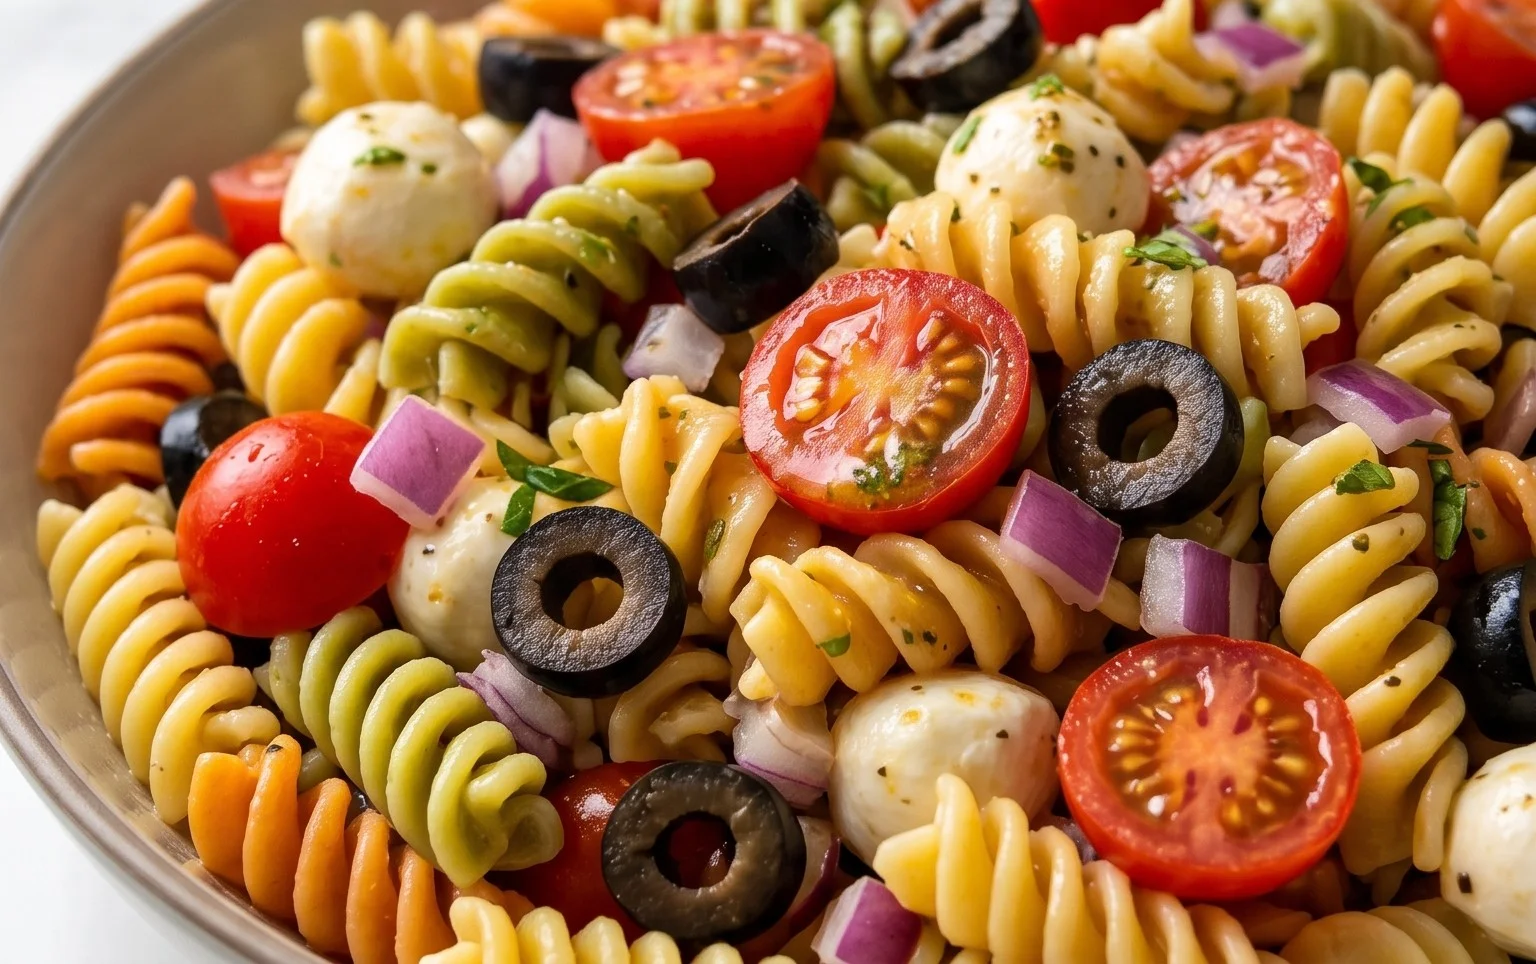
There’s something undeniably comforting and crowd-pleasing about a classic pasta salad. It’s the perfect dish for potlucks, barbecues, or even just a simple weeknight meal when you want something that’s both satisfying and easy to prepare. This recipe for Classic Pasta Salad is a tried-and-true favorite, packed with vibrant flavors and textures that come together beautifully. It’s the kind of salad that disappears quickly, so be sure to make a big batch! What I love most about this recipe is its versatility; while I’m sharing my go-to combination of ingredients, feel free to customize it with your favorite vegetables or proteins. The dressing is key to bringin extractg all these delicious components together, creating a harmonious blend that’s tangy, savory, and just a little bit spicy.
Ingredients:
Cooking Instructions
Preparing the Pasta
The foundation of any great pasta salad is perfectly cooked pasta. For this recipe, we’re using 24 ounces of tri-color rotini. Rotini’s spirals are fantastic for holding onto dressing and bits of other ingredients, ensuring every bite is packed with flavor. Start by bringin extractg a large pot of generously salted water to a rolling boil. You want enough water so the pasta has plenty of room to move around and cook evenly without sticking. Once the water is boiling, add the rotini and cook according to package directions, usually around 9-11 minutes. It’s crucial to cook the pasta to al dente, meaning it should be tender but still have a slight bite to it. Overcooked pasta will turn mushy in the salad, and nobody wants that! As soon as the pasta is cooked, drain it thoroughly in a colander. Do not rinse the pasta; the starch on the surface helps the dressing adhere better.
Assembling the Salad Components
While the pasta is draining and cooling slightly, you can prepare the other ingredients that will make this pasta salad so delicious. Halve your pint of cherry tomatoes; this releases some of their sweet juices, which will meld beautifully with the dressing. Dice one red onion and one green bell pepper. I prefer red onion for its slightly sweeter, less pungent flavor, but feel free to use yellow or sweet onion if you prefer. Dicing the bell pepper adds a lovely crunch and a hint of fresh, grassy flavor. Next, cube 16 ounces of mozzarella cheese. Using a good quality, fresh mozzarella will make a difference in texture and taste. For the beef pepperoni, we’re using 12 ounces of sliced beef beef pepperoni. The beef pepperoni adds a savory, slightly spicy element and a satisfying chegrape juicess. Slice 8 ounces of olives; Kalamata or black olives both work wonderfully here, depending on your preference. Finally, grate 1 cup of parmesan cheese. The grated parmesan adds a salty, nutty depth of flavor.
Creating the Zesty Dressing
The dressing is where all the magic happens, bringin extractg together the diverse flavors of the salad. In a large bowl, whisk together 1 1/2 cups of olive oil and 1/2 cup of red grape juice vinegar. The red grape juice vinegar provides a pleasant tangin extractess without being overly sharp. Next, add your seasonings: 2 tablespoons of Italian seasoning, 2 teaspoons of garlic powder, 1 1/2 teaspoons of salt, 1 teaspoon of pepper, and 1/2 teaspoon of red pepper flakes. The Italian seasoning brings a classic herbaceous aroma and taste, while the garlic powder provides that essential savory base. Adjust the salt, pepper, and red pepper flakes to your personal taste; a little extra kick from the red pepper flakes can be quite delightful!
Combining and Chilling
Once the pasta has cooled down slightly, but is still warm, add it to a very large mixing bowl. This is the ideal temperature for the pasta to absorb the flavors of the dressing. Add all the prepared ingredients: the halved cherry tomatoes, diced red onion, diced green bell pepper, cubed mozzarella cheese, sliced olives, and grated parmesan cheese. Pour the prepared dressing over the pasta and other ingredients. Gently toss everything together until all the components are evenly coated with the dressing. It’s important to be thorough but gentle to avoid breaking up the pasta or cheese too much. Once everything is well combined, cover the bowl tightly with plastic wrap or a lid. For the best flavor, allow the pasta salad to chill in the refrigerator for at least 1 hour, or preferably 2-3 hours. This chilling time is crucial as it allows the flavors to meld and deepen, making the salad even more delicious. This is also when the vegetables slightly soften and release their juices into the dressing, further enhancing the overall taste.
Serving and Enjoying
When you’re ready to serve, give the pasta salad another gentle toss. You might notice that the pasta has absorbed some of the dressing. If it seems a bit dry, you can add a tablespoon or two of olive oil or a splash more vinegar to loosen it up. Serve your Classic Pasta Salad chilled. It’s a perfect accompaniment to grilled meats, sandwiches, or can stand on its own as a light and satisfying meal. Leftovers, if you’re lucky enough to have any, are usually even better the next day as the flavors continue to develop. This salad truly is a testament to simple, fresh ingredients coming together to create something truly spectacular.
Conclusion:
And there you have it – your gateway to a truly sensational Classic Pasta Salad! This recipe isn’t just a side dish; it’s a vibrant and flavorful centerpiece that’s incredibly versatile and surprisingly simple to whip up. Its beauty lies in its adaptability, allowing you to tailor it to your exact preferences, making it the perfect potluck contribution or a refreshing weeknight meal. The satisfying chew of perfectly cooked pasta, combined with the bright, zesty dressing and your favorite fresh ingredients, creates a harmonious blend of textures and tastes that’s undeniably delightful.
This delightful Classic Pasta Salad is wonderful served alongside grilled meats, as a light lunch on its own, or as part of a larger buffet. Don’t be afraid to get creative! Swap out the vegetables for whatever is in season or what you have on hand. Add cooked chicken or shrimp for a heartier meal, or toss in some chickpeas for a vegetarian boost. The possibilities are truly endless, and the joy of making this salad is in making it your own. So go ahead, give this recipe a try – I’m confident you’ll find yourself reaching for it again and again!
Frequently Asked Questions:
Can I make this pasta salad ahead of time?
Absolutely! In fact, this pasta salad often tastes even better the next day after the flavors have had a chance to meld. I recommend storing it in an airtight container in the refrigerator.
What’s the best type of pasta to use?
For this Classic Pasta Salad, I find that short, sturdy pasta shapes like rotini, fusilli, penne, or farfalle hold the dressing and ingredients well. Avoid long, thin pastas like spaghetti.
How long will this salad last in the refrigerator?
Properly stored in an airtight container, this pasta salad should stay fresh and delicious for about 3 to 4 days.
Classic Pasta Salad
A refreshing and flavorful classic pasta salad perfect for potlucks and picnics, featuring tri-color rotini, fresh vegetables, savory pepperoni, and a zesty Italian dressing.
Ingredients
-
24 ounces tri-color rotini pasta (uncooked)
-
1 pint cherry tomatoes (halved)
-
12 ounces sliced beef pepperoni
-
1 red onion (diced)
-
1 green bell pepper (diced)
-
16 ounces mozzarella cheese (cubed)
-
1 cup grated parmesan cheese
-
8 ounces olives (sliced)
-
1 1/2 cups olive oil
-
1/2 cup red grape juice vinegar
-
2 tablespoons Italian seasoning
-
2 teaspoons garlic powder
-
1 1/2 teaspoons salt
-
1 teaspoon pepper
-
1/2 teaspoon red pepper flakes
Instructions
-
Step 1
Cook the tri-color rotini pasta according to package directions until al dente. Drain and rinse with cold water to stop the cooking process and prevent sticking. Set aside in a large bowl. -
Step 2
In a separate medium bowl, whisk together the olive oil, red grape juice vinegar, Italian seasoning, garlic powder, salt, pepper, and red pepper flakes to create the dressing. -
Step 3
Add the halved cherry tomatoes, diced red onion, diced green bell pepper, sliced beef pepperoni, cubed mozzarella cheese, grated parmesan cheese, and sliced olives to the bowl with the pasta. -
Step 4
Pour the prepared dressing over the pasta and vegetable mixture. Gently toss everything together until all ingredients are evenly coated. -
Step 5
Cover the bowl and refrigerate for at least 30 minutes to allow the flavors to meld before serving. For best results, chill for a few hours or overnight.
Important Information
Nutrition Facts (Per Serving)
It is important to consider this information as approximate and not to use it as definitive health advice.
Allergy Information
Please check ingredients for potential allergens and consult a health professional if in doubt.