Cottage Cheese Banana Bread- Moist & Easy Recipe
Cottage Cheese Banana Bread is a game-changer, and I’m so excited to share this recipe with you! If you’ve ever found yourself with a few overripe bananas and a hankering for a comforting, home-baked treat, this is your answer. It’s no secret that banana bread is a beloved classic, but what sets this particular variation apart is the secret ingredient that elevates it to a whole new level of moistness and delightful tang: cottage cheese!
Why You’ll Love This Recipe
Forget dry, crum extractbly loaves. The addition of cottage cheese creates an incredibly tender crum extractb that practically melts in your mouth. It also adds a subtle, pleasing richness without making the bread feel heavy. It’s the perfect breakfast companion, a satisfying afternoon snack, or even a healthier dessert option. This isn’t just any banana bread; this Cottage Cheese Banana Bread is destined to become your new go-to for a reason.
What Makes It So Special?
The magic truly lies in that unassuming tub of cottage cheese. It works wonders to bind the ingredients and infuse the entire loaf with a wonderful softness that traditional recipes sometimes struggle to achieve. Plus, it’s a fantastic way to sneak in a little extra protein! Prepare to be amazed by how this simple substitution transforms your favorite comfort food.
Ingredients:
Cottage Cheese Banana Bread: A Moist and Delicious Twist
Are you looking for a way to elevate your banana bread game? Perhaps you want a recipe that’s not only incredibly moist and flavorful but also packs a little extra protein and goodness? Then you’ve come to the right place! This Cottage Cheese Banana Bread is a revelation. The humble cottage cheese, often overlooked in sweet baking, is the secret ingredient here, working wonders to create an unbelievably tender crum extractb and a subtly creamy texture that you won’t find in traditional banana bread. Forget dry, crum extractbly loaves; this recipe delivers pure indulgence with a wholesome edge. It’s perfect for breakfast, a satisfying snack, or even a light dessert. The natural sweetness of ripe bananas pairs beautifully with the warm spice of cinnamon, and the almond flour provides a lovely nutty undertone and a gluten-free option.
The beauty of this recipe lies in its simplicity and its ability to be adapted to your personal preferences. Whether you’re a fan of crunchy nuts, melty chocolate, or bursts of fruity sweetness, the optional mix-ins are your canvas. I personally love a combination of chopped walnuts and dark chocolate chips for that classic sweet and savory balance. Let’s get baking!
Getting Started: Preparation is Key
Before we dive into mixing, it’s essential to get your mise en place ready. This means preheating your oven and preparing your baking pan. Preheat your oven to 350 degrees Fahrenheit (175 degrees Celsius). Grease and flour a standard 9×5 inch loaf pan. You can use butter or cooking spray for greasing. For a truly non-stick experience and easy removal, I like to line my loaf pan with parchment paper, leaving an overhang on the sides. This creates a natural sling, making it super simple to lift the cooled bread out of the pan without any sticking.
Step-by-Step Baking Instructions
1. Mash the Bananas and Combine Wet Ingredients: In a large mixing bowl, start by mashing your two ripe bananas. The riper the bananas, the sweeter and more flavorful your bread will be, so don’t be afraid of those brown spots! You want a relatively smooth consistency, but a few small lumps are perfectly fine and can even add a nice textural element. Add the three eggs to the bowl with the mashed bananas and whisk them together until well combined. Next, add the 1/2 cup of cottage cheese. Don’t worry about the curds; they will break down as you mix and bake, contributing to the moisture. Stir in the 3 tablespoons of maple syrup for sweetness, and finally, the 2 teaspoons of vanilla extract for that classic aroma and depth of flavor. Whisk everything thoroughly until it forms a cohesive, wet mixture.
2. Incorporate Dry Ingredients: In a separate medium bowl, whisk together your dry ingredients. This is where the almond flour, baking soda, and cinnamon come into play. Almond flour is a fantastic base for this recipe, offering a great texture and flavor profile. Make sure your baking soda is fresh; it’s crucial for giving your bread its lift and light texture. Whisking the dry ingredients together before adding them to the wet ingredients helps to distribute the leavening agent and spices evenly, ensuring consistent results throughout your loaf. Gradually add this dry mixture to your wet ingredients, mixing on low speed or by hand until just combined. Be careful not to overmix at this stage; overmixing can develop the gluten in the almond flour too much, leading to a tougher bread. A few streaks of dry ingredients are acceptable, as they will fully incorporate as you gently fold in any optional mix-ins.
3. Add Optional Mix-Ins (If Using): Now is the fun part! If you’ve decided to add any nuts, chocolate chips, or blueberries, gently fold them into the batter. For nuts like walnuts, give them a rough chop. If using chocolate chips, I recommend using a good quality dark or semi-sweet chocolate for the best flavor balance. For blueberries, fresh or frozen will work, but if using frozen, toss them in a tablespoon of almond flour first to help prevent them from sinking to the bottom of the loaf during baking. Fold these additions in gently with a spatula until they are evenly distributed throughout the batter. The goal is to coat them slightly with the batter without overworking the mixture.
4. Pour Batter and Bake: Pour the batter into your prepared loaf pan, spreading it evenly. You can smooth the top with your spatula. Place the loaf pan in the preheated oven. Bake for approximately 50-60 minutes. The exact baking time will depend on your oven, so it’s important to keep an eye on it.
5. Check for Doneness and Cool: To check if your banana bread is done, insert a toothpick or a thin knife into the center of the loaf. If it comes out clean, or with just a few moist crum extractbs attached (not wet batter), your bread is ready. If it comes out with wet batter, continue baking for another 5-10 minutes, checking again. Once baked, carefully remove the loaf pan from the oven. Let the banana bread cool in the pan for about 10-15 minutes before attempting to remove it. This initial cooling period allows the bread to set up properly, making it less likely to break when you take it out of the pan.
6. Final Cooling and Serving: After the initial cooling in the pan, use the parchment paper overhangs (if you used them) or carefully invert the pan onto a wire cooling rack to fully remove the bread. Allow the banana bread to cool completely on the wire rack before slicing. This is crucial for achieving the best texture and preventing a gummy interior. Patience is key here! Once completely cool, slice it with a serrated knife and enjoy this wonderfully moist and flavorful Cottage Cheese Banana Bread. It’s delicious on its own, or served with a dollop of Greek yogurt or a smear of butter. Store any leftovers in an airtight container at room temperature for up to 3 days, or refrigerate for longer storage.

Conclusion:
There you have it! This Cottage Cheese Banana Bread recipe is a true winner, offering a delightful balance of moistness, sweetness, and a hint of tang from the cottage cheese. It’s a fantastic way to use up those ripe bananas while creating a healthier, more satisfying treat. The added cottage cheese not only boosts the protein content but also contributes to an incredibly tender crum extractb that you’ll absolutely adore. It’s the perfect breakfast, snack, or even a light dessert. Feel free to experiment with add-ins like chocolate chips, walnuts, or a sprinkle of cinnamon for extra flavor dimensions. I truly encourage you to give this Cottage Cheese Banana Bread a try – I’m confident it will become a staple in your baking repertoire!
Frequently Asked Questions:
Can I use a different type of cottage cheese?
Yes, you can! While regular full-fat cottage cheese works wonderfully, you can also use low-fat or even fat-free cottage cheese. Keep in mind that fat-free might result in a slightly less rich texture, but it will still be delicious. Blending the cottage cheese until smooth before adding it to the batter is key for a seamless integration and to avoid any curdy texture.
How should I store this banana bread?
Once cooled completely, this Cottage Cheese Banana Bread can be stored in an airtight container at room temperature for up to 3 days. For longer storage, it freezes beautifully. Wrap individual slices or the whole loaf tightly in plastic wrap, then in aluminum foil, and freeze for up to 3 months. Thaw at room temperature before enjoying.
What can I serve with this banana bread?
This bread is incredibly versatile! It’s delicious on its own, but also pairs wonderfully with a dollop of Greek yogurt, a smear of cream cheese, or a drizzle of honey. For a more indulgent treat, serve it warm with a scoop of vanilla ice cream. It also makes a great accompaniment to a cup of coffee or tea.
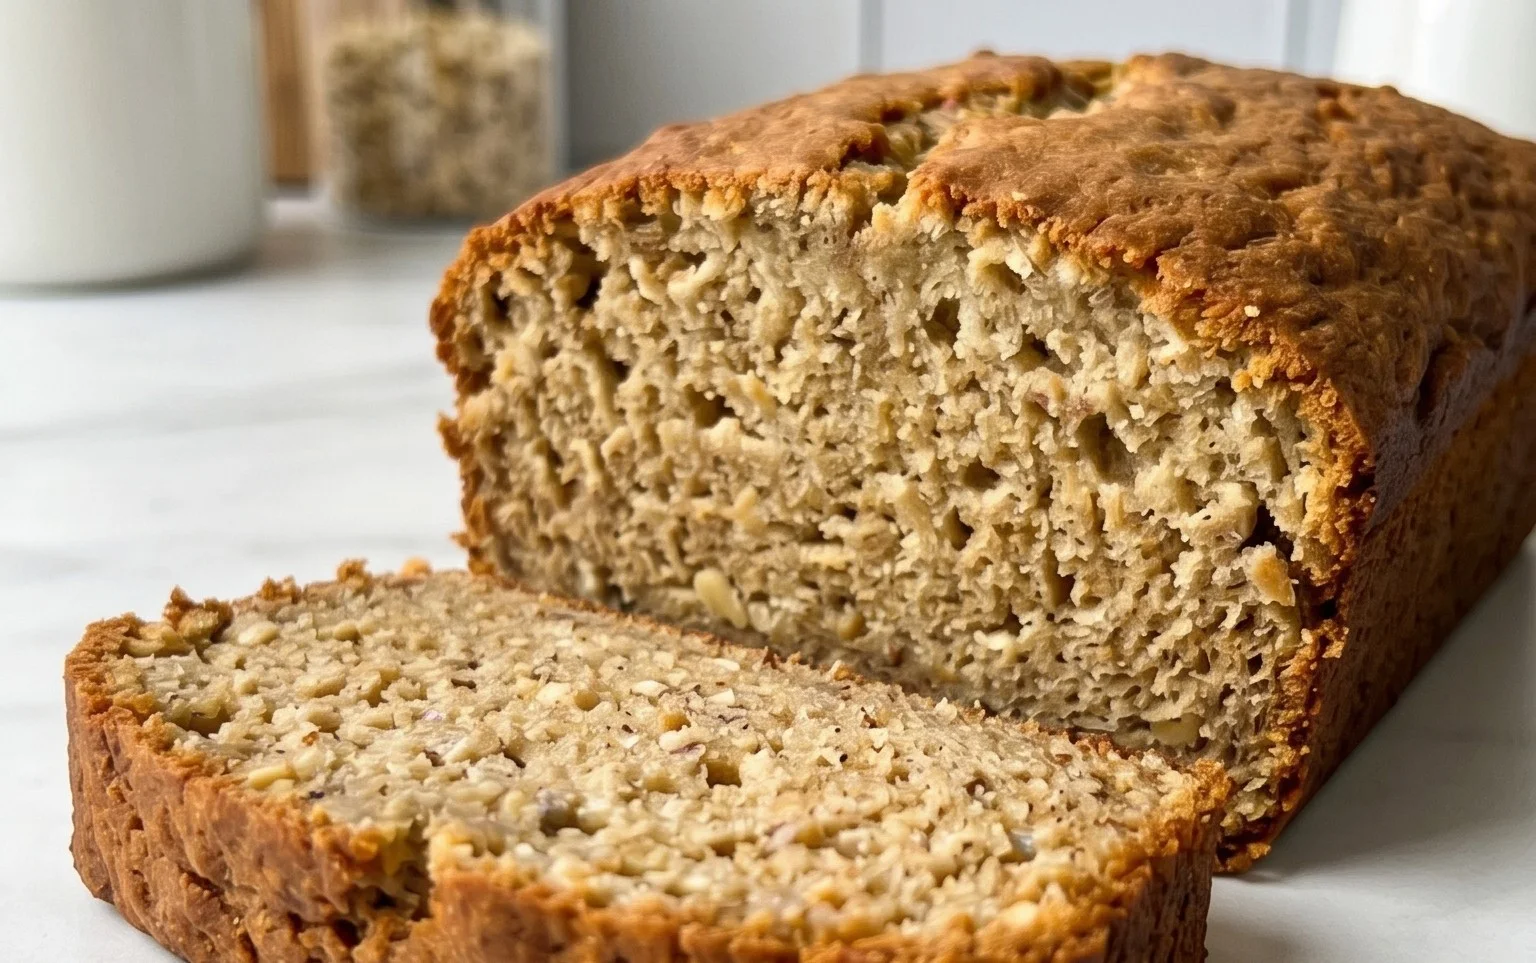
Cottage Cheese Banana Bread
A moist and delicious banana bread made healthier with the addition of cottage cheese and almond flour.
Ingredients
-
2 ripe bananas, mashed
-
3 eggs
-
1/2 cup cottage cheese
-
3 tablespoons maple syrup
-
2 teaspoons vanilla extract
-
2 1/2 cups almond flour
-
1 teaspoon baking soda
-
2 teaspoons cinnamon
Instructions
-
Step 1
Preheat oven to 350°F (175°C). Grease and flour a 9×5 inch loaf pan. -
Step 2
In a large bowl, mash the ripe bananas until smooth. -
Step 3
Whisk in the eggs, cottage cheese, maple syrup, and vanilla extract until well combined. -
Step 4
In a separate bowl, combine the almond flour, baking soda, and cinnamon. Gradually add the dry ingredients to the wet ingredients, mixing until just combined. Do not overmix. -
Step 5
Fold in any optional mix-ins like walnuts, chocolate chips, or blueberries. -
Step 6
Pour the batter into the prepared loaf pan and spread evenly. -
Step 7
Bake for 50-60 minutes, or until a wooden skewer inserted into the center comes out clean. -
Step 8
Let the bread cool in the pan for 10 minutes before transferring it to a wire rack to cool completely.
Important Information
Nutrition Facts (Per Serving)
It is important to consider this information as approximate and not to use it as definitive health advice.
Allergy Information
Please check ingredients for potential allergens and consult a health professional if in doubt.