Healthy Crispy Chocolate Puffed Rice Cereal-Easy Recipe
Healthy Crispy Chocolate Puffed Rice Cereal is more than just a breakfast option; it’s a delightful culinary adventure that marries indulgence with wellness. Who doesn’t love the satisfying crunch of cereal combined with the rich, deep flavor of chocolate? It’s a nostalgic treat that brings back childhood memories for many, yet it appeals just as strongly to adults seeking a guilt-free way to satisfy their sweet cravings. What truly sets this healthy crispy chocolate puffed rice cereal apart is its ingenious ability to deliver that beloved texture and taste without relying on excessive sugar or artificial ingredients. It’s a testament to how simple, wholesome components can be transformed into something truly extraordinary. Prepare yourself for a revelation in breakfast bowls and snack time, a dish that proves healthy eating can be incredibly delicious and wonderfully satisfying.
Why You’ll Adore This Recipe
Imagin extracte a cereal that not only wakes up your taste buds with an intense chocolatey punch but also keeps you feeling energized and satisfied throughout your morning. That’s the magic of this healthy crispy chocolate puffed rice cereal. It’s incredibly versatile, perfect for a quick breakfast on the go, a delightful mid-afternoon snack, or even a base for creative dessert recipes. The secret lies in carefully selected ingredients that work in harmony to create that perfect balance of crunchiness and deep cocoa flavor. We’re talking about a recipe that prioritizes whole grains and natural sweetness, making it a staple for anyone looking to elevate their daily nutrition without compromising on enjoyment.
Ingredients:
- 4 cups of puffed rice
- 4 tbsp of coconut oil, melted
- 3 tbsp of raw cacao powder
- 2 tbsp of maple syrup, or to taste
- 1/4 tsp of vanilla extract
Making Your Healthy Crispy Chocolate Puffed Rice Cereal
This recipe is all about achieving that satisfying crunch and rich chocolate flavor without any of the processed sugars and artificial ingredients often found in store-bought cereals. We’re leveragin extractg the simple goodness of puffed rice, enhanced by wholesome fats from coconut oil and the intense, natural chocolate notes of raw cacao. The maple syrup provides just enough sweetness to balance the cacao, and a hint of vanilla rounds out the flavor profile beautifully. The key to success here is creating a well-combined, lightly coated cereal that bakes to a perfect crisp.
Phase 1: Melting and Mixing
This initial phase is crucial for ensuring your chocolate coating is smooth and evenly distributed throughout the puffed rice. It’s where we build the foundation for that delicious, chocolatey crunch.
1. Melt the Coconut Oil: Begin by gently melting your coconut oil. If your coconut oil is already liquid, you can simply measure out the 4 tablespoons. If it’s solid, place it in a small saucepan over very low heat, or in a microwave-safe bowl and heat it in 15-second intervals, stirring in between, until it’s fully liquid. Be careful not to overheat it; we just want it to be fluid enough to mix easily. Overheating can sometimes affect the flavor.
2. Combine Dry Ingredients: In a large mixing bowl, add the raw cacao powder and the maple syrup. Whisk these together vigorously until they form a smooth, lump-free paste. It’s important to get rid of any small clumps of cacao powder at this stage. If the mixture seems too thick, you can add an extra teaspoon of maple syrup or a tiny splash of water to help achieve a smoother consistency.
3. Incorporate Wet Ingredients: Now, pour the melted coconut oil into the cacao and maple syrup mixture. Add the vanilla extract to this bowl as well. Whisk everything together thoroughly until you have a glossy, homogenous chocolate sauce. This sauce will be the coating for our puffed rice, so its consistency and evenness are paramount. Ensure there are no streaks of oil or unmixed cacao powder. The aroma at this point should already be quite enticing!
Phase 2: Coating and Toasting
This is where the magic happens, transforming simple puffed rice into a delightful chocolate cereal. Patience and a gentle hand are your best friends here.
4. Gently Coat the Puffed Rice: Add the 4 cups of puffed rice to the bowl containing your chocolate mixture. Now, the key here is to be extremely gentle. You want to coat every single piece of puffed rice without crushing them. Use a large spatula or your hands (clean, of course!) to carefully fold and toss the puffed rice into the chocolgin extract mixture. Imagine you’re trying to gently stir a cloud. Continue folding until all the puffed rice is evenly coated in the chocolate. It might look a little clumpy at first, but keep going; the coating will distribute as you toss.
5. Prepare for Baking: Preheat your oven to a moderate temperature, around 300°F (150°C). Line a large baking sheet with parchment paper. This is crucial to prevent sticking and makes cleanup a breeze. Carefully spread the chocolate-coated puffed rice onto the prepared baking sheet in a single, even layer. Try to avoid piling it up too much, as this can lead to uneven toasting. The goal is to allow heat to circulate around each cluster of cereal. Don’t worry if some pieces clump together slightly; this is natural and will contribute to some lovely clusters.
Phase 3: Achieving the Perfect Crisp
The final stage involves baking, which will transform the coated cereal into a wonderfully crispy treat. Keep a close eye on it to prevent burning.
6. Bake and Stir: Place the baking sheet in the preheated oven. Bake for approximately 12-15 minutes. During the baking process, it’s important to check on the cereal. After about 7-8 minutes, gently stir the cereal with your spatula. This helps ensure even toasting and prevents any sections from burning while others remain underdone. You’ll notice the chocolate coating firming up and the puffed rice becoming more fragrant. Continue baking for the remaining time, keeping a close watch. The cereal is done when it smells fragrant and the chocolate coating looks set and dry to the touch, not wet.
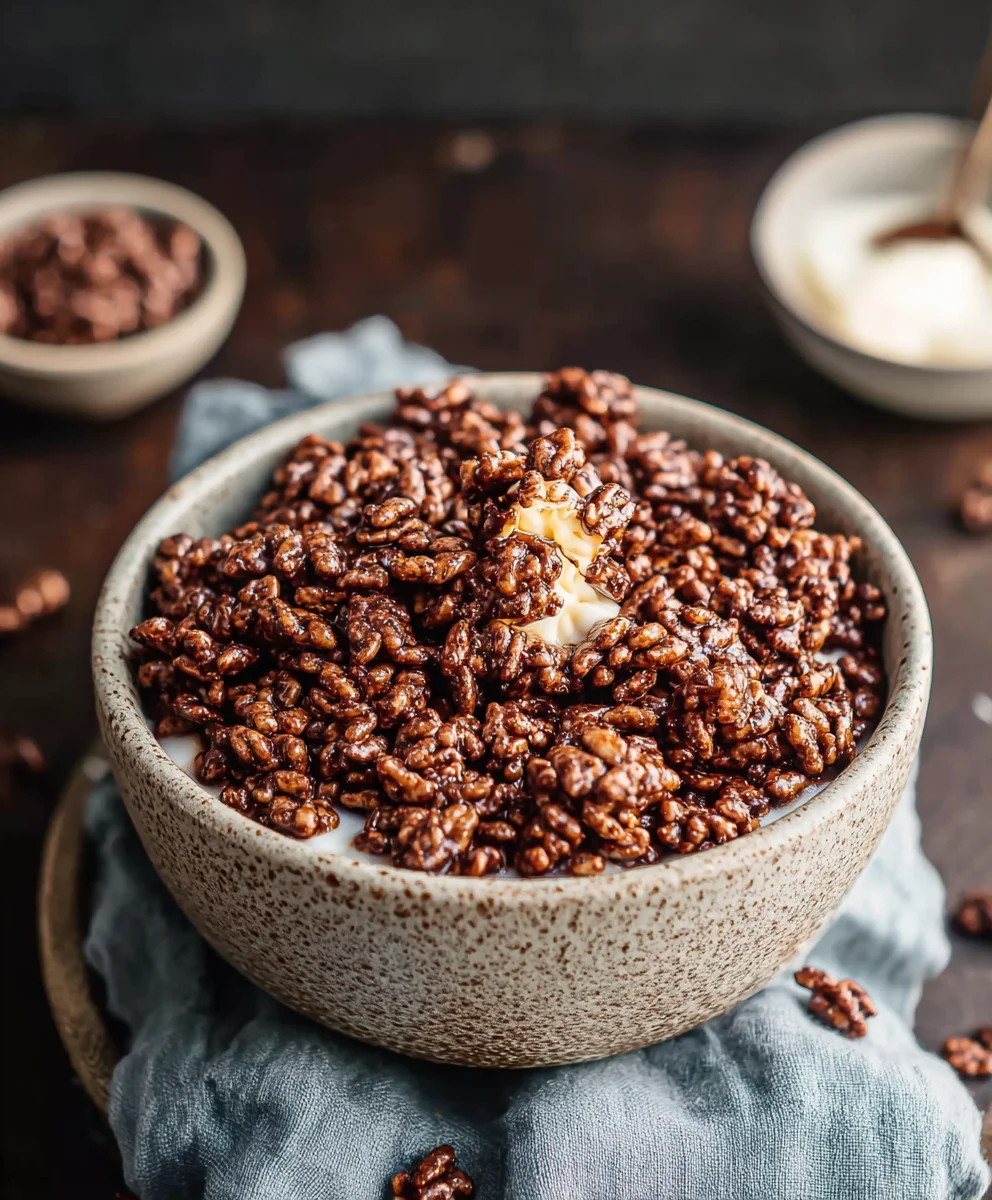
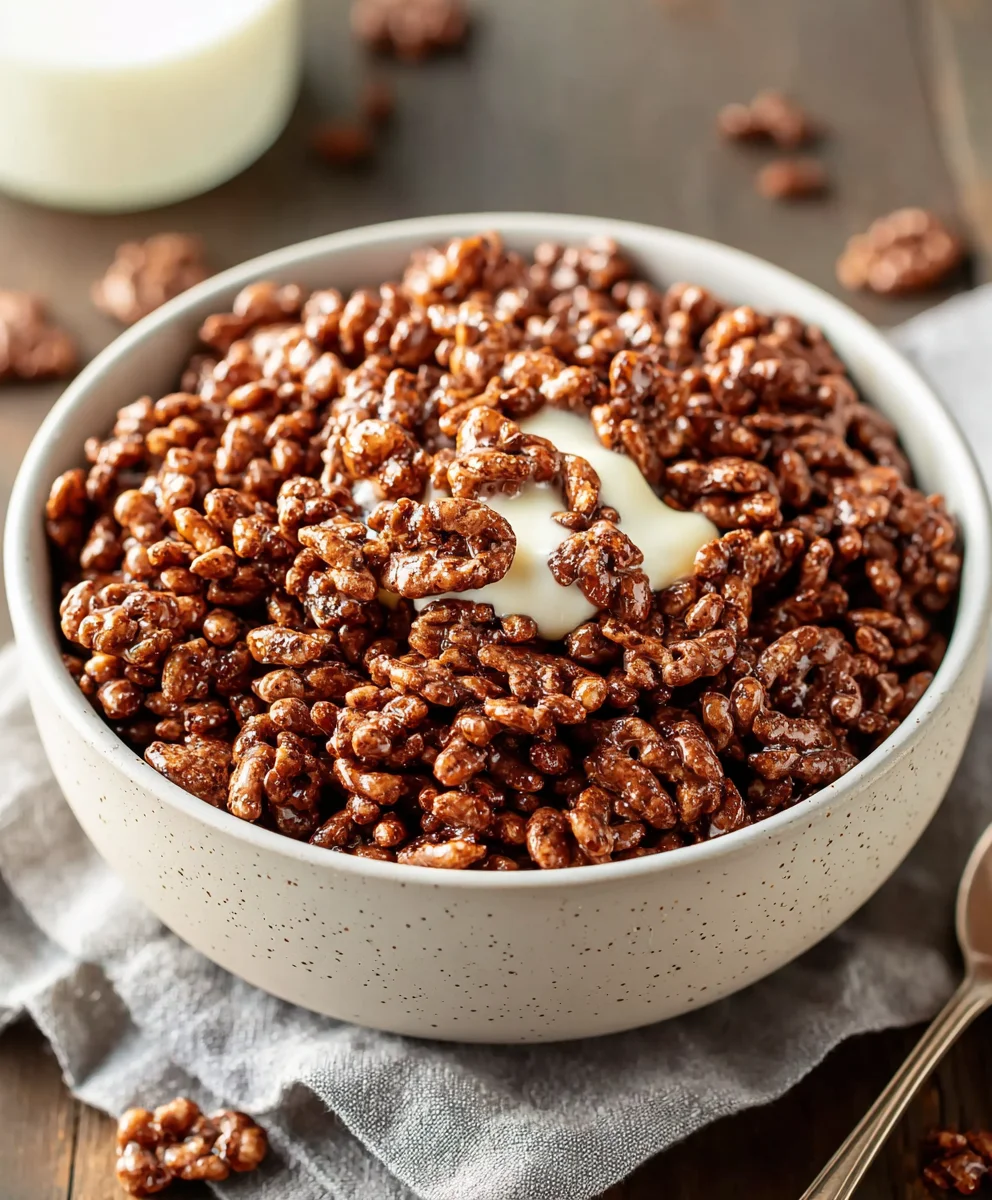
7. Cool and Separate: Once baked, carefully remove the baking sheet from the oven. Let the cereal cool completely on the baking sheet. This cooling process is just as important as the baking itself for achieving that signature crispiness. As it cools, the chocolate will harden fully, and the puffed rice will become wonderfully crunchy. Once completely cool, you can gently break apart any larger clusters into individual pieces. If you find some pieces are still a bit stuck together, you can carefully use your fingers to separate them. The result should be a light, airy, and incredibly satisfying chocolatey cereal that’s perfect for enjoying with milk, yogurt, or even as a standalone snack. Store any leftovers in an airtight container at room temperature to maintain its crispness.
Conclusion:
You’ve now got all the tools to create your very own Healthy Crispy Chocolate Puffed Rice Cereal! This recipe is a fantastic way to enjoy a crunchy, satisfying treat without the guilt. The combination of whole grain puffed rice, rich cocoa, and a touch of natural sweetness creates a flavor profile that’s both delicious and wholesome. It’s incredibly rewarding to make your own cereal, knowing exactly what goes into it. Feel free to experiment with different sweeteners or add-ins to personalize your batch. I encourage you to give this recipe a try – it’s simpler than you might think and the results are truly delightful. Enjoy this homemade cereal as part of a balanced breakfast, a post-workout snack, or even a light dessert!
Serving Suggestions: This cereal is wonderful with your favorite milk (dairy or non-dairy), sprinkled over yogurt, or even enjoyed dry as a quick snack. For a more substantial breakfast, serve it alongside fresh fruit or a dollop of nut butter.
Variations: To add extra flavor and texture, consider stirring in a handful of chopped nuts, seeds (like chia or flax), or a sprinkle of cinnamon before baking. A few drops of vanilla extract can also enhance the chocolatey notes.
Frequently Asked Questions:
Q: How can I make the Healthy Crispy Chocolate Puffed Rice Cereal extra crispy?
A: The key to crispiness is ensuring the cereal is fully dried out during the baking process. Spread it in a thin, even layer on your baking sheet and bake for the recommended time, stirring occasionally. Allow it to cool completely on the baking sheet before storing. If it loses its crispness over time, you can briefly re-toast it in a low oven.
Q: Can I use a different type of puffed grain for this recipe?
A: Absolutely! While puffed rice is ideal for this recipe’s name, you can experiment with other puffed grains like puffed quinoa or puffed amaranth. Keep in mind that the texture and flavor may vary slightly.
Healthy Crispy Chocolate Puffed Rice Cereal
An easy recipe for homemade crispy chocolate puffed rice cereal, made with wholesome ingredients for a delicious and healthy breakfast or snack.
Ingredients
-
4 cups puffed rice
-
4 tbsp melted coconut oil
-
3 tbsp raw cacao powder
-
2 tbsp maple syrup, or to taste
-
1/4 tsp vanilla extract
Instructions
-
Step 1
Gently melt coconut oil over low heat or in 15-second microwave intervals until liquid. Do not overheat. -
Step 2
In a large bowl, whisk together raw cacao powder and maple syrup until a smooth, lump-free paste forms. Add a teaspoon of maple syrup or a splash of water if too thick. -
Step 3
Pour the melted coconut oil and vanilla extract into the cacao-maple syrup mixture. Whisk until a glossy, homogenous chocolate sauce is formed. -
Step 4
Add the puffed rice to the chocolate sauce. Gently fold and toss with a spatula or clean hands until all puffed rice is evenly coated. Avoid crushing the rice. -
Step 5
Preheat oven to 300°F (150°C). Line a baking sheet with parchment paper and spread the coated puffed rice in a single, even layer. -
Step 6
Bake for 12-15 minutes, stirring gently halfway through, until fragrant and the chocolate coating is set and dry to the touch. Watch closely to prevent burning. -
Step 7
Let the cereal cool completely on the baking sheet. Once cool, break apart any large clusters. Store in an airtight container at room temperature.
Important Information
Nutrition Facts (Per Serving)
It is important to consider this information as approximate and not to use it as definitive health advice.
Allergy Information
Please check ingredients for potential allergens and consult a health professional if in doubt.