Crispy Baked Zucchini Chips Recipe-Healthy Snack
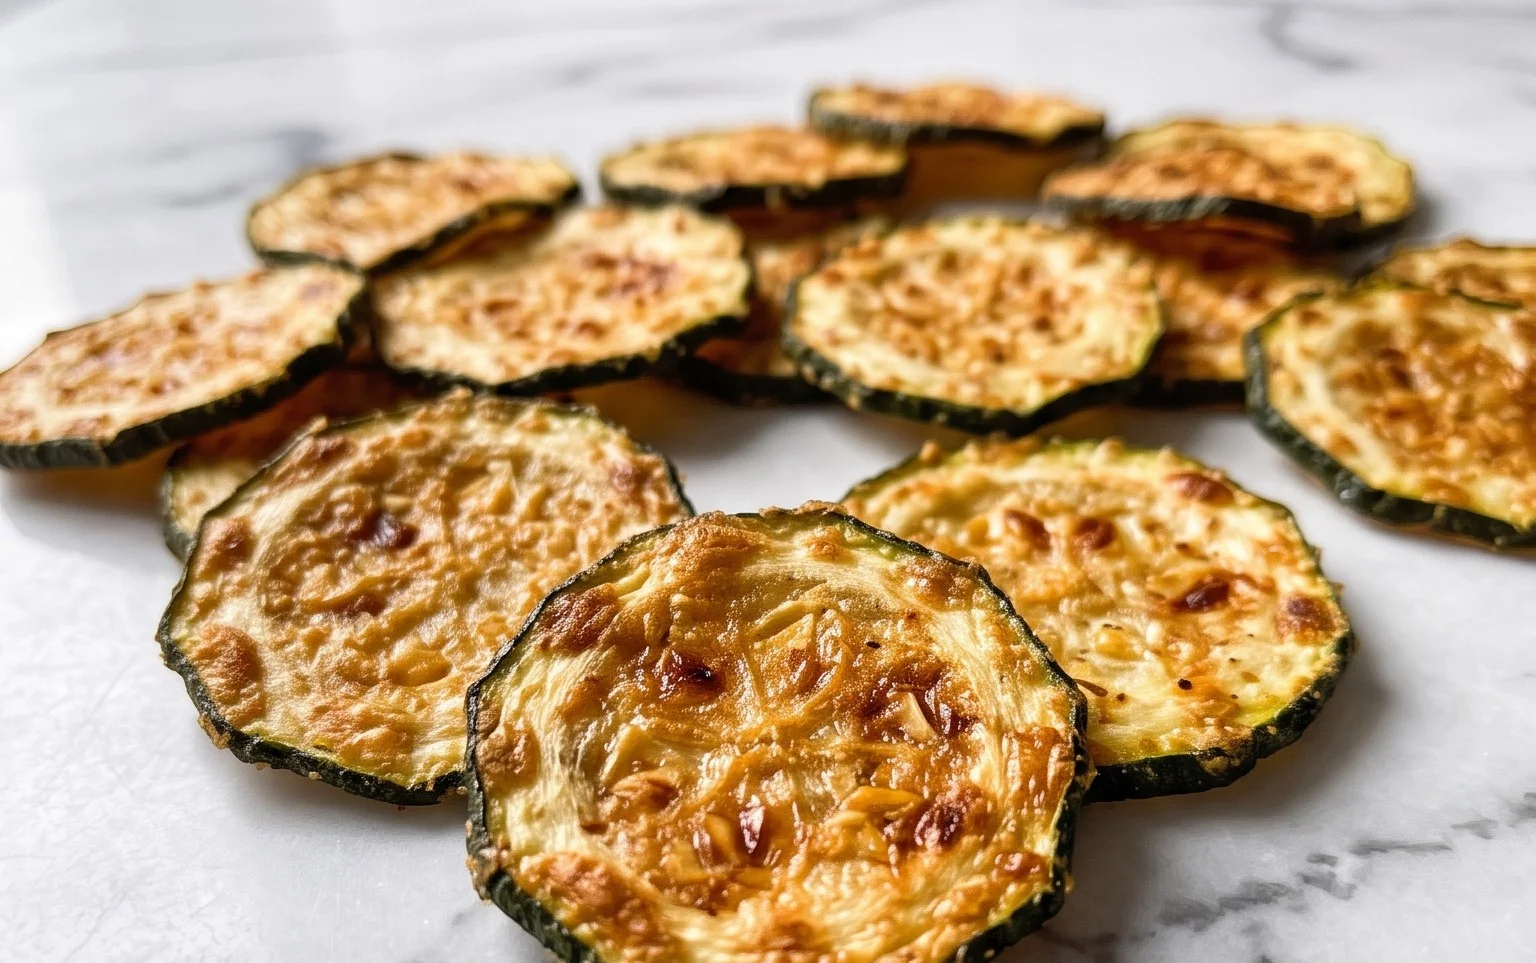
Crispy Baked Zucchini Chips are an absolute game-changer in my kitchen, and I’m so excited to share them with you! If you’ve ever found yourself staring at a surplus of zucchini, or just craving a healthy, satisfying crunch, then you’ve landed in the perfect spot. These aren’t your average soggy vegetable fries; we’re talking about golden, delightfully brittle discs that disappear faster than you can say “snack attack.” What makes these Crispy Baked Zucchini Chips so irresistible? It’s their incredible texture contrast – a tender, slightly sweet interior encased in a perfectly seasoned, oven-baked crust. They’re the ideal appetizer for guests, a fantastic side dish that even picky eaters will devour, or, let’s be honest, a guilt-free indulgence just for you. Get ready to discover your new favorite way to enjoy zucchini!
Crispy Baked Zucchini Chips
Looking for a delicious and healthy way to enjoy your garden bounty, or just craving a satisfyingly crunchy snack? These Crispy Baked Zucchini Chips are the answer! Forget the greasy fried versions; we’re achieving incredible crispiness with the magic of your oven. They’re surprisingly simple to make, require just a few basic ingredients, and the result is a light, flavorful, and incredibly addictive treat. Perfect for a healthy appetizer, a side dish for sandwiches and burgers, or even just a guilt-free munchie while you’re relaxing. The subtle sweetness of the zucchini pairs beautifully with the savory seasoning, creating a flavor profile that’s universally loved.
Ingredients:
Cooking Instructions:
The secret to achieving truly crispy baked zucchini chips lies in a few key techniques: slicing them thinly, ensuring they’re completely dry, and giving them enough space on the baking sheet. Don’t worry if your zucchini looks a little sad; it will transform into golden, crunchy perfection with this method.
1. Prepare the Zucchini: Start by washing your zucchini thoroughly under cool running water and then drying it completely. This is a crucial step. Any excess moisture will steam the zucchini instead of allowing it to crisp up in the oven. I like to use a clean kitchen towel or paper towels and pat it down until there’s no visible water. Next, you’ll want to slice the zucchini into very thin rounds. The ideal thickness is about 1/8-inch. You can achieve this with a sharp knife, a mandoline slicer, or even a vegetable peeler if you’re feeling adventurous (though a mandoline will give you the most uniform results). Uniformity is key here, as it ensures all the chips cook evenly. If your zucchini is particularly large, you might want to cut it in half lengthwise before slicing into rounds to make handling easier.
2. Season the Zucchini: Once your zucchini is sliced, it’s time to get them seasoned. In a medium bowl, gently toss the zucchini slices with the olive oil. Make sure each slice is lightly coated. It doesn’t need to be swimming in oil; just a thin film will do. This oil helps the spices adhere and contributes to the browning and crisping process. Now, sprinkle the kosher salt, black pepper, onion powder, and paprika over the seasoned zucchini slices. Gently toss again to distribute the seasonings evenly. I like to give it a good minute or two of tossing to ensure every single chip gets its fair share of flavor. Don’t be tempted to skip the salt; it really brings out the natural sweetness of the zucchini and enhances all the other flavors.
3. Arrange for Optimal Crispiness: This step is paramount for achieving that irresistible crunch. Preheat your oven to 400°F (200°C). Line two large baking sheets with parchment paper. This not only prevents sticking but also makes cleanup a breeze. Now, arrange the seasoned zucchini slices on the prepared baking sheets in a single layer. This is where spacing is critical. Do NOT overcrowd the baking sheets. If the zucchini slices are piled on top of each other or too close together, they will steam rather than bake and crisp. You want a little bit of air to circulate around each chip. If you have too many zucchini slices for two baking sheets, it’s better to bake in batches. I often find myself using a third baking sheet to ensure perfect results.
4. Bake Until Golden and Crispy: Place the baking sheets in the preheated oven. Now, we wait and watch. Bake for approximately 15-20 minutes. However, oven temperatures can vary, so the best indicator is visual. Around the 15-minute mark, start checking on them. You’re looking for the edges to start turning a beautiful golden brown and the chips to look slightly shrunken and firm to the touch. Carefully flip each chip with a spatula (or your fingers if you’re brave and they’re not too hot) and continue baking for another 5-10 minutes, or until the other side is also golden and the chips are wonderfully crisp. The cooking time will depend on the thickness of your slices and your specific oven. Keep a close eye on them during the last few minutes, as they can go from perfectly crispy to burnt very quickly.
5. Cool and Enjoy: Once your zucchini chips have reached that perfect crispy state, remove the baking sheets from the oven. Carefully transfer the hot chips to a wire cooling rack. Allowing them to cool on a rack is essential. This allows air to circulate all around them, ensuring they stay crispy as they cool down. If you leave them on the hot baking sheet, the residual heat can make them a bit soggy. They will continue to crisp up a bit more as they cool. Once they are completely cool, they are ready to be devoured! Serve them immediately for the best texture. You can enjoy them plain, or if you’re feeling fancy, serve them with your favorite dipping sauce like ranch, hummus, or a spicy aioli. Store any leftovers in an airtight container at room temperature, though I highly doubt you’ll have any!

Conclusion:
So there you have it – a straightforward guide to creating incredibly delicious and satisfying Crispy Baked Zucchini Chips! This recipe is a true game-changer for anyone looking for a healthy yet incredibly addictive snack. Unlike their fried counterparts, these chips are baked to perfection, offering a delightful crunch without the guilt. They’re packed with flavor, surprisingly easy to make, and a fantastic way to utilize those garden-fresh zucchinis. I’ve found them to be a hit with everyone, from picky eaters to seasoned snack enthusiasts. Experiment with different seasonings and dips to truly make them your own!
Serving these versatile delights is a breeze. They are perfect as a standalone appetizer, a delightful side dish alongside grilled meats or sandwiches, or even crum extractbled over salads for added texture. Don’t hesitate to get creative with your dipping sauces – a creamy ranch, a zesty marinara, or a spicy aioli all work wonderfully. Feel free to explore variations by adding a sprinkle of smoked paprika for a smoky kick, a pinch of garlic powder for an extra savory punch, or even a dusting of Parmesan cheese for a richer flavor profile. I truly encourage you to give these Crispy Baked Zucchini Chips a try; you won’t be disappointed!
Frequently Asked Questions:
Why are my zucchini chips not crispy?
Several factors can contribute to soggy zucchini chips. Ensure your zucchini slices are as thin and uniform as possible. Pat them thoroughly dry with paper towels before seasoning and baking; excess moisture is the enemy of crispiness. Also, make sure your oven is preheated to the correct temperature and avoid overcrowding the baking sheet, as this can steam the chips instead of crisping them. Baking them directly on the oven rack (if your recipe allows) can also improve air circulation and crispiness.
Can I make these ahead of time?
While these chips are best enjoyed fresh for maximum crispiness, you can prepare them a few hours in advance. Store them in an airtight container at room temperature once they have completely cooled. However, for the absolute best texture, I highly recommend making them just before serving. If they lose some crispness, you can briefly reheat them in a single layer on a baking sheet in a preheated oven at a low temperature for a few minutes.
What are some other dipping sauce ideas?
Beyond the classics, consider a lemon-herb aioli for a bright flavor, a honey-mustard dip for a sweet and tangy contrast, or even a simple hummus with a drizzle of olive oil. For something a bit spicier, a sriracha mayo or a chipotle ranch would be fantastic. The possibilities are truly endless!
Crispy Baked Zucchini Chips
Thinly sliced zucchini baked until golden brown and crispy. A healthy and delicious snack or side dish.
Ingredients
-
1 medium zucchini (washed and dried)
-
1 tablespoon olive oil
-
½ teaspoon kosher salt
-
½ teaspoon black pepper
-
¼ teaspoon onion powder
-
½ teaspoon paprika
Instructions
-
Step 1
Preheat your oven to 400°F (200°C). Line two baking sheets with parchment paper. -
Step 2
Slice the zucchini very thinly, about 1/16 inch thick. A mandoline is recommended for even slices. -
Step 3
In a medium bowl, toss the zucchini slices with olive oil, kosher salt, black pepper, onion powder, and paprika until evenly coated. -
Step 4
Arrange the zucchini slices in a single layer on the prepared baking sheets, ensuring they do not overlap. -
Step 5
Bake for 15-20 minutes, flipping halfway through, until the edges are golden brown and the chips are crispy. Watch closely to prevent burning. -
Step 6
Let the zucchini chips cool on the baking sheets for a few minutes before serving. They will crisp up further as they cool.
Important Information
Nutrition Facts (Per Serving)
It is important to consider this information as approximate and not to use it as definitive health advice.
Allergy Information
Please check ingredients for potential allergens and consult a health professional if in doubt.