Easy Bunny Cake Recipe-Whimsical Spring Treat
Easy Bunny Cake Recipe – get ready to hop into springtime fun with this incredibly simple yet utterly delightful dessert! Whether you’re a seasoned baker or just starting out, this easy bunny cake recipe is your ticket to a show-stopping centerpiece that will have everyone saying “aww!” There’s something truly magical about a cake that embodies the joy and whimsy of Easter, and this adorable bunny shape is a guaranteed crowd-pleaser. We all love a dessert that’s as fun to look at as it is to eat, and this easy bunny cake recipe delivers on all fronts. It’s perfect for family gatherings, classroom parties, or just a sweet treat to brighten your day. What makes it truly special is its approachable nature; you don’t need fancy tools or advanced decorating skills to achieve a charming result.
Easy Bunny Cake Recipe
Get ready to hop into some baking fun with this incredibly easy bunny cake recipe! This is the perfect dessert for Easter, spring birthdays, or just whenever you need a dose of adorable cheer. We’ll take two simple round cake layers and transform them into a whimsical bunny, complete with floppy ears and a sweet little nose. The best part? It requires minimal fuss and delivers maximum cuteness. So, grab your apron, and let’s create something truly delightful!
Ingredients:
Preparing Your Cake Layers
Before we get to the decorating magic, ensure your cake layers are completely cooled. This is crucial for frosting to adhere properly and prevent a messy situation. If you’re baking from scratch, follow your recipe’s instructions and allow ample time for cooling on a wire rack. If using a cake mix, simply follow the box directions. Once cooled, place one cake layer on your serving platter or cake stand. This will be the bunny’s body.
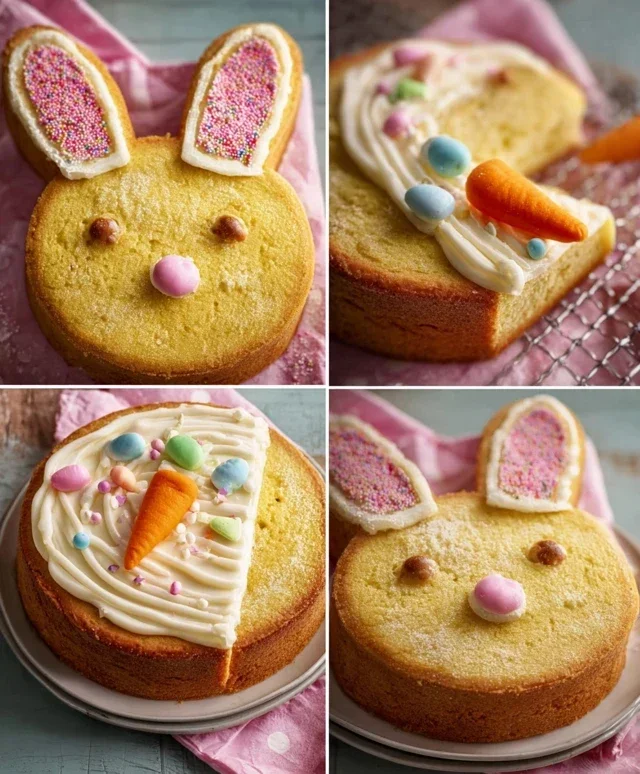
Assembling the Bunny Base
Now for the fun part of shaping our bunny! Take your second round cake layer and carefully cut it in half. These two halves will become our bunny’s ears. Position these semi-circles on top of the first round cake layer, with the cut edges facing outwards and slightly angled, resembling floppy ears. You can gently press them into the frosting of the bottom layer to help them stay put, or if you’re using a thicker frosting, they might just balance there. Don’t worry about perfection; a slightly askew ear adds to the charm!
The Frosting Foundation
This is where our bunny really starts to take shape! Using your white frosting, generously cover the entire assembled cake, including the “body” (the bottom layer) and the “ears” (the two half-circles). Aim for an even coating. Use an offset spatula or a butter knife to smooth the frosting as much as possible. This will create a clean canvas for our bunny’s face and body. If you find the frosting is a bit stiff, you can gently warm it for a few seconds in the microwave (be careful not to overheat!) to make it more spreadable. Remember to frost right up to the edges and over the sides to ensure a complete coverage.
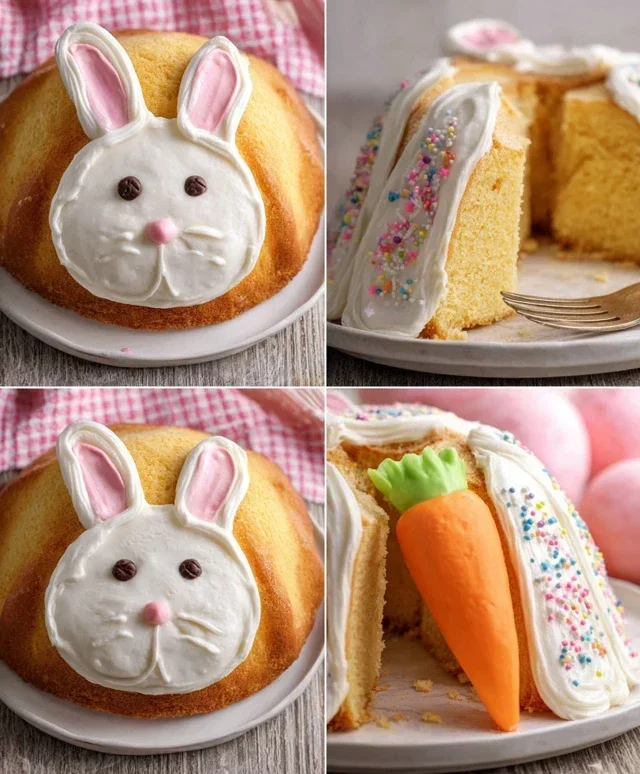
Adding the Bunny’s Features
Now for the adorable details that bring our bunny to life!
This easy bunny cake is a testament to how simple ingredients and a little creativity can result in a show-stopping dessert. Enjoy the process, have fun with the decorations, and savor the delicious outcome!
Conclusion:
And there you have it – your very own, wonderfully simple, Easy Bunny Cake Recipe! This recipe truly shines because it’s accessible for bakers of all skill levels, requiring minimal fuss and delivering maximum adorable impact. It’s the perfect centerpiece for Easter celebrations, spring birthdays, or just a delightful afternoon treat. The beauty of this bunny cake lies in its adaptability; feel free to get creative with your decorations!
Serve this charming bunny cake as is, or perhaps with a side of fresh berries or a dollop of whipped cream for an extra special touch. For variations, consider using different colored frosting to give your bunny unique fur, or adding sprinkles to its ears for a bit of sparkle. You could even experiment with different cake flavors like lemon or carrot cake for a twist on tradition. I truly encourage you to give this recipe a try – it’s a guaranteed crowd-pleaser and so much fun to make!
Frequently Asked Questions:
Can I make this bunny cake ahead of time?
Yes, absolutely! You can bake the cake layers up to two days in advance and store them tightly wrapped at room temperature. Frosting and decorating are best done closer to serving for the freshest look, but the assembled cake will hold up well in the refrigerator for a day if needed.
What kind of frosting is best for decorating the bunny cake?
A classic buttercream frosting works wonderfully for both taste and stability, making it easy to pipe details and hold its shape. Cream cheese frosting is also delicious, but it can be a bit softer, so you might want to chill it slightly before decorating.
Are there any gluten-free or vegan options for this recipe?
While this specific recipe isn’t written for those dietary needs, it’s quite adaptable! You can easily substitute a good quality gluten-free flour blend for the all-purpose flour, and use plant-based butter and milk alternatives for a vegan version. Just ensure your substitutions are ones you trust for baking!
Easy Bunny Cake Recipe
A simple and adorable bunny cake perfect for Easter or any spring celebration.
Ingredients
-
Two round cake layers (use one cake mix or your favorite homemade recipe)
-
White frosting (ready-made or your favorite homemade recipe)
-
Pink frosting (strawberry is commonly available ready-made and comes pink)
-
Chocolate icing or melted chocolate for details
-
Jellybeans or colorful round candies
-
Piping bags
Instructions
-
Step 1
Bake your two round cake layers according to your cake mix or homemade recipe instructions. Let them cool completely. -
Step 2
Place one cake layer on your serving platter. Spread a generous amount of white frosting over the top. -
Step 3
Place the second cake layer on top of the first. Frost the entire cake with white frosting, creating a smooth surface for the bunny. -
Step 4
Using a piping bag, create the bunny’s ears. Pipe two large, elongated shapes pointing upwards from the top of the cake. You can also pipe a third smaller shape for the nose. -
Step 5
Use the pink frosting to decorate the inside of the ears and the bunny’s nose. You can also add pink accents for cheeks. -
Step 6
Use chocolate icing or melted chocolate to pipe eyes and a mouth for your bunny. Decorate with jellybeans or colorful round candies for added flair.
Important Information
Nutrition Facts (Per Serving)
It is important to consider this information as approximate and not to use it as definitive health advice.
Allergy Information
Please check ingredients for potential allergens and consult a health professional if in doubt.