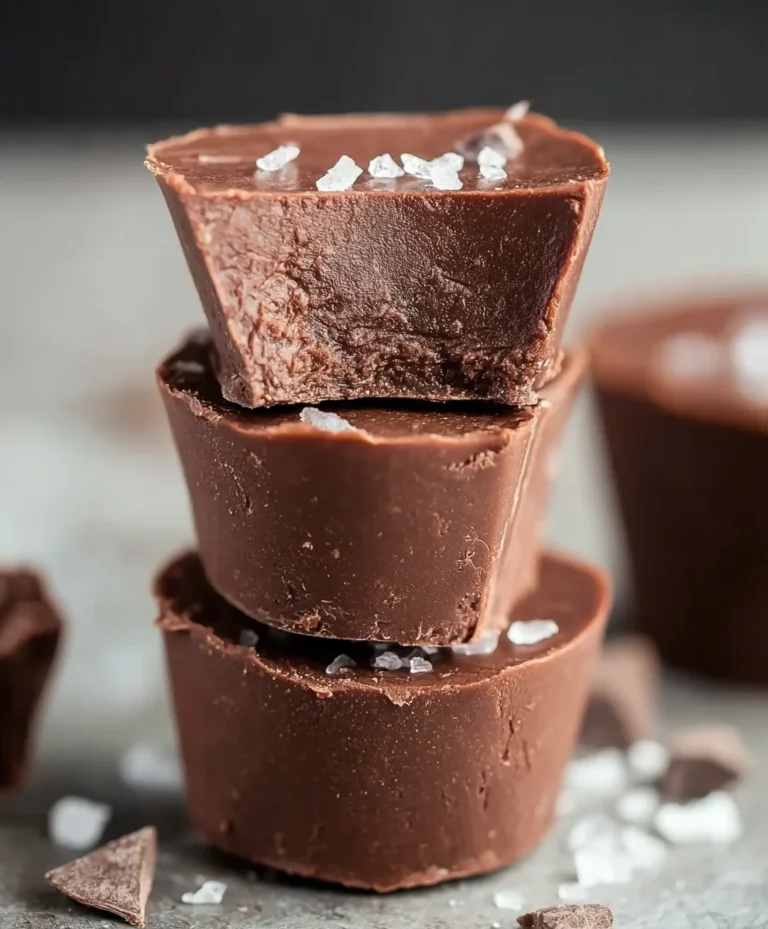
Easy Chocolate Peanut Butter Bars-Decadent Treat
Chocolate Peanut Butter Bars are a timeless classic for a reason, and today I’m sharing my absolute favorite way to create these irresistible treats. If you’re anything like me, the mere mention of this iconic flavor combination sends a shiver of pure delight down your spine. It’s that perfect harmony of rich, decadent chocolate and creamy, slightly salty peanut butter that makes these bars so universally loved. They’re the ultimate comfort food, the perfect sweet ending to any meal, and an absolute crowd-pleaser at any gathering. What truly sets these particular Chocolate Peanut Butter Bars apart is their wonderfully chewy texture and the incredible depth of flavor achieved with a few simple, yet impactful, ingredients. Get ready to experience pure bliss in every bite!
Decadent Chocolate Peanut Butter Bars: A Recipe for Pure Bliss
Get ready to embark on a culinary adventure that will tantalize your taste buds and satisfy your deepest chocolate and peanut butter cravings. These Chocolate Peanut Butter Bars are not just a dessert; they’re an experience. Imagin extracte a perfect harmony of rich, creamy peanut butter nestled beneath a blanket of smooth, melted chocolate, all built upon a delightfully crum extractbly base. This recipe is surprisingly simple, making it a fantastic choice for both seasoned bakers and kitchen novices. Prepare to impress yourself and anyone lucky enough to snag a bite of these irresistible bars.
The magic of these bars lies in their straightforward construction and the irresistible combination of classic flavors. We’ll be creating a luscious peanut butter layer that melts in your mouth, perfectly complemented by a decadent chocolate topping. The base, made from crushed cracker crum extractbs, provides a subtle crunch and a hint of savory to balance the sweetness. So, gather your ingredients, preheat your oven (though not for this particular recipe, as it’s no-bake!), and let’s dive into creating these little squares of happiness.
Ingredients:
Crafting Your Chocolate Peanut Butter Masterpiece
This recipe is all about layering textures and flavors to create a truly unforgettable treat. We’ll start by preparing the foundational peanut butter layer, which is incredibly easy to whip up. Then, we’ll move on to creating the irresistible chocolate topping.
Creating the Peanut Butter Base
This is where the core of our delicious bars takes shape. The combination of butter, powdered sugar, and peanut butter creates a dense, yet wonderfully smooth and creamy filling that is the heart of these bars.
The Luscious Chocolate Topping
Now for the crowning glory! Melting chocolate can seem daunting, but with a few simple techniques, you’ll achieve a glossy, decadent topping that perfectly complements the peanut butter layer.
Setting and Serving Your Masterpiece
The final steps are all about allowing these delightful bars to firm up so you can enjoy them at their best.
These Chocolate Peanut Butter Bars are best stored in an airtight container in the refrigerator. They’re perfect for a quick sweet treat, a potluck contribution, or simply when that chocolate and peanut butter craving hits. Enjoy every single delicious bite!
Conclusion:
I hope you’re as excited as I am to dive into making these absolutely divine Chocolate Peanut Butter Bars! They truly are a triumph of simple ingredients coming together to create something truly spectacular. The perfect balance of rich chocolate and creamy peanut butter, with that delightful chewy texture, makes these bars an irresistible treat for any occasion. Whether you’re craving a quick dessert, a satisfying snack, or something special to share with loved ones, these bars deliver every single time.
For serving, they are fantastic on their own, chilled or at room temperature. They also make an incredible addition to a dessert platter alongside fresh berries or a scoop of vanilla ice cream. Thinking about variations? Absolutely! You can swirl in some caramel for an extra layer of decadence, sprinkle chopped pretzels on top for a salty crunch, or even add a pinch of sea salt to the peanut butter layer to enhance the flavors. I wholeheartedly encourage you to give this Chocolate Peanut Butter Bar recipe a try; I promise you won’t be disappointed!
Frequently Asked Questions:
Can I make these bars ahead of time?
Yes, absolutely! These bars are fantastic for making ahead. In fact, they often taste even better after the flavors have had a chance to meld for a few hours or overnight. Store them in an airtight container at room temperature for up to 3 days, or in the refrigerator for up to a week.
What kind of peanut butter works best?
For the best texture and flavor, I recommend using creamy, sweetened peanut butter. Natural peanut butter can sometimes separate or have a runnier consistency, which might affect the final texture of your bars. However, if you prefer natural, just be sure to stir it very well before measuring.
Can I freeze these chocolate peanut butter bars?
Yes, freezing is a great option! Once cut into bars, wrap them individually in plastic wrap and then place them in a freezer-safe bag or container. They will keep well in the freezer for up to 2-3 months. Thaw them at room temperature before enjoying.
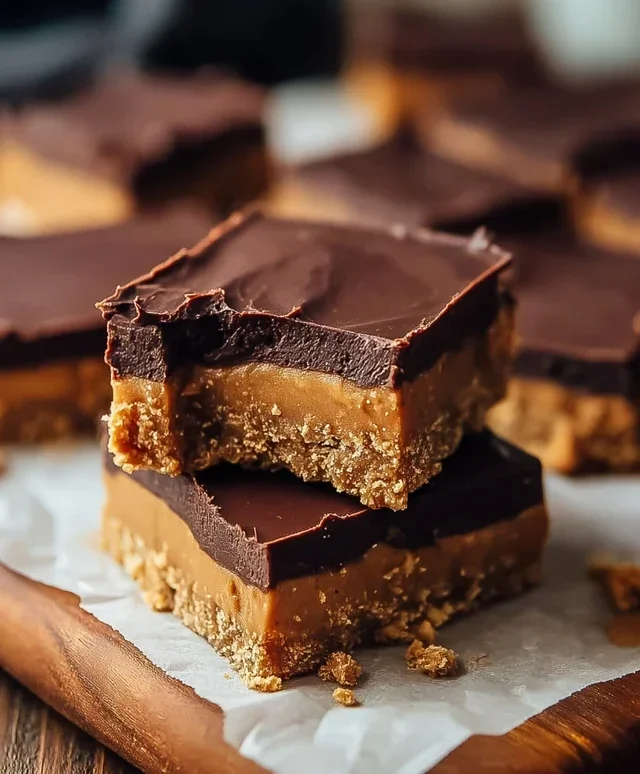
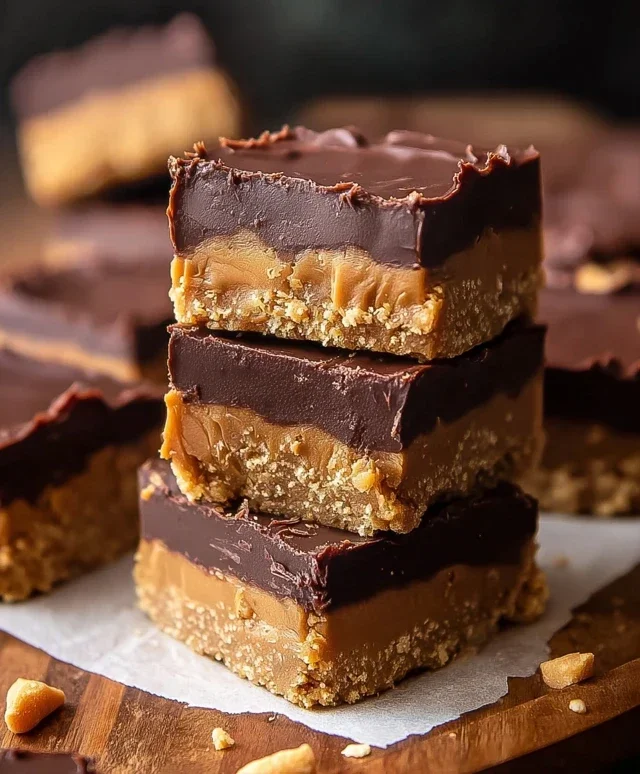
Chocolate Peanut Butter Bars
Decadent layers of chocolate and peanut butter create an irresistible no-bake treat. Perfect for any occasion, these bars are a crowd-pleaser.
Ingredients
-
½ cup salted butter
-
1 ½ cups powdered sugar
-
1 ½ cups graham cracker crumbs
-
1 cup creamy peanut butter
-
12 ounces semi-sweet chocolate chips, melted
Instructions
-
Step 1
Line an 8×8 inch baking dish with parchment paper, leaving an overhang on the sides. -
Step 2
In a medium bowl, cream together the ½ cup salted butter and 1 ½ cups powdered sugar until well combined. -
Step 3
Stir in the 1 ½ cups graham cracker crumbs and 1 cup creamy peanut butter until the mixture holds together. -
Step 4
Press the peanut butter mixture evenly into the bottom of the prepared baking dish. -
Step 5
Pour the 12 ounces of melted semi-sweet chocolate chips over the peanut butter layer, spreading it evenly to cover. -
Step 6
Refrigerate for at least 1 hour, or until the chocolate is firm. -
Step 7
Lift the bars out of the dish using the parchment paper overhang. Cut into desired squares.
Important Information
Nutrition Facts (Per Serving)
It is important to consider this information as approximate and not to use it as definitive health advice.
Allergy Information
Please check ingredients for potential allergens and consult a health professional if in doubt.