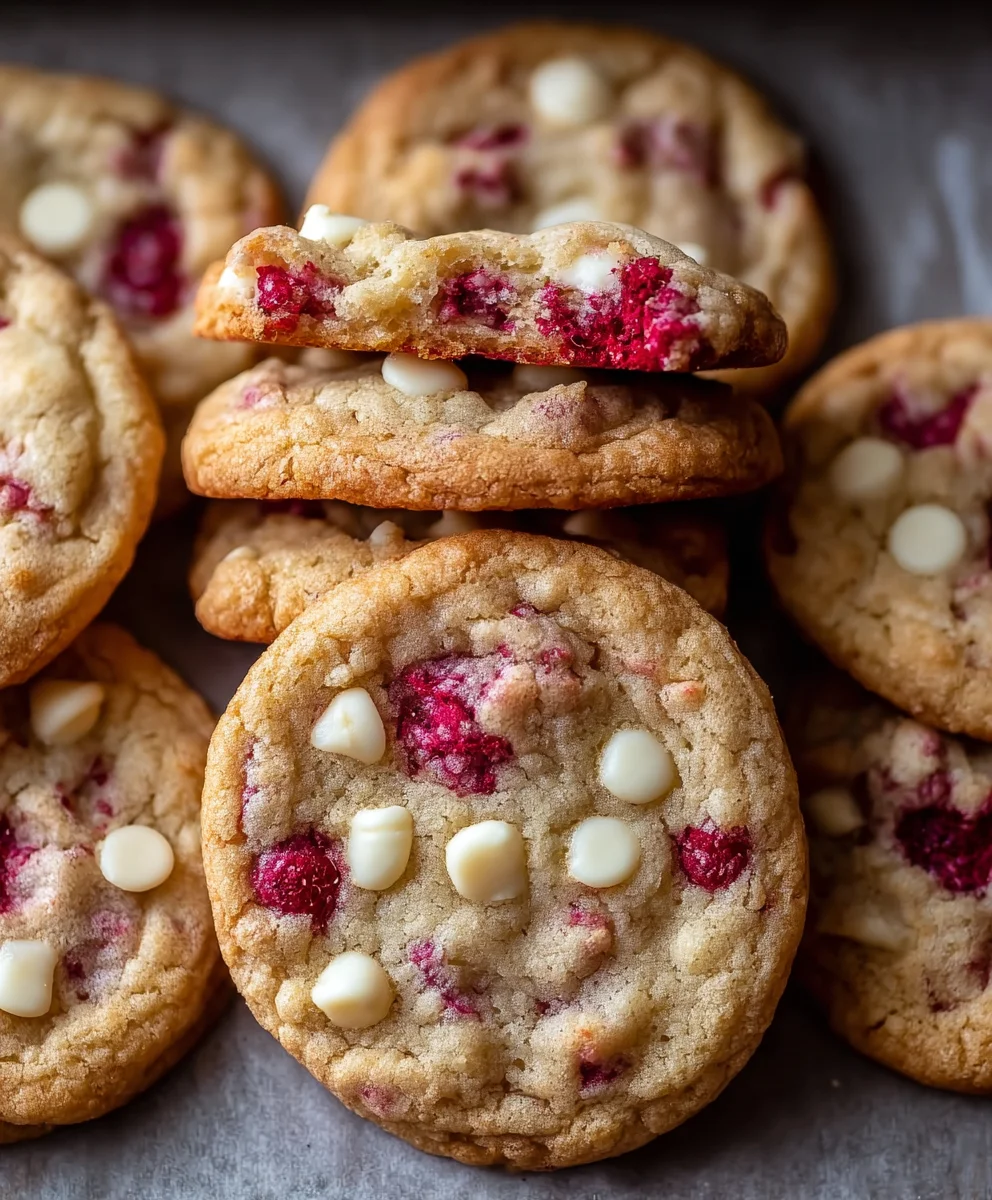
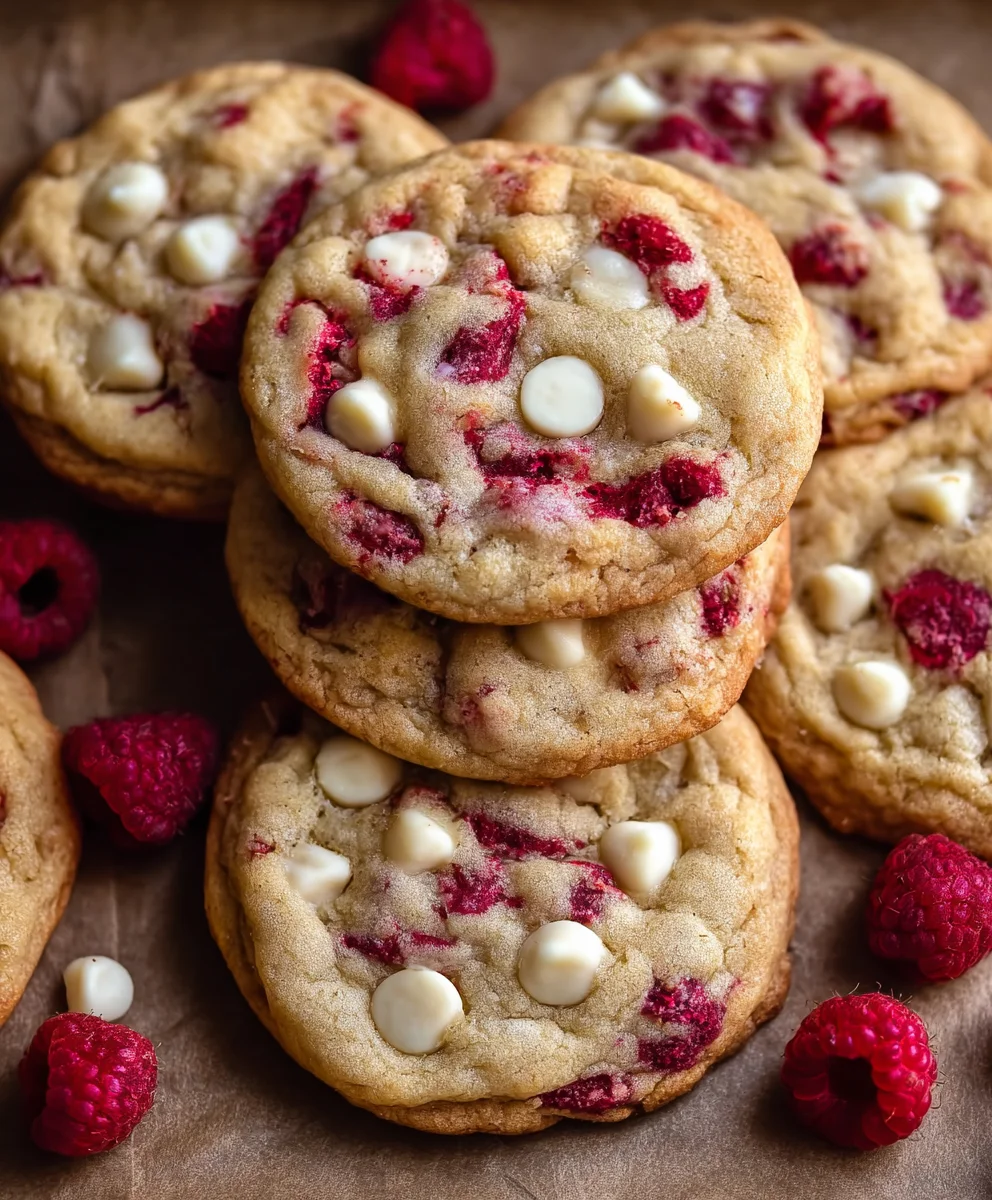
Raspberry White Chocolate Cookies-Easy & Delicious
Raspberry White Chocolate Cookies Recipe are more than just a treat; they’re an experience. Imagin extracte the delightful burst of tart raspberries harmonizing with the creamy sweetness of molten white chocolate, all nestled within a perfectly chewy, golden cookie. This isn’t just another cookie recipe; it’s an invitation to pure bliss. What is it about these particular cookies that captures our hearts and taste buds? Perhaps it’s the irresistible textural contrast – the slightly crisp edges giving way to a soft, yielding center. Or maybe it’s the vibrant pop of red from the raspberries against the pnon-alcoholic ale ivory of the white chocolate, making them as beautiful to behold as they are to devour. We love them because they strike that perfect balance between sophisticated flavor and comforting familiarity. This Raspberry White Chocolate Cookies Recipe will become your new go-to for moments when you crave something truly special, a little bit of indulgence that feels both decadent and wonderfully homemade.
Ingredients:
- 2 1/2 cups all-purpose flour
- 1/2 teaspoon baking powder
- 1/2 teaspoon baking soda
- 1 teaspoon salt
- 1 cup unsalted butter, melted
- 3/4 cup brown sugar, packed (light or dark is fine)
- 3/4 cup white granulated sugar
- 1 teaspoon pure vanilla extract
- 1 large egg, at room temperature
- 1 egg yolk, at room temperature
- 1 cup frozen raspberries, slightly thawed
- 3/4 cup white chocolate chips, plus additional for sprinkling on top before baking
Preparing Your Raspberry White Chocolate Cookies
Phase 1: Mixing the Dry Ingredients
First, in a medium-sized bowl, we’ll combine all of our dry ingredients to ensure everything is evenly distributed before we start adding the wet ingredients. This step is crucial for consistent texture and leavening in your cookies. Into your bowl, sift the 2 1/2 cups of all-purpose flour. Sifting helps to aerate the flour and prevent any lumps from forming in your dough. Next, add the 1/2 teaspoon of baking powder and the 1/2 teaspoon of baking soda. These leavening agents are what give our cookies their lift and tender crum extractb. Finally, measure out 1 teaspoon of salt. Salt not only enhances the sweetness of the cookies but also balances the flavors. Whisk all of these ingredients together thoroughly until they are well combined. Set this bowl aside for now; we’ll be returning to it shortly.
Phase 2: Creating the Cookie Dough Base
Now, let’s move on to creating the rich and flavorful base of our cookie dough. In a large mixing bowl, preferably one that is sturdy and deep, pour in the 1 cup of melted unsalted butter. Melted butter will give our cookies a wonderfully chewy texture and a rich flavor. To the melted butter, add 3/4 cup of packed brown sugar. The brown sugar contributes moisture and a caramel-like flavor, while its packed nature means we get more of that delightful chegrape juicess. Next, measure in 3/4 cup of white granulated sugar. Granulated sugar contributes to crisp edges and a lighter texture. Using both brown and granulated sugar creates a perfect balance for these cookies. Add 1 teaspoon of pure vanilla extract to this mixture. Vanilla extract is an essential flavor enhancer that rounds out the sweetness and complements the other ingredients beautifully. Now, using a whisk or an electric mixer on medium speed, beat these ingredients together until they are well combined and form a smooth, glossy mixture. This is the foundation of our delicious cookie dough.
Phase 3: Incorporating Wet Ingredients and Building the Dough
We’re getting closer to cookie perfection! To the creamy butter and sugar mixture, we’ll now add our eggs. Make sure your 1 large egg and 1 egg yolk are at room temperature. Room temperature eggs emulsify better with the fats in the dough, resulting in a smoother and more cohesive batter. Add the whole egg and the egg yolk to the bowl. Beat them into the mixture until they are fully incorporated. You should have a smooth, creamy, and slightly lighter-colored mixture at this point. Now it’s time to gradually introduce our dry ingredients to the wet. With your mixer on low speed, or by hand with a spatula, begin extract adding the flour mixture from Phase 1 to the wet ingredients, about a third of the flour mixture at a time. Mix until just combined after each addition. Be careful not to overmix the dough at this stage; overmixing can develop the gluten in the flour too much, leading to tough cookies. Mix until you no longer see streaks of dry flour. The dough will be quite thick.
Phase 4: Adding the Stars of the Show: Raspberries and White Chocolate
This is where our Raspberry White Chocolate Cookies truly come to life! Gently fold in 1 cup of frozen raspberries that have been slightly thawed. You don’t want them to be completely defrosted, as a little frostiness helps them hold their shape better during baking. Folding means using a spatula to gently turn the dough over on itself, incorporating the raspberries without crushing them too much. You want to see streaks of raspberry throughout the dough, but not a mushy mess. Next, add 3/4 cup of white chocolate chips to the dough. Again, use your spatula to gently fold these into the mixture until they are evenly distributed. The white chocolate will melt and create luscious pockets of sweetness within the cookies. You can also reserve a few extra white chocolate chips to press onto the tops of the cookie dough balls before baking for an extra beautiful presentation and more visible chocolatey goodness.
Phase 5: Baking Your Masterpieces
Now that our dough is ready, it’s time to bake these delightful cookies! Preheat your oven to 375°F (190°C). Line baking sheets with parchment paper. This prevents sticking and makes cleanup a breeze. Using a cookie scoop or two spoons, drop rounded tablespoons of dough onto the prepared baking sheets, leaving about 2 inches of space between each cookie to allow for spreading. If you reserved extra white chocolate chips, gently press a few onto the tops of each dough ball now. Place the baking sheets in the preheated oven and bake for 10 to 12 minutes. You’re looking for the edges to be lightly golden brown and the centers to appear slightly soft and set. They will continue to cook slightly on the hot baking sheet after you remove them from the oven. Allow the cookies to cool on the baking sheets for about 5 minutes before carefully transferring them to a wire rack to cool completely. Enjoy the wonderful aroma filling your kitchen as these bake!
Conclusion:
There you have it! Our delightful Raspberry White Chocolate Cookies Recipe is ready to grace your kitchen. We hope you’ve enjoyed this step-by-step guide to creating these irresistible treats. The combination of tart raspberries and creamy white chocolate is a classic for a reason, resulting in a cookie that’s both comforting and elegantly sweet. They bake up beautifully with a slightly crisp edge and a chewy center, making each bite a little piece of heaven. These cookies are perfect for any occasion, from a casual afternoon treat with a cup of tea to a show-stopping addition to your next cookie exchange or holiday spread.
To truly elevate your experience, consider serving these Raspberry White Chocolate Cookies warm from the oven, perhaps with a scoop of vanilla bean ice cream. They also pair wonderfully with a glass of cold milk or a robust coffee. For variations, don’t be afraid to experiment! You could add a pinch of almond extract for a nutty undertone, or swirl in some lemon zest for a brighter flavor profile. Chopped macadamia nuts would also be a fantastic addition, offering a lovely crunch. We encourage you to embrace your creativity and make these cookies your own. Happy baking!
Frequently Asked Questions:
Q1: Can I use fresh raspberries instead of frozen in this Raspberry White Chocolate Cookies Recipe?
Yes, you absolutely can! If using fresh raspberries, it’s a good idea to lightly toss them in a tablespoon of flour before folding them into the dough. This helps prevent them from bleeding too much color into the cookie batter and keeps them from sinking to the bottom during baking. Be sure to gently fold them in to avoid crushing them too much.
Q2: My cookies are spreading too much. What can I do?
Cookie spread can happen for a few reasons. Ensure your butter is softened but not melted; overly soft butter will lead to excessive spreading. Also, chilling the dough for at least 30 minutes (or even longer) before baking can significantly help. This allows the fats to firm up, which in turn helps the cookies hold their shape better during baking. Make sure your oven temperature is accurate as well; an oven that’s too hot can cause them to spread and burn too quickly.
Q3: How should I store these Raspberry White Chocolate Cookies?
Once cooled completely, store your Raspberry White Chocolate Cookies in an airtight container at room temperature for up to 3-4 days. For longer storage, you can freeze baked cookies for up to 2-3 months. Alternatively, you can freeze the dough balls before baking; simply bake them directly from frozen, adding a few extra minutes to the baking time as needed.
Raspberry White Chocolate Cookies
Easy and delicious raspberry white chocolate cookies with a chewy center and crisp edges.
Ingredients
-
2 1/2 cups all-purpose flour
-
1/2 teaspoon baking powder
-
1/2 teaspoon baking soda
-
1 teaspoon salt
-
1 cup unsalted butter, melted
-
3/4 cup brown sugar, packed
-
3/4 cup white granulated sugar
-
1 teaspoon pure vanilla extract
-
1 large egg, at room temperature
-
1 egg yolk, at room temperature
-
1 cup frozen raspberries, slightly thawed
-
3/4 cup white chocolate chips, plus additional for sprinkling on top before baking
Instructions
-
Step 1
In a medium bowl, whisk together the all-purpose flour, baking powder, baking soda, and salt. Set aside. -
Step 2
In a large bowl, combine the melted unsalted butter, packed brown sugar, white granulated sugar, and pure vanilla extract. Beat until smooth and glossy. -
Step 3
Add the room temperature large egg and egg yolk to the butter mixture and beat until fully incorporated. -
Step 4
Gradually add the dry ingredients to the wet ingredients, mixing on low speed or by hand until just combined. Do not overmix. -
Step 5
Gently fold in the slightly thawed frozen raspberries and white chocolate chips until evenly distributed. -
Step 6
Preheat oven to 375°F (190°C). Line baking sheets with parchment paper. Drop rounded tablespoons of dough onto prepared sheets, leaving 2 inches between cookies. Press additional white chocolate chips on top if desired. -
Step 7
Bake for 10-12 minutes, or until edges are lightly golden brown and centers are slightly soft. Cool on baking sheets for 5 minutes before transferring to a wire rack to cool completely.
Important Information
Nutrition Facts (Per Serving)
It is important to consider this information as approximate and not to use it as definitive health advice.
Allergy Information
Please check ingredients for potential allergens and consult a health professional if in doubt.