Crispy Chicken Caesar Sandwich- Easy & Delicious Recipe
Crispy Chicken Caesar Sandwich. Ah, the mere mention of it conjures up images of golden, crunchy chicken nestled between soft buns, all smothered in that iconic, creamy, garlicky Caesar dressing. This isn’t just another sandwich; it’s a culinary masterpiece that has captured hearts (and stomachs) around the globe. What is it about this humble combination that makes it so utterly irresistible? Perhaps it’s the perfect harmony of textures – the satisfying crunch of the fried chicken against the pillowy bread, complemented by the crispness of fresh romaine lettuce. Or maybe it’s the explosion of flavor: the zesty lemon, the pungent Parmesan, the subtle bite of garlic, all working in delicious concert. This particular version of the Crispy Chicken Caesar Sandwich takes things to the next level, offering a foolproof way to achieve that perfect golden crust and an interior that remains impossibly juicy. Get ready to elevate your lunch game with a sandwich that’s as impressive to make as it is to devour.
Ingredients:
- ½ cup full-fat mayonnaise
- 3 tbsp Greek yogurt
- 1 tsp Dijon mustard
- 1 tsp Worcestershire sauce
- 2 tbsp lemon juice
- ¼ cup Parmesan cheese (freshly grated)
- 1-2 garlic cloves (minced)
- ¼ tsp black pepper
- Pinch sea salt
- 5 chicken cutlets (see note 1 for preparation)
- Sea salt (to taste)
- Ground black pepper (to taste)
- Oil (for frying, a neutral oil like vegetable or canola is ideal)
- ⅓ cup all-purpose flour
- ½ tsp salt
Preparing the Crispy Chicken Caesar Sandwich
This recipe will guide you through creating a delightful Crispy Chicken Caesar Sandwich, packed with flavor and satisfying textures. We’ll start by preparing our chicken for frying, then move on to crafting that irresistible Caesar dressing, and finally, assemble the perfect sandwich.
Step 1: Preparing the Chicken Cutlets for Frying
First things first, let’s get our chicken ready. You should have 5 chicken cutlets. If your cutlets are particularly thick, I recommend gently pounding them to an even thickness of about ½ inch. This ensures they cook evenly and quickly. We want them to be tender on the inside and perfectly crispy on the outside. For the dredgin extractg station, grab two shallow dishes or plates. In the first dish, combine the ⅓ cup of all-purpose flour with the ½ teaspoon of salt and a good pinch of ground black pepper. Give it a good whisk to ensure the salt and pepper are evenly distributed throughout the flour. This seasoned flour will form the base of our crispy coating. In the second dish, you can lightly beat one or two eggs (this is an optional step but helps the breadcrum extractbs adhere better if you choose to add them, though we are sticking to a simple flour dredge for maximum crispiness in this version). For now, just focus on the seasoned flour.
Step 2: Coating the Chicken
Now, it’s time to coat our chicken cutlets. Take each chicken cutlet and press it firmly into the seasoned flour, ensuring it’s completely covered on all sides. Gently shake off any excess flour. You want a nice, even coating without thick clumps. For an extra crispy texture, you can repeat this process: dip the floured chicken back into the egg wash (if using) and then into a mixture of pankrum extractreadcrumbs mixed with a little more salt and pepper. However, for the essence of a truly crispy chicken, the flour dredge alone is fantastic. Place the coated chicken cutlets on a clean plate or baking sheet while you prepare the frying oil and the Caesar dressing. This resting period also helps the coating adhere better.
Step 3: Frying the Chicken to Golden Perfection
Heat a generous amount of your chosen frying oil in a large, heavy-bottomed skillet over medium-high heat. You’ll want enough oil to come up about ½ inch on the sides of the skillet. To test if the oil is hot enough, drop a tiny pinch of flour into it. If it sizzles and floats, it’s ready. Carefully place the floured chicken cutlets into the hot oil, being careful not to overcrowd the skillet. You may need to fry them in batches to ensure even cooking and crispiness. Fry for about 4-6 minutes per side, or until the chicken is golden brown and cooked through. The internal temperature should reach 165°F (74°C). Use tongs to carefully flip the chicken and ensure both sides achieve that beautiful crispy exterior. Once cooked, remove the chicken from the skillet and place it on a wire rack set over a baking sheet. This allows excess oil to drain off, keeping your chicken wonderfully crisp. Season immediately with a little more sea salt and ground black pepper while it’s still hot.
Step 4: Crafting the Classic Caesar Dressing
While the chicken is frying or resting, let’s whip up our flavorful Caesar dressing. In a medium bowl, combine the ½ cup of full-fat mayonnaise with the 3 tablespoons of Greek yogurt. The Greek yogurt adds a lovely tang and creaminess without making the dressing too heavy. Next, whisk in the 1 teaspoon of Dijon mustard for a bit of sharp bite and the 1 teaspoon of Worcestershire sauce for that savory depth. Now, add the 2 tablespoons of fresh lemon juice. This is crucial for balancing the richness of the mayonnaise and yogurt and cutting through the fat of the fried chicken. Finely mince 1 to 2 garlic cloves and add them to the bowl. The amount of garlic is really up to your personal preference, but start with one and add more if you like a more pronounced garlic flavor. Stir in the ¼ cup of freshly grated Parmesan cheese. The freshly grated cheese melts beautifully into the dressing, adding a salty, nutty complexity. Finally, season with ¼ teaspoon of black pepper and a pinch of sea salt. Taste and adjust the seasoning as needed. You might want a touch more lemon, salt, or pepper depending on your palate. Whisk everything together until smooth and well combined.
Step 5: Assembling the Ultimate Crispy Chicken Caesar Sandwich
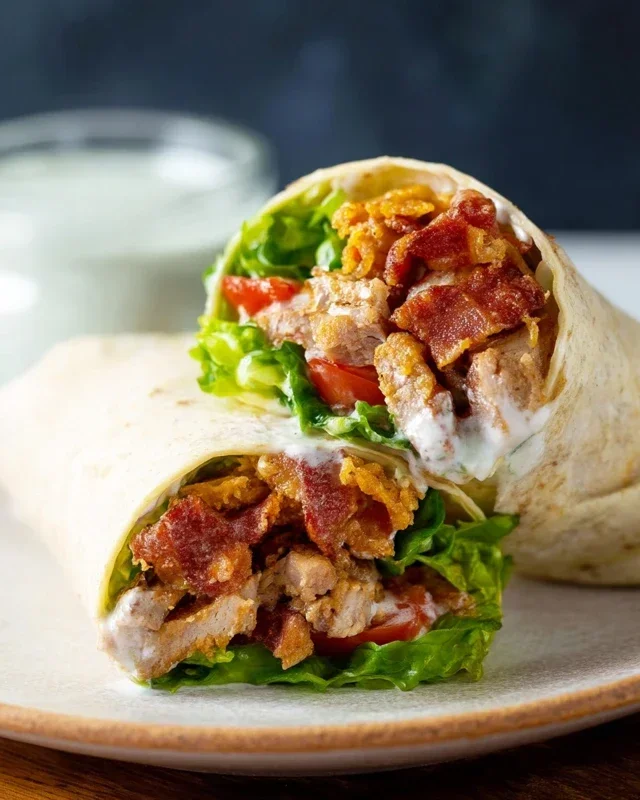
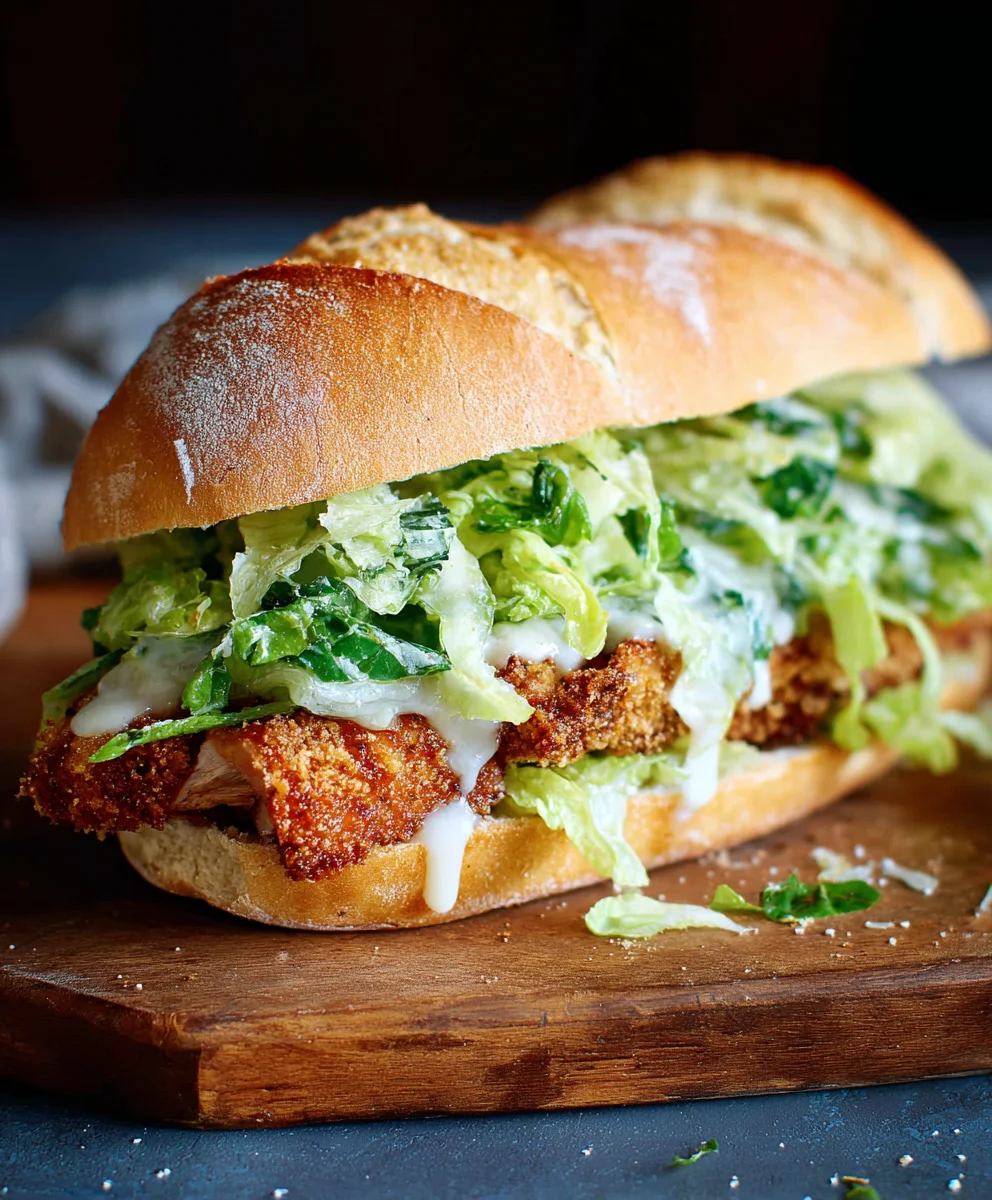
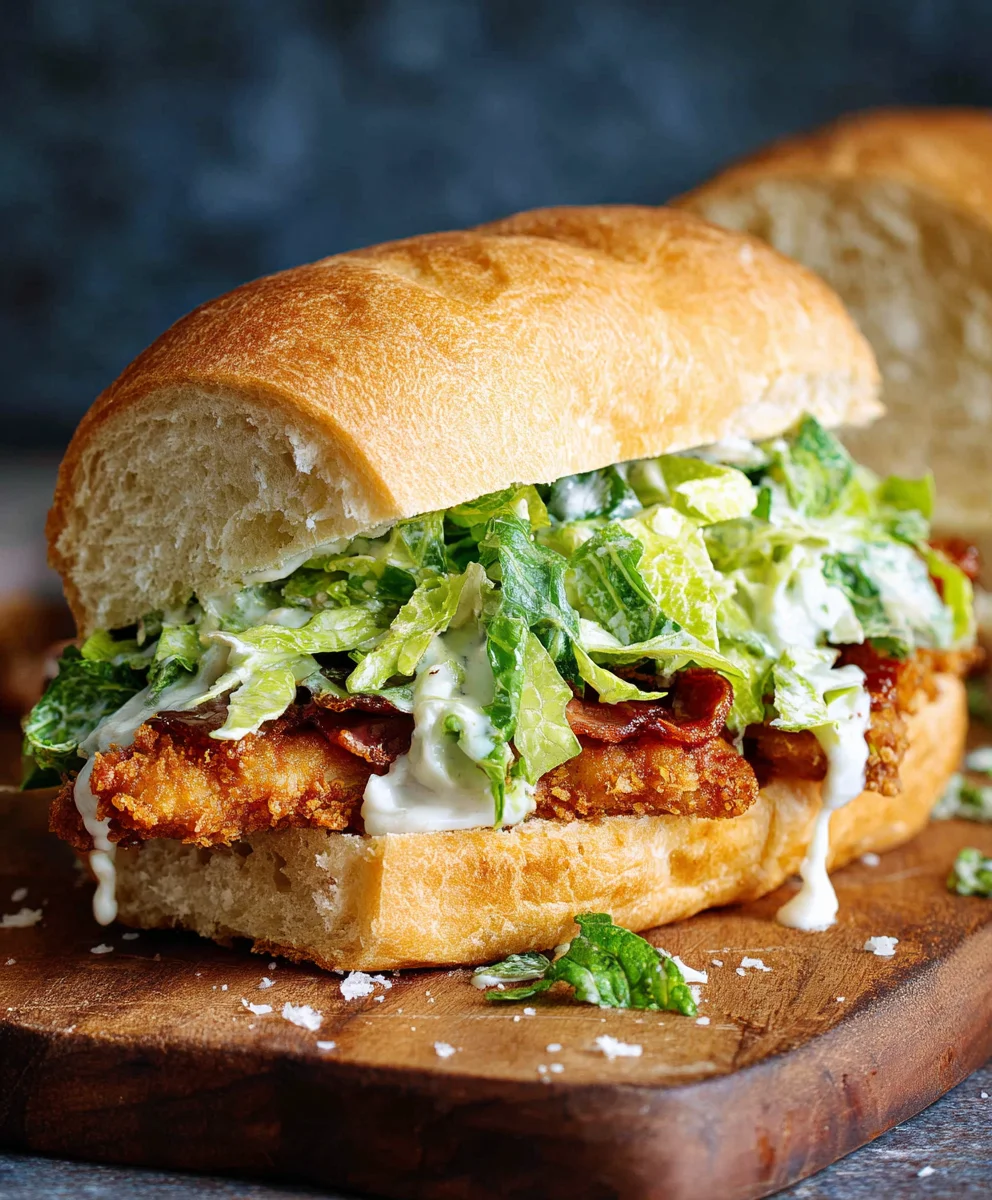
Now for the grand finnon-alcoholic ale – assembling your Crispy Chicken Caesar Sandwich! Lightly toast your favorite sandwich rolls or buns. While they are warm, spread a generous amount of your homemade Caesar dressing on both halves of the toasted roll. Place one of your perfectly crispy, golden-brown chicken cutlets on the bottom half of the bun. If you like a little extra crunch and freshness, you can add some crisp romaine lettuce leaves on top of the chicken. A few extra shavings of Parmesan cheese are also a wonderful addition. Crown your masterpiece with the top half of the bun, perhaps with a little more Caesar dressing for good measure. Press down gently, and your delicious Crispy Chicken Caesar Sandwich is ready to be devoured! Enjoy the incredible combination of crispy chicken, creamy, tangy Caesar dressing, and soft bread.
Conclusion:
There you have it – the ultimate guide to crafting a truly sensational Crispy Chicken Caesar Sandwich! We’ve walked through each step, from perfectly seasoning and frying your chicken to assembling a sandwich that’s bursting with flavor and texture. The combination of the crunchy chicken, creamy Caesar dressing, sharp Parmesan, and fresh romaine lettuce creates an unforgettable experience. Whether you’re looking for a quick and satisfying lunch or an impressive dinner option, this sandwich is sure to become a favorite.
For serving, this Crispy Chicken Caesar Sandwich is fantastic on its own, but also pairs wonderfully with a side of crispy sweet potato fries, a light garden salad, or even some crunchy coleslaw. Don’t be afraid to experiment with variations! Try adding some crispy beef bacon for extra smoky flavor, a slice of avocado for added creaminess, or even a sprinkle of red pepper flakes for a touch of heat. The possibilities are endless, and the joy of making this delicious sandwich is all yours. So go ahead, gather your ingredients, and enjoy the rewarding process of creating your own perfect Crispy Chicken Caesar Sandwich. Happy cooking!
Frequently Asked Questions:
Can I bake the chicken instead of frying it?
Absolutely! While frying yields the crispiest texture, you can bake the chicken. Ensure it’s well-seasoned and coat it in breadcrum extractbs or panko for crunch. Bake at around 400°F (200°C) until golden brown and cooked through, flipping halfway.
What kind of bread is best for a Crispy Chicken Caesar Sandwich?
A sturdy bun that can hold up to the filling is ideal. Brioche buns, ciabatta rolls, or even a toasted sourdough slice work wonderfully. The key is to ensure it’s toasted slightly to prevent soggin extractess.
How can I make the Caesar dressing healthier?
You can make a lighter Caesar dressing by using Greek yogurt as a base instead of mayonnaise, or by reducing the amount of oil. Freshly squeezed lemon juice and garlic are still key for that classic flavor!
Crispy Chicken Caesar Sandwich- Easy & Delicious Recipe
A delightful and easy recipe for a Crispy Chicken Caesar Sandwich, featuring a homemade Caesar dressing and perfectly fried chicken.
Ingredients
-
½ cup full-fat mayonnaise
-
3 tbsp Greek yogurt
-
1 tsp Dijon mustard
-
1 tsp Worcestershire sauce
-
2 tbsp lemon juice
-
¼ cup Parmesan cheese (freshly grated)
-
1-2 garlic cloves (minced)
-
¼ tsp black pepper
-
Pinch sea salt
-
5 chicken cutlets
-
sea salt (to taste)
-
ground black pepper (to taste)
-
Oil (for frying)
-
⅓ cup all-purpose flour
-
½ tsp salt
Instructions
-
Step 1
Prepare the chicken cutlets by pounding them to an even thickness of about ½ inch. In a shallow dish, combine ⅓ cup all-purpose flour with ½ teaspoon salt and a pinch of ground black pepper. Whisk to combine. -
Step 2
Coat each chicken cutlet firmly in the seasoned flour, ensuring it is completely covered. Shake off excess flour. For extra crispiness, you can repeat this flour dredge. -
Step 3
Heat a generous amount of neutral oil in a large skillet over medium-high heat until it sizzles when a pinch of flour is added. Carefully place coated chicken cutlets into the hot oil, avoiding overcrowding. Fry for 4-6 minutes per side, until golden brown and cooked through (internal temperature 165°F/74°C). -
Step 4
While chicken fries, prepare the Caesar dressing. In a bowl, combine ½ cup full-fat mayonnaise, 3 tbsp Greek yogurt, 1 tsp Dijon mustard, 1 tsp Worcestershire sauce, 2 tbsp lemon juice, 1-2 minced garlic cloves, ¼ cup freshly grated Parmesan cheese, ¼ tsp black pepper, and a pinch of sea salt. Whisk until smooth. -
Step 5
Once chicken is cooked, remove from skillet and drain on a wire rack. Season immediately with sea salt and ground black pepper. Lightly toast sandwich rolls or buns. Spread a generous amount of Caesar dressing on both halves. Place crispy chicken on the bottom half, add optional romaine lettuce and Parmesan cheese shavings, then top with the other half of the bun.
Important Information
Nutrition Facts (Per Serving)
It is important to consider this information as approximate and not to use it as definitive health advice.
Allergy Information
Please check ingredients for potential allergens and consult a health professional if in doubt.