Easy Homemade Strawberry Ice Cream Recipe
Homemade strawberry ice cream is more than just a dessert; it’s a vibrant, nostalgic experience bottled up in a creamy, dreamy swirl. Imagin extracte the sweet perfume of sun-ripened strawberries mingling with rich, velvety dairy – that’s the magic we’re about to create right in your own kitchen. There’s something undeniably special about enjoying homemade strawberry ice cream, a classic that evokes lazy summer days, childhood memories, and pure, unadulterated joy. Unlike store-bought versions, which often rely on artificial flavors, our homemade strawberry ice cream bursts with authentic, fresh fruitiness. We’ll be diving into a simple yet decadent recipe that guarantees a scoop of pure happiness, capturing the very essence of this beloved frozen treat. Get ready to fall in love with the simple perfection of this iconic flavor, made with love and a few simple ingredients.
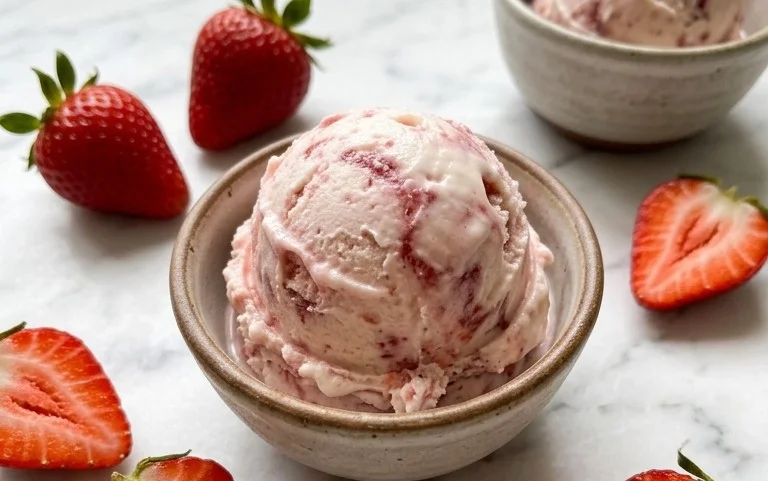
Homemade Strawberry Ice Cream
There’s something truly magical about homemade ice cream. It’s the creamy texture, the burst of fresh flavor, and the satisfaction of creating something delicious from scratch. And when it comes to summer flavors, nothing beats the bright, sweet taste of strawberries. Forget those store-bought tubs that often lack real fruit intensity; this homemade strawberry ice cream recipe is a game-changer. We’re going to coax the most vibrant strawberry flavor out of fresh berries, blend it with a rich, creamy base, and churn it into pure frozen bliss. This recipe is surprisingly simple, requiring no fancy equipment beyond a standard ice cream maker, and the results are absolutely worth it. Get ready to impress yourself (and anyone lucky enough to share!).
Ingredients:
Preparing the Strawberry Base
The secret to intensely flavored strawberry ice cream lies in how we treat the berries. We want to unlock their natural sweetness and aroma without losing that fresh, fruity essence. First, ensure your strawberries are ripe and fragrant. Hulling them means removing the green leafy tops. Then, dice them into smaller pieces. This helps them break down more easily.
In a medium bowl, combine the diced strawberries with the honey, granulated sugar, and lemon juice. The lemon juice is crucial here; it not only adds a subtle brightness that complements the sweetness of the strawberries but also helps to enhance their natural flavor and color. Now, here’s where we’re going to do something a little special. We’ll let this mixture sit for at least 30 minutes, or even up to an hour. This maceration process allows the sugar and honey to draw out the juices from the strawberries, creating a sweet, syrupy mixture. You’ll notice the berries start to soften and release their vibrant red liquid. This liquid is pure strawberry gold and will form the flavor backbone of our ice cream.
Once the strawberries have macerated, you have a couple of options for achieving the desired texture. For a smoother ice cream with tiny flecks of berry, you can lightly mash the strawberries with a fork or potato masher. For an even smoother texture and more uniform color, you can transfer the strawberry mixture to a blender or food processor and pulse until it’s mostly smooth but still has a little bit of texture. Avoid over-processing into a complete puree if you want some visual appeal from the berry pieces.
Creating the Creamy Base
While our strawberries are doing their thing, we’ll prepare the creamy foundation for our ice cream. This is where the richness and smooth mouthfeel come from. In a separate medium bowl, whisk together the heavy whipping cream, half and half, and vanilla extract. The heavy whipping cream is what gives our ice cream its luxurious, velvety texture, while the half and half provides a good balance of fat and liquid. The vanilla extract, while seemingly simple, adds another layer of depth and aroma that harmonizes beautifully with the strawberries. Make sure to whisk until everything is well combined and the mixture is smooth. Avoid over-whipping at this stage, as we’re not making whipped cream.
Combining and Chilling
Now it’s time to bring our two components together. Pour the strawberry mixture into the cream mixture. Gently whisk them together until they are thoroughly combined. You should see a beautiful pink hue develop throughout the base. At this point, the mixture will still be quite liquid, which is exactly what we want.
The next crucial step is chilling this mixture thoroughly. Transfer the combined base to an airtight container and refrigerate it for at least 2 to 4 hours, or preferably overnight. The colder the base, the faster and more efficiently your ice cream maker will be able to churn it. Proper chilling prevents large ice crystals from forming, which can lead to a less smooth ice cream. This waiting period might test your patience, but trust me, it’s an essential part of achieving that perfect creamy consistency.
Churning the Ice Cream
Once your base is thoroughly chilled, it’s time to churn! Prepare your ice cream maker according to the manufacturer’s instructions. This usually involves ensuring the freezer bowl is completely frozen (typically 24 hours beforehand). Pour the cold strawberry mixture into the frozen bowl of your ice cream maker.
Start the churning process. The machine will agitate the mixture, incorporating air and gradually freezing it. This typically takes about 20 to 30 minutes, depending on your machine. You’ll notice the mixture thickening and becoming more like soft-serve ice cream. Keep an eye on it, and don’t over-churn, as this can sometimes make the ice cream too hard. The goal is a thick, creamy, scoopable consistency straight from the machine.
Freezing for Firmness
After churning, your homemade strawberry ice cream will have the consistency of soft-serve. While delicious to eat immediately, it will be even better after a period of hardening. Transfer the churned ice cream to a freezer-safe container. Press a piece of parchment paper or plastic wrap directly onto the surface of the ice cream to prevent ice crystals from forming on top. Seal the container tightly with a lid.
Place the container in the freezer for at least 4 to 6 hours, or until it’s firm enough to scoop. This final freezing step allows the ice cream to fully set and develop its characteristic scoopable texture. The wait is the hardest part, but the reward of diving into your own creation makes it all worthwhile. Enjoy your incredibly fresh and flavorful homemade strawberry ice cream!
Conclusion:
Making homemade strawberry ice cream is a truly rewarding experience, offering a taste of pure, unadulterated summer that store-bought simply can’t replicate. This recipe is fantastic because it allows you to control the quality of your ingredients, ensuring a vibrant, fresh strawberry flavor without artificial additives. The creamy texture, achieved through a simple churning process, is simply divine. I encourage you to give this delightful homemade strawberry ice cream a try; you’ll be amazed at how easy and satisfying it is to create such a delicious treat right in your own kitchen!
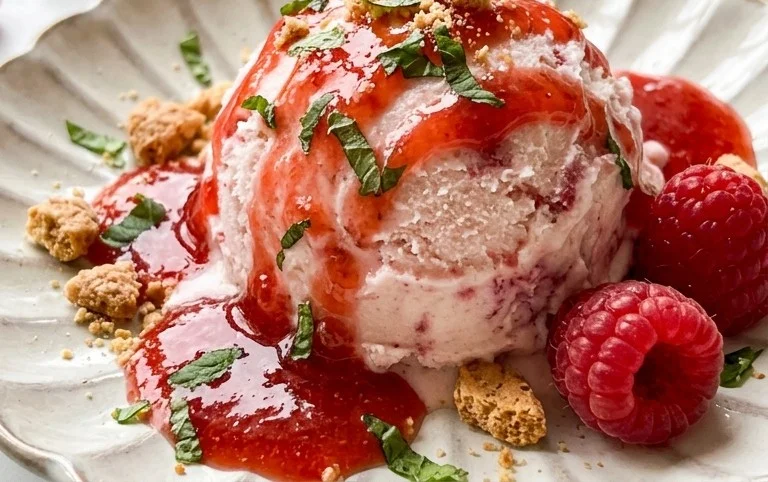
Serve this gorgeous pink ice cream on its own for a pure taste of strawberry bliss, or get creative! It’s wonderful piled high on a warm brownie, drizzled with a balsamic glaze for a sophisticated twist, or nestled alongside a slice of angel food cake. For variations, consider adding a swirl of strawberry jam for extra intense flavor, a sprinkle of fresh mint for a refreshing kick, or even a few chocolate chips for a delightful textural contrast.
Frequently Asked Questions:
Can I make this strawberry ice cream without an ice cream maker?
Yes, you absolutely can! While an ice cream maker makes the process smoother, you can achieve a similar result by freezing the base in a shallow container and stirring vigorously with a fork every 30-45 minutes until it reaches your desired consistency. This manual method will require a bit more effort but is perfectly achievable.
How long will homemade strawberry ice cream last?
Homemade strawberry ice cream is best enjoyed within 1-2 weeks of making it for optimal texture and flavor. After that, it can start to develop ice crystals, which can affect the creaminess. Store it in an airtight container in the coldest part of your freezer.
Homemade Strawberry Ice Cream
A simple and delicious homemade strawberry ice cream recipe made with fresh strawberries, cream, and honey.
Ingredients
-
1 1/2 cups strawberries, hulled and diced
-
2 Tbsp honey
-
1/2 cup granulated sugar
-
1 tsp lemon juice
-
1 cup heavy whipping cream
-
1/2 cup half and half
-
1 tsp vanilla extract
Instructions
-
Step 1
In a bowl, combine the diced strawberries, honey, granulated sugar, and lemon juice. Stir gently and let sit for about 15-20 minutes to allow the strawberries to macerate. -
Step 2
Puree the strawberry mixture using an immersion blender or a regular blender until smooth. -
Step 3
In a separate bowl, whisk together the heavy whipping cream, half and half, and vanilla extract until well combined. -
Step 4
Gently fold the strawberry puree into the cream mixture until just combined, creating swirls. -
Step 5
Pour the mixture into an ice cream maker and churn according to the manufacturer’s instructions. -
Step 6
Transfer the churned ice cream to an airtight container and freeze for at least 2-4 hours to firm up.
Important Information
Nutrition Facts (Per Serving)
It is important to consider this information as approximate and not to use it as definitive health advice.
Allergy Information
Please check ingredients for potential allergens and consult a health professional if in doubt.